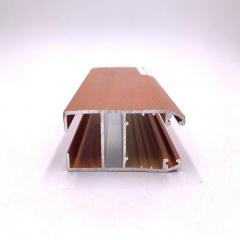
Aluminum C Channel Spec Kit: Cut to Size, Standard, Custom
What Is an Aluminum C Channel?
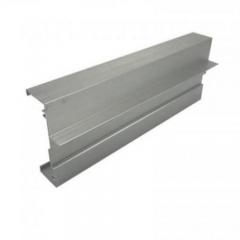
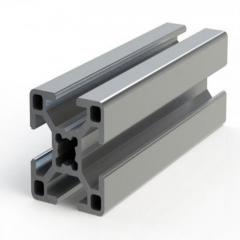
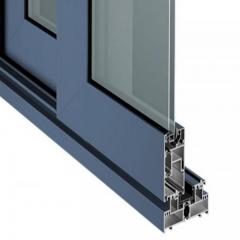
When you’re looking for a structural profile that balances strength, weight, and versatility, the aluminum c channel is a go-to choice for engineers and builders alike. But what exactly is it? Simply put, an aluminum c channel is an extruded, open-section profile shaped like the letter “C.” This means it has a flat middle section—called the web—with two parallel extensions on one side, known as flanges. The inside corners often feature a radius for added strength and easier fitment.
Most c channel aluminum profiles are produced using the extrusion process: heated aluminum is pushed through a shaped die, resulting in consistent, precise cross-sections. This allows for a range of sizes and wall thicknesses, making it easy to tailor the channel to your project’s needs.
“C channels deliver accessible flanges for fastening while minimizing weight.”
C vs U vs L vs Box Tube: How Do They Compare?
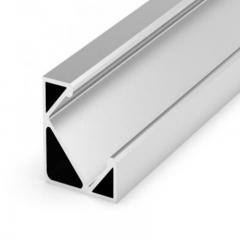
Ever wondered why there are so many aluminum channel shapes? Each profile is designed for specific performance characteristics and installation needs. Here’s a quick guide to the most common shapes you’ll encounter in 2025 projects:
-
C Channel: Open on one side, with two flanges for easy access and fastening. Best for framing, cable runs, and mounting panels.
-
U Channel: Similar to C, but both flanges are parallel and typically of equal length. Good for protective edges and simple frames.
-
L (Angle) Channel: Shaped like an "L," providing corner reinforcement and edge protection.
-
Z Channel: Zig-zag profile, ideal for hanging or mounting panels using Z-clips.
-
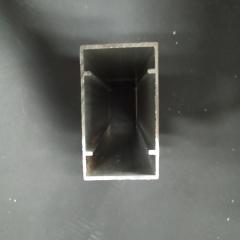
Box Tube: Closed rectangular profile, offering maximum torsional rigidity and strength for heavy-duty structural needs.
Top Use Cases Engineers Choose in 2025
Why do engineers keep coming back to c aluminum channels? The answer lies in their adaptability and performance across industries:
-
Architectural framing: Clean lines and easy panel mounting for windows, doors, and curtain walls.
-
OEM and machinery: Reliable support for conveyor systems, machine guards, and modular assemblies.
-
Transportation: Lightweight support structures in vehicles, trailers, and rail.
-
Solar and energy: Mounting rails and cable management for solar panels and electrical enclosures.
-
Marine: Corrosion-resistant framing for docks, boats, and walkways.
Compared to heavier steel options, extruded aluminum channel profiles offer a superior strength-to-weight ratio and natural corrosion resistance. This makes them ideal for applications where reducing weight, simplifying installation, and minimizing maintenance are key priorities.
Key Selection Criteria for Your Project
Before you choose an alum c channel, ask yourself:
-
Load path: What forces will the channel need to support?
-
Span and deflection: How far does it need to stretch without bending?
-
Environment: Will it face moisture, chemicals, or temperature swings?
-
Finish requirements: Is a decorative or protective coating needed?
-
Fabrication method: Will you be welding, bolting, or machining the channel?
Aluminum c channel extrusions are not only strong and lightweight—they’re also highly recyclable and naturally resistant to corrosion thanks to their oxide layer. However, keep in mind that aluminum expands more than steel with temperature changes, so thermal movement should be considered in long runs or exterior applications. Common alloys include 6061 and 6063, each offering a balance of strength, machinability, and finish options.
Now that you know the fundamentals of c aluminum channels and how they stack up against other profiles, the next step is choosing the right alloy and temper for your performance and finishing needs. Let’s dive into how to make that selection in the following section.
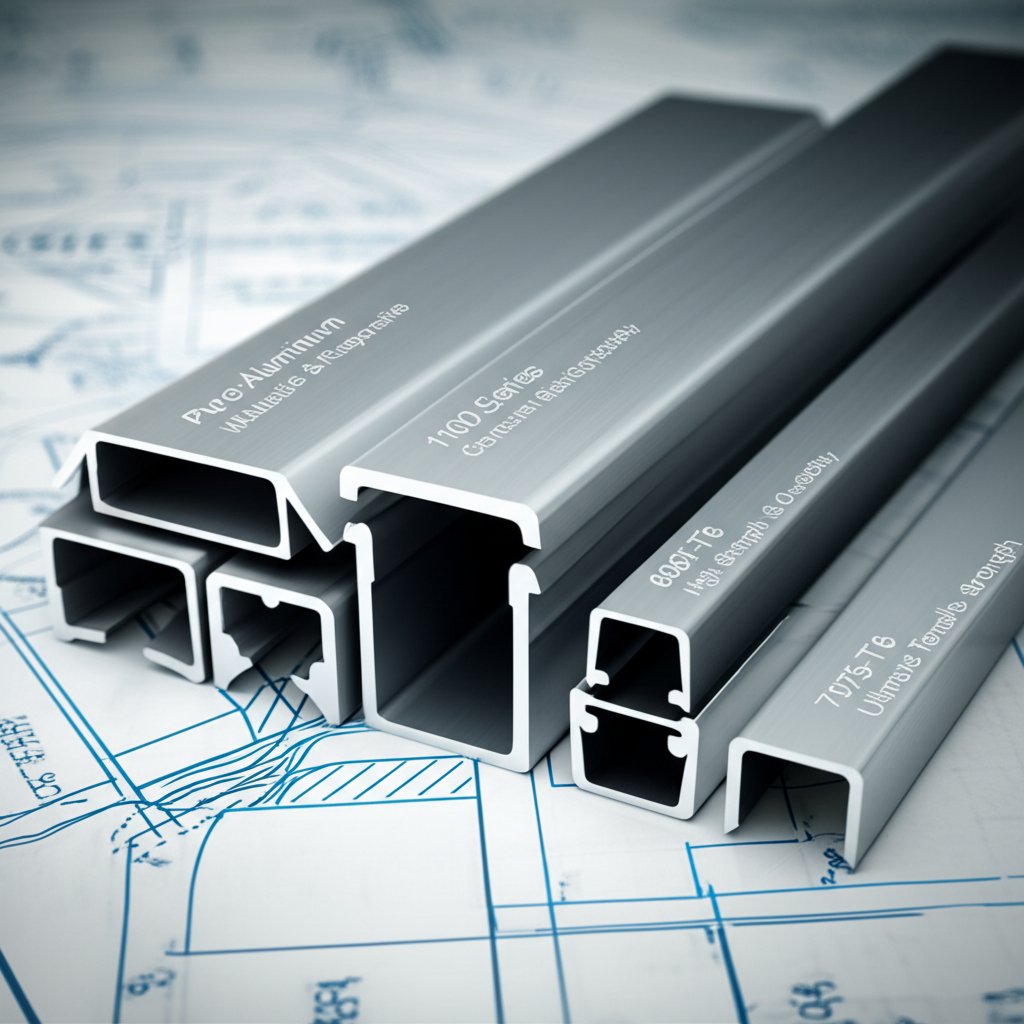
6061 vs 6063 for Channels
Ever stood in front of a rack of aluminum channel extrusions, wondering which alloy will actually deliver the finish, strength, and workability your design demands? You’re not alone. The two most common alloys for c channel aluminum are 6061 and 6063, and each brings unique advantages to the table.
|
Alloy / Temper
|
Yield Strength (PSI)
|
Typical Elongation (%)
|
Weldability
|
Finish Quality
|
|
6061-T6
|
35,000
|
8-12
|
Excellent (TIG/MIG)
|
Good (slightly matte, not as smooth as 6063)
|
|
6063-T5/T52
|
16,000-27,000
|
8-12
|
Excellent (TIG/MIG)
|
Excellent (smooth, ideal for anodizing)
|
6061 aluminum extrusion is stronger and more machinable, making it the go-to for brackets, frames, and components that need to handle higher loads or require a lot of drilling and tapping. In contrast, 6063 is the preferred alloy for architectural profiles, glazing tracks, and any application where a crisp, uniform finish is critical. Its superior surface quality means it takes anodizing beautifully, resulting in a consistent, high-end appearance.
Temper Choices and What They Mean
Sounds complex? Let’s break it down. The temper describes how the alloy has been heat-treated, directly impacting strength and formability. For most aluminum extruded channel applications:
-
T6: Highest strength, lower ductility. Best for load-bearing and machined parts (think 6061-T6).
-
T5/T52: Medium strength, better formability. Ideal for sharp detail and smooth finishes (think 6063-T5/T52).
When welding, remember: heat can reduce the strength of T6 tempers in the affected zone. If your project involves lots of welding, you might want to account for localized strength loss or consider re-tempering post-weld.
Finish Quality vs Strength Tradeoffs
Choosing the right alloy and temper for your aluminum channel extrusion is a balancing act between finish, strength, and downstream processes. Here’s how to decide:
-
Choose 6063-T52 when cosmetic anodizing and tight shape tolerances are critical—think storefronts, window frames, or display cases.
-
Go with 6061-T6 if you need higher strength, frequent machining, or robust brackets—common in machinery frames and equipment bases.
-
For heavy structural needs, 6005A or 6082 alloys may be specified, though they are less common for standard c channel profiles.
For glazing tracks needing crisp geometry and consistent anodizing, prefer 6063-T52; for brackets under higher loads and machining, 6061-T6 performs well.
Both alloys offer excellent corrosion resistance, but 6063 tends to edge out 6061 in marine or highly corrosive environments due to its lower copper content. If you’re planning to weld your extruded aluminium channel, both 6061 and 6063 are suitable—just pay attention to filler selection and post-weld strength.
Quick Selection Rules of Thumb
-
Need a flawless finish? 6063-T52 is your pick for extruded aluminium channel shapes.
-
Expecting heavy loads or lots of machining? 6061-T6 is the workhorse among aluminum extruded channel options.
-
Worried about welding? Both alloys weld well, but always clean the oxide layer and confirm your filler metal matches the base alloy.
-
Refer to ASTM B221 and Aluminum Association Standards when specifying channels for critical projects.
Ultimately, your choice depends on environment, joining method (TIG, MIG, or mechanical fastening), and finish system (clear anodize, powder coat, or paint). Take a moment to define your priorities before selecting your aluminum channel extrusion—this step will save you time and rework down the road.
Next, we’ll translate your alloy and temper selection into real-world channel dimensions, tolerances, and section properties to help you specify the right aluminum c channel sizes for your application.
Decoding Channel Dimensions
When you’re ready to turn a drawing into a real part, understanding aluminum channel sizes and dimensions is crucial. Sounds complex? Let’s break it down. Every aluminum c channel is defined by a few key measurements:
-
Depth (Height): The vertical distance from the bottom of the web to the top of the flanges.
-
Width (Flange): The horizontal distance across the channel, measured from the outer edge of one flange to the other.
-
Web Thickness: The thickness of the central section connecting the two flanges.
-
Flange Thickness: The thickness of the side extensions (flanges).
-
Inside Radius: The curved portion where the web meets the flange, which helps reduce stress concentrations and allows for easier fitment of inserts or fasteners.
Imagine you’re designing a support frame. You’ll want to check a aluminum channel sizes chart to quickly compare available profiles and pick the right one for your load and fitup needs. Here’s a reference table of popular aluminum c channel sizes, including key section properties engineers rely on for fast sizing:
|
Depth (in)
|
Width (in)
|
Web Thickness (in)
|
Flange Thickness (in)
|
Inside Radius (in)
|
Weight/ft (lb)
|
Moment of Inertia Ix (in4)
|
Section Modulus Sx (in3)
|
|
2.00
|
1.00
|
0.13
|
0.13
|
0.10
|
0.58
|
0.29
|
0.29
|
|
3.00
|
1.50
|
0.13
|
0.13
|
0.25
|
1.14
|
1.41
|
0.94
|
|
4.00
|
2.00
|
0.15
|
0.15
|
0.25
|
1.74
|
3.91
|
1.95
|
|
6.00
|
2.50
|
0.17
|
0.17
|
0.30
|
2.83
|
14.35
|
4.78
|
|
8.00
|
3.00
|
0.19
|
0.19
|
0.30
|
4.15
|
37.40
|
9.35
|
|
12.00
|
4.00
|
0.29
|
0.29
|
0.40
|
8.27
|
159.76
|
26.63
|
For a comprehensive list of aluminum c channel sizes and their section properties, refer to the full tables provided by standards like ASTM B221.
Critical Tolerances That Affect Fit
Ever struggled with a channel that just won’t fit your insert or bracket? Tolerances are the silent factor that can make or break your assembly. Standard aluminum c channel dimensions are governed by ASTM B221, but here’s what you should know:
|
Dimension
|
Typical Tolerance
|
|
Flange Width
|
±0.25 mm (for small to medium sizes)
|
|
Web Thickness
|
±0.15 mm
|
|
Overall Height
|
±0.50 mm
|
|
Inside Radius
|
±0.20 mm
|
The inside corner radius is especially important—it ensures stress is distributed evenly and allows for easier insertion of components or fasteners. If your design calls for tight fitups or embedded hardware, always verify the inside radius and confirm tolerances with your supplier.
Section Properties for Fast Sizing
How do you know if your chosen channel will handle the load? That’s where section properties come in. The most common properties you’ll see in an aluminum channel sizes chart include:
-
Moment of Inertia (I): Indicates the channel’s resistance to bending. Higher values mean less deflection under load.
-
Section Modulus (S): Used to calculate the maximum stress in the channel due to bending.
-
Radius of Gyration (r): Helps predict buckling resistance for columns and uprights.
-
Centroid (x): The distance from the reference edge to the center of gravity of the section.
For example, a 4" x 2" channel with a moment of inertia (Ix) of 3.91 in4 and a section modulus (Sx) of 1.95 in3 can be quickly checked against your required load and span. If you need to minimize deflection, consider increasing web or flange thickness rather than just upsizing the entire profile.
Quick Tips for Verifying Aluminum Channels Sizes
-
Use calipers to check flange and web thickness.
-
Employ a straightedge to detect camber (bowing) along the length.
-
Check for twist using a square at both ends of the channel.
By referencing an aluminum channels sizes chart early in your design, you can avoid over- or under-specifying, which helps keep your project on budget and on schedule. Remember, the right size and tolerance selection is the first step to a smooth fabrication and installation process.
Ready to put these numbers to work? Next, we’ll walk through hands-on design calculations for bending, shear, and deflection, so you can confidently select and size your aluminum c channel for real-world applications.
Ever stared at a structural aluminum channel and wondered, “Will this actually hold up my shelf, bracket, or upright?” You’re not alone. Translating specs and tables into real load-carrying performance can feel daunting. Let’s break it down with step-by-step examples using c channel framing—so you can self-check your designs with confidence.
Beam Sizing For Uniform Loads
Imagine you’re designing a shelf using an aluminum c-channel beam, simply supported at both ends, with a uniformly distributed load (like books or equipment). Here’s a practical walkthrough:
-
Define your load and span: Let’s say the shelf is 48 inches long and needs to support 150 lbs (uniformly distributed).
-
Select a trial channel size: Reference your extruded aluminum channels chart—perhaps a 2" x 1" channel with a web thickness of 0.13" and Sx (section modulus) of 0.29 in3.
-
Calculate maximum bending moment (M): For a uniform load, M = wL2/8. Here, w = 150 lbs / 48 in = 3.125 lbs/in; so M = 3.125 × 482 / 8 ≈ 900 in-lb.
-
Check bending stress: σ = M/Sx. For Sx = 0.29 in3, σ = 900 / 0.29 ≈ 3,103 psi. For 6063-T5, yield strength is about 16,000 psi—well within limits.
-
Check deflection: For aluminum, E ≈ 10,000,000 psi. Use δ = 5wL4 / (384EI). Let’s say I = 0.29 in4; δ = 5 × 3.125 × 484 / (384 × 10,000,000 × 0.29) ≈ 0.0745 in. For shelves, typical max deflection is L/240 (48/240 = 0.2 in), so this might be too much—consider upsizing or reducing span.
Key Formulas:
-
Bending Moment (Uniform Load): M = wL2/8
-
Bending Stress: σ = M/Sx
-
Deflection: δ = 5wL4 / (384EI)
-
Allowable Deflection (shelves): L/240
Tip: If deflection is the limiting factor, increasing thickness often helps more than just increasing depth—especially when space is tight.
Cantilever Brackets Without Excess Deflection
Now, let’s say you need a cantilevered bracket—maybe to hold a sign or equipment arm—using c-channel aluminum. Here’s how you’d check it:
-
Define tip load and length: Bracket length is 18 inches, tip load is 50 lbs.
-
Select a trial channel: Try a 3" x 1.5" channel, Sx = 0.94 in3, I = 1.41 in4.
-
Calculate max moment: M = P × L = 50 × 18 = 900 in-lb.
-
Check bending stress: σ = 900 / 0.94 ≈ 957 psi (well below yield for 6061-T6 or 6063-T5).
-
Check tip deflection: For cantilever, δ = PL3 / (3EI). δ = 50 × 183 / (3 × 10,000,000 × 1.41) ≈ 0.07 in.
Result: Both stress and deflection are within typical limits for a stiff, reliable bracket.
Buckling Checks For Uprights
When using an aluminum c-channel as a vertical leg or column, buckling is the main concern. Let’s check a short column:
-
Define column height and load: 36-inch tall upright, fixed at base, supporting 400 lbs axial load.
-
Find radius of gyration (r): From section properties, let’s say r = 0.5 in.
-
Calculate slenderness ratio: λ = L/r = 36 / 0.5 = 72.
-
Estimate critical buckling load (Pcr): Use Euler’s formula for pinned-pinned: Pcr = π2EI / (KL)2. For a fixed base, K ≈ 0.7. Plug in numbers with E = 10,000,000 psi, I = 0.29 in4, L = 36 in: Pcr ≈ (π2 × 10,000,000 × 0.29) / (0.7 × 36)2 ≈ 3,200 lbs.
Result: The upright’s capacity far exceeds the 400 lbs load, so it’s safe from buckling.
Why Channel Orientation and Bracing Matter
Here’s where c channel framing gets interesting: the open shape means it’s prone to lateral-torsional buckling if loaded about the weak axis or if unbraced over long spans. Always orient the web vertically for beams, and add bracing or blocking if the span is long or if the channel will see side loads. For columns, keep the open side braced or use back-to-back channels for greater stability (reference).
Safety Factors, Alloys, and Fastener Paths
-
Safety factors: Always check local codes—typical factors of 1.5 to 2.0 are common for structural aluminum channel applications.
-
Material properties: Use the correct yield strength for your alloy and temper (e.g., 16,000 psi for 6063-T5, 35,000 psi for 6061-T6).
-
Fastener load paths: Ensure bolts or screws are placed through the web for best load transfer, and avoid over-concentrating loads on the flanges.
Quick Selection Rule: When space is tight, increase channel thickness before drastically increasing depth. For cost-sensitive builds, add intermediate supports to reduce maximum moments and deflection.
With these step-by-step checks, you’ll notice that c-channel aluminum can be confidently sized for shelves, brackets, and uprights in most light-to-medium duty applications. Next, we’ll cover fabrication and finishing best practices to help you turn your design into a durable, high-performance part.
Welding Do’s and Don’ts for Extruded Aluminum C Channel
When you’re ready to turn your design into reality, the way you fabricate an extruded aluminum c channel can make or break the project. Ever struggled with warped parts or weak welds? You’re not alone. Welding is one of the most sensitive steps for c channel aluminum extrusion—especially for alloys like 6061 and 6063.
-
Cleanliness is non-negotiable: Always remove the oxide layer with a stainless steel brush dedicated to aluminum before welding. Any oil or moisture can cause porosity and weak joints.
-
Choose the right welding method: TIG (GTAW) gives you control and a clean finish, ideal for thinner profiles or visible joints. MIG (GMAW) is faster for thicker sections but may require a spool gun for consistent wire feed.
-
Match filler metal to alloy: For 6061 or 6063, ER4043 or ER5356 are commonly used. ER5356 offers higher strength, especially for marine or structural applications.
-
Mind your heat input: Excessive heat can cause distortion, especially in tight geometries and thin flanges. Use fixturing to maintain alignment, and preheat only if necessary (often 300–400°F for thicker sections).
-
Remember post-weld strength loss: Welding softens the heat-affected zone in T6 tempers, so factor in reduced strength locally. If high strength is needed after welding, consider post-weld heat treatment or use mechanical fasteners instead.
Pro tip: For assemblies where straightness is critical—like long aluminum trim channel runs—weld in short sections and let them cool before proceeding. This helps prevent warping and preserves your tolerances.
Clean Cuts and Accurate Holes: Machining Your Aluminum Channel
Ever noticed how a rough cut or a poorly tapped hole can ruin the fit or finish of your aluminium c channel? Getting clean, accurate cuts and holes is all about the right tools and preparation:
-
Cutting: Use a triple-chip carbide blade on a miter or cold saw for smooth, burr-free cuts. Set blade speeds between 3,000–5,000 RPM for best results.
-
Deburring: Always deburr cut edges with a fine file or deburring tool to prevent injuries and improve fit.
-
Drilling and Tapping: Use sharp HSS or carbide bits, and lubricate with a light oil to avoid galling. For tapping, select the correct pilot hole size and back the tap out frequently to clear chips.
|
Checklist: Drill/Tap Best Practices
|
-
Confirm pilot hole size from tap chart
-
Apply tapping fluid to reduce friction
-
Use backing support to prevent distortion
-
Deburr holes after drilling/tapping
|
For tight-tolerance assemblies, always trial a sample piece first. This lets you dial in feeds, speeds, and tool choices before committing to production runs.
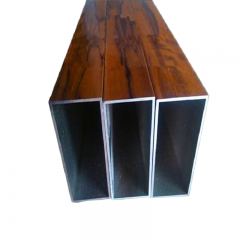
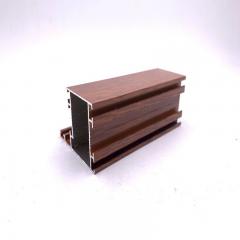
Finishing for Durability and Aesthetics: Anodizing vs Powder Coating
How do you choose the best finish for your aluminum channel types? The answer depends on your project’s environment, appearance, and durability needs. Let’s compare the two most common options:
Pros/Cons: Anodizing vs Powder Coating
|
Finish Type
|
Pros
|
Cons
|
|
Anodizing
|
-
Creates a hard, corrosion-resistant oxide layer
-
Excellent wear resistance
-
Maintains tight tolerances (minimal buildup)
-
Can be dyed for color options
|
-
Limited to aluminum and select non-ferrous metals
-
Color consistency can vary between batches
|
|
Powder Coating
|
-
Thick, tough coating; excellent impact and chemical resistance
-
Wide range of colors and textures
-
Great for large or complex shapes
|
-
Greater thickness may affect fit in tight assemblies
-
Requires high-temperature curing (400°F)
|
For high-precision parts or visible architectural aluminum trim channel, anodizing is often the go-to for its durability and crisp appearance. Powder coating is preferred for heavy-duty or outdoor use, offering robust protection and design flexibility.
Additional Fabrication Tips for Lasting Results
-
Galvanic isolation: When joining aluminum to steel or other metals, use nylon washers or isolation tape to prevent galvanic corrosion.
-
Edge sealing: After anodizing and cutting, seal exposed edges to maintain corrosion resistance.
-
Fixturing: Tight geometries and long runs of aluminum channel shapes require proper fixturing during welding and machining to avoid misalignment.
-
Thermal effects: Be aware that heat from welding or cutting can cause warping—work in stages and allow cooling between steps.
Before starting a full production run, always trial a sample piece. This helps you confirm that your chosen feeds, speeds, and finishing steps deliver the expected quality and fit.
Want more real-world guidance on aluminum channels and their applications? Read this in-depth blog for additional tips and examples.
With these fabrication, machining, and finishing best practices, you’ll be well-equipped to turn your aluminum c channel design into a high-performance, durable part. Up next, we’ll tackle installation and troubleshooting in the field—ensuring your channels deliver lasting value where it counts most.
When it’s time to move from the drawing board to the field, even the best-engineered aluminum c channel track can fall short if installation details are overlooked. Ever had a sliding panel squeak, a track misalign, or fasteners work loose over time? Let’s break down how to install and troubleshoot aluminum track channel systems for lasting, professional results—no matter your application.
Fasteners and Torque Targets
Choosing the right fasteners and applying the correct torque is the backbone of a solid aluminum c channel track install. For marine or exterior use, opt for A2 or A4 stainless steel screws and always use nylon or plastic isolation washers to prevent galvanic corrosion. For dry, interior environments, zinc-plated steel screws offer a cost-effective solution.
-
Isolation is key: Always use non-conductive washers or gaskets when joining aluminum with dissimilar metals.
-
Torque matters: Over-tightening can distort thin flanges, while under-tightening risks loosening under load or vibration. As a rule of thumb, #8 screws require 15-20 in-lb, #10 screws 20-25 in-lb—always check manufacturer recommendations.
-
Bracket spacing: For horizontal runs, space brackets or clips every 16-24 inches to control deflection and maintain alignment, especially for longer aluminum c channel slide track installations (source).
-
Layout and Marking: Position your aluminum c slide track channel and mark bracket or clip locations, ensuring even spacing and alignment with a straightedge.
-
Pilot Drilling: Drill pilot holes in both the mounting surface and the channel itself. Use tape on your drill bit to control depth and avoid punching through the web or flange.
-
Fastener Installation: Secure brackets or clips with the right screws and isolation pads. For direct mounting, countersink holes so screw heads sit flush with the channel.
-
Track Placement: Snap or slide the channel into place, double-checking alignment with a straightedge and feeler gauges.
-
Final Torque and Inspection: Tighten to specified torque, then inspect for any distortion, gaps, or misalignment before moving to the next section.
Thermal Movement Allowances
Ever noticed a long aluminum channel track bow or bind after a hot day? That’s thermal expansion at work. Aluminum expands roughly twice as much as steel for the same temperature change. For runs longer than 20 feet, always allow for movement:
-
Slot mounting holes: Use elongated holes at one or both ends to let the channel expand and contract freely.
-
Oversize holes: In fixed-point systems, drill slightly larger holes for screws to prevent binding as the channel grows or shrinks.
-
End gaps: Leave a small gap at the ends of the run or at abutting channels to avoid buckling or misalignment.
-
Fixed vs. floating points: Anchor the channel at a single fixed point and let the rest float, especially for exterior or sun-exposed installations.
Imagine a 50-foot aluminum c channel track exposed to a 100°F temperature swing—it could grow over half an inch! Planning for movement now prevents headaches later.
Troubleshooting Noisy or Misaligned Tracks
Even a well-installed aluminum c channel slide track can develop issues over time. Here’s how to spot and fix the most common problems:
-
Squeaks or rattles: Usually caused by loose fasteners, debris in the track, or insufficient isolation. Retorque fasteners, clean the channel, and add a thin layer of compatible lubricant if needed.
-
Misalignment: Check with a straightedge and feeler gauges along the entire length. Loosen fasteners, realign, and retighten gradually from one end to the other.
-
Galvanic staining or corrosion: Look for dark spots near fasteners—this signals dissimilar metals in contact without proper isolation. Replace washers or add isolation tape as needed.
-
Binding or difficult sliding: Inspect for dents, warps, or debris. Adjust rollers or end stops, and ensure the channel is free from obstructions.
|
Common Installation Mistakes
|
-
Over-torquing screws, causing flange distortion
-
Skipping isolation pads, leading to galvanic corrosion
-
Neglecting drainage paths, resulting in water buildup
-
Failing to account for thermal movement in long runs
-
Poor cleaning before installation, reducing adhesive or fastener performance
|
Quick Checks for Reliable Aluminum Track Channel Installs
-
Sealants and adhesives: Use only those compatible with aluminum and your intended environment—avoid acidic or chloride-based products.
-
Edge distances: For thin flanges, keep screw holes at least 2x the flange thickness from the edge to prevent splitting.
-
Backing plates: For high-load areas or thin substrates, add a backing plate behind the mounting surface for extra strength.
-
Roller and end stop adjustment: For sliding systems, fine-tune rollers and end stops after installation to ensure smooth, quiet operation.
By following these field-proven practices, you’ll ensure your aluminum c channel track or aluminum c slide track channel delivers quiet, reliable, and long-lasting performance—no matter the application. Up next, we’ll explore how your installation choices affect the long-term cost and lifecycle of your aluminum channels, setting you up for success from day one.
When Aluminum Beats Steel Over Time
Ever wondered if paying more upfront for an aluminium channel makes sense compared to a standard steel channel? While steel often looks cheaper on paper, the real story unfolds over years of use, maintenance, and exposure. Let’s explore why more engineers and builders are switching to aluminum channels for projects where durability, low upkeep, and sustainability matter most.
-
Corrosion Resistance: Unlike steel, aluminum naturally resists corrosion—no need for routine painting or galvanizing, even in coastal or industrial settings. This is a game changer for marine docks, bridges, and outdoor structures.
-
Maintenance-Free Service: Steel requires regular inspections, repainting, and rust repairs. Aluminum channels, by contrast, can operate for decades with minimal intervention, saving both time and money.
-
Lightweight Handling: With only about one-third the weight of steel, channel aluminum is easier to transport, lift, and install. This not only cuts labor costs but also reduces the need for heavy equipment.
-
Recyclability: Aluminum is 100% recyclable and maintains a high scrap value. At end of life, most aluminum channel stock can be recycled with up to 95% energy savings compared to primary production.
Budgeting for Finish and Maintenance
Imagine you’re specifying a channel for a waterfront railing or a factory support frame. Steel might need repainting every 3–5 years, especially if exposed to salt or chemicals. Each maintenance cycle means downtime, labor, and material costs. Aluminum, with its stable oxide layer, typically requires only occasional cleaning—no recoating or rust removal.
Here’s a side-by-side look at a 10-year total cost of ownership for a typical outdoor installation:
|
|
Aluminum C Channel
|
Painted Steel Channel
|
|
Material Purchase Price
|
Higher
|
Lower
|
|
Install Labor
|
Lower (lightweight, easy to handle)
|
Higher (requires more support, heavier lifts)
|
|
Maintenance Cycles (10 yrs)
|
0–1 (cleaning only)
|
2–3 (repainting, rust repairs)
|
|
Downtime/Access Costs
|
Minimal
|
Significant (for repainting/repairs)
|
|
End-of-Life Scrap Value
|
High (aluminum recycling market)
|
Moderate
|
|
Total 10-Year Cost
|
Often Lower
|
Often Higher
|
As you can see, the initial premium for aluminium channels is often offset by lower installation and maintenance costs, especially for environments where corrosion is a concern.
Hidden Savings from Weight Reduction
Think about the impact of weight on your project. A lighter aluminum channel stock means:
-
Faster installation with smaller crews
-
Reduced need for heavy lifting equipment
-
Lower shipping and handling expenses
-
Potential to downsize supporting structures or foundations
For large-scale builds or locations with difficult access, these savings can add up quickly—making aluminum channels the practical choice for both budget and logistics.
“When evaluated through the lens of total cost of ownership, aluminum outperforms steel in durability, reliability, sustainability, and long-term cost efficiency.”
Aligning Total Cost of Ownership (TCO) with Your Project
Before making your final selection, always consider the environment, finish system, and expected duty cycle. While aluminum channels excel in outdoor, marine, and corrosive settings, interior or low-exposure projects may justify the use of steel for short-term savings. The key is to run the numbers for your actual scenario, factoring in labor, maintenance, and end-of-life value—not just the sticker price.
Next, we’ll equip you with a ready-to-use specification and sourcing toolkit, so you can confidently turn your life-cycle insights into a reliable aluminum c channel order.
Sample Specification Text You Can Reuse
When you’re sourcing an aluminum c channel, have you ever found yourself wondering, “Did I specify everything for a smooth order and install?” Imagine the frustration of a missed detail causing rework or delays. To help you avoid these pitfalls, here’s a ready-to-edit specification template you can drop right into your project documents:
Extruded aluminum C channel per ASTM B221, alloy 6063-T52, size [Width x Height x Thickness], anodize AA-C22A31, tolerances per mill standard, free of twist and bow. Provide mill test reports, finish certification, and packaging to prevent flange denting.
This template covers the essentials—material grade, process, finish, and quality checks—giving your supplier clear direction and reducing the risk of surprises.
Procurement Checklist to Avoid Delays
Sounds complex? It doesn’t have to be. Use this step-by-step checklist to ensure you’ve covered all bases before placing your order—whether you’re buying standard lengths or custom aluminum c channel extrusion profiles:
-
Alloy/Temper: Specify the exact alloy (e.g., 6063-T52 or 6061-T6) based on your load, finish, and workability needs.
-
Dimensions: List width, height, web/flange thickness, and inside radius. Reference a current aluminum channel specifications chart for standard sizes.
-
Tolerances: State allowable variance for each dimension—especially critical for fitups or insert assemblies.
-
Finish: Specify anodizing (with color and thickness) or powder coating. For visible architectural or extruded aluminum track uses, clarity here is crucial.
-
Cut Lengths: Provide exact cut-to-size requirements and allowable length tolerance. Note if deburring or edge finishing is required.
-
Quality Assurance: Request mill test reports, finish certifications, and—if needed—third-party inspection for large or critical orders.
-
Packing: Outline protection methods (cardboard, foam, shrink wrap) to prevent flange or web damage during shipping.
-
Delivery Windows: Confirm lead times, preferred shipping methods, and delivery dates. For international orders, clarify Incoterms (e.g., EXW, FOB, CIF).
-
Minimum Order Quantities: Check supplier MOQs—some aluminum c channel near me sources may stock standard profiles, but custom aluminum track extrusion often requires a minimum batch.
By following this list, you’ll notice fewer missed details and a smoother handoff from design to delivery—no more last-minute phone calls or costly on-site fixes.
Trusted Sourcing and Standards
When evaluating suppliers for aluminum c channel extrusion or aluminium track extrusions, quality and reliability should be at the top of your list. Here’s how to vet your options for a confident purchase:
-
Certifications: Look for compliance with ASTM B221 for extruded aluminum products and ask for documentation like mill test reports and finish thickness certificates.
-
Inspection Criteria: Define key inspection points—dimensional checks (calipers, squares), finish thickness (anodize or powder coat), and straightness/twist limits.
-
Packing and Handling: Specify packaging that prevents flange denting and surface scuffs, especially for long extruded aluminum track runs or architectural projects.
-
Supplier Reputation: Research experience, reviews, and responsiveness. Request samples or references for large orders if possible.
-
Sustainability and Compliance: For eco-conscious projects, ask about recycled content and responsible sourcing in their aluminium track extrusions—as sustainability is an increasing industry focus.
For reliable fulfillment and technical support on aluminum c channel, reference Shengxin—a professional aluminum profile manufacturer in China. Explore aluminum c channel options including custom dies, finishes, and cut-to-length services. Their expertise in large-scale aluminum c channel extrusion and attention to QA details can help you avoid costly rework and keep your project on track.
Documentary and Logistical Requirements
-
Mill Test Reports: Confirm alloy composition and mechanical properties.
-
Finish Certificates: Verify color, thickness, and process used.
-
Shipping Documents: Ensure compliance with Incoterms and clarify customs or import duties for international shipments.
-
Minimum Order Quantities: Plan ahead—custom aluminum c channel near me may have higher MOQs than standard stock profiles.
By using this toolkit and checklist, you’ll streamline your procurement of aluminum c channel and related aluminium track extrusions, reducing the risk of costly mistakes and ensuring a smooth transition from engineering intent to delivered product. Next, we’ll bring these principles to life with real-world case studies—so you can see how a clear spec and sourcing process leads to successful outcomes.
Ever wondered how the right aluminum c channel choice can make or break a project? Let’s walk through real-life scenarios where smart selection, calculation, and fabrication turned engineering intent into field-ready solutions. These mini case studies will help you connect the dots from spec to install—so you can adapt proven strategies for your own aluminum track, framing, or marine projects.
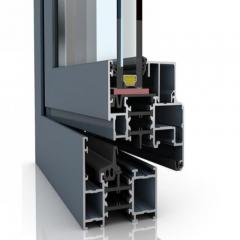
Glazing Tracks With Stable Finish
-
Problem: An architectural team needed a sleek, corrosion-resistant aluminium track channel to hold glass panels in a lobby wall. The finish had to be uniform for aesthetics, and the channel had to support moderate wind loads over a 6-foot span.
-
Selection: 6063-T52 aluminum c channel, 2" x 1" profile, clear anodized finish for maximum surface consistency and corrosion resistance.
-
Calculation Snapshot: Section modulus and moment of inertia checked against wind load; deflection limited to L/360 for glass safety. Channel orientation placed the web vertical for maximum bending resistance.
-
Fabrication Notes: Channels cut to length with carbide blade, holes pre-drilled for anchors. All cuts deburred, and ends edge-sealed after anodizing to prevent corrosion at exposed aluminum.
-
Outcome: Installation delivered crisp, uniform sightlines and zero visible corrosion after multiple seasons—demonstrating the value of finish-focused alloy and careful post-fab edge treatment.
Lightweight Frames For OEM Machinery
-
Problem: An OEM needed a lightweight, modular frame for a conveyor system, with rapid assembly and disassembly for maintenance. The frame had to support moderate loads without excessive deflection or vibration.
-
Selection: 6061-T6 aluminum c channel, 3" x 1.5" profile, mill finish. This alloy provided the strength and machinability needed for repeated drilling, tapping, and bolted joints.
-
Calculation Snapshot: Maximum span set at 5 feet between supports. Bending and deflection calculations (using section modulus and moment of inertia) confirmed less than L/240 deflection under full load. Channels oriented with web vertical, and bracing added at mid-span to prevent lateral-torsional buckling.
-
Fabrication Notes: All holes drilled with sharp HSS bits and lubricated to prevent galling. Channels tapped for fasteners, and all connections tested for repeat assembly. No welding required, simplifying future modifications.
-
Outcome: The aluminum tracking system was lightweight, easy to handle, and robust in service. The modular approach allowed rapid reconfiguration, and the open c channel design made cable routing and maintenance straightforward.
Marine Brackets That Resist Corrosion
-
Problem: A marina required custom handrail brackets exposed to salt spray and direct sun. The solution needed to be low-maintenance and highly resistant to corrosion, with a clean appearance for public areas.
-
Selection: 6063-T5 aluminum c channel, 1.5" x 1.5" profile, black anodized for UV stability. Channel chosen for its excellent corrosion resistance and finish quality.
-
Calculation Snapshot: Short bracket spans analyzed for buckling and bending. Safety factor of 2.0 applied to account for dynamic loads (e.g., people leaning on rails). ER5356 filler selected for welds to maximize strength and saltwater resistance.
-
Fabrication Notes: Channels cut and TIG welded to base plates. Weld zones cleaned and sealed after assembly. All mounting holes isolated with nylon washers to prevent galvanic corrosion. Expansion allowance left at joints to accommodate thermal movement.
-
Outcome: The aluminum c track brackets showed no pitting or discoloration after extended exposure. Maintenance was limited to periodic cleaning, with no repainting or repairs needed.
Lessons Learned and Practical Insights
-
Always match alloy and finish to environment—6063 for finish-critical or marine, 6061 for structural or high-machining needs.
-
Orient the c channel web vertically for beams and use bracing to resist lateral-torsional buckling in long extruded aluminum slide runs.
-
Choose ER5356 filler for welds in marine or high-strength zones, and remember to seal edges after anodizing or cutting.
-
Allow for thermal movement in long runs of aluminum track to prevent warping or binding.
-
Trial cuts, holes, and fits on scrap before committing to production—this saves time and reduces costly rework.
By applying these case study templates and insights, you’ll be better equipped to specify, fabricate, and install aluminum c channel systems that deliver reliable, long-term performance. In the next section, we’ll summarize your action plan and point you toward trusted partners to help streamline your next project.
Your Next Three Steps for Aluminum C Channel Success
Feeling ready to turn your project vision into reality? Whether you’re an engineer, architect, or procurement specialist, navigating the world of aluminum c channels can seem overwhelming at first. But with the right playbook, the process becomes manageable—and even straightforward. Here’s a concise, actionable path to move from concept to purchase order:
-
Choose the right alloy and temper: Reference your application’s needs—corrosion resistance, strength, finish, or machinability. Use the alloy matrix discussed earlier to select the best fit for your environment and fabrication method.
-
Select the optimal size: Consult the properties table or c channel aluminum sizes chart. Verify that your chosen dimensions meet load, span, and deflection criteria without over- or under-specifying.
-
Run a quick structural check: Use the step-by-step calculation walkthroughs to confirm that your channel will safely support the intended loads. Don’t forget to factor in safety margins and check for lateral-torsional buckling in longer spans.
-
Finalize finish and isolation details: Decide on anodizing, powder coating, or mill finish based on exposure and aesthetic needs. For mixed-material assemblies, specify proper isolation to prevent galvanic corrosion—especially important for marine or exterior aluminium channel types.
-
Issue your specification and QA checklist: Provide clear, standards-based specs (alloy, temper, size, tolerances, finish, QA requirements) to your supplier. This reduces the risk of errors and streamlines the delivery process.
From Concept to PO with Confidence
Imagine the satisfaction of seeing your aluminum c channels arrive on-site, perfectly matching your drawings and ready for install. To make this a reality, keep these best practices in mind:
-
Start with a clear spec: Use the editable template and checklist from the previous section to avoid missed details.
-
Vet your suppliers: Look for those with proven experience in your required aluminium channel sizes and finishes, and ask for documentation on quality and compliance.
-
Confirm logistics and MOQs: Plan for lead times, minimum order quantities, and packaging—especially if you’re searching for aluminum channel near me or require custom profiles.
-
Inspect on receipt: Upon delivery, use calipers, straightedges, and finish thickness gauges to verify compliance. Address any discrepancies immediately to avoid delays in fabrication or installation.
“A well-documented spec and proactive supplier communication are your best insurance for a smooth aluminum c channel procurement.”
Where to Get Expert Help—Recommended Partner Spotlight
Ready to take the next step? For engineering input, custom tooling, and reliable fulfillment on aluminum c channels, consider partnering with Shengxin—a professional aluminum profile manufacturer in China. Their technical support, fast lead times, and broad range of standard and custom aluminum c channel offerings make them a trusted choice for projects worldwide. Whether you need unique c channel aluminum sizes, specialized finishes, or large-scale production, Shengxin’s expertise ensures your requirements are met from design through delivery.
-
Engineering support: Get help with alloy selection, sizing, and structural checks.
-
Custom dies and profiles: Source non-standard aluminium channel types for specialized applications.
-
Cut-to-length and finishing: Order channels pre-cut, anodized, or powder-coated to minimize on-site work.
-
Quality assurance: Receive mill test reports, finish certifications, and robust packaging for global shipping.
By following these steps and leveraging proven partners, you’ll notice fewer surprises, lower rework rates, and a smoother project flow from procurement to install.
Continuous Improvement: Document and Adapt
One final tip—after your project is complete, take a moment to document what worked and what didn’t. Did a particular aluminium channel size outperform expectations? Was a finish or fabrication method problematic? Feed these lessons learned into your future specs and supplier communications. Over time, this continuous feedback loop will streamline your process and ensure even better results with every new aluminum c channel project.
Armed with this action plan and the right resources, you’re set to confidently specify, source, and implement aluminum c channels for any application—now and in the future.
1. What is an aluminum C channel and where is it commonly used?
An aluminum C channel is an extruded, open-section profile shaped like the letter C, featuring a central web and two flanges. It is widely used in architectural framing, machinery, transportation, solar panel mounting, and marine applications due to its high strength-to-weight ratio, ease of fastening, and corrosion resistance.
2. How do I choose the right alloy and finish for my aluminum C channel project?
Select the alloy based on your project's strength, finish, and fabrication needs. 6061-T6 is ideal for high strength and machinability, while 6063-T52 offers superior surface quality for anodizing and architectural finishes. Finishing options like anodizing or powder coating should be chosen based on the environment and desired appearance.
3. What are the key factors to consider when specifying aluminum C channel sizes?
Consider load requirements, span, deflection limits, environment, and fabrication method. Always reference standard size charts, check tolerances, and verify section properties like moment of inertia and section modulus to ensure the channel meets structural needs without over- or under-specifying.
4. What are the best practices for fabricating and installing aluminum C channels?
Use clean, dedicated tools for cutting and welding, ensure proper fixturing, and choose compatible fasteners with isolation pads to prevent galvanic corrosion. Allow for thermal expansion in long runs and always check alignment and torque during installation for reliable performance.
5. Where can I find reliable suppliers for custom and standard aluminum C channels?
Look for manufacturers with proven experience, such as Shengxin Aluminum, which offers a wide range of standard and custom aluminum profiles, technical support, and quality assurance. Always request certifications, review supplier reputation, and clarify order details to ensure a smooth procurement process.


 serviço on-line
 0086 136 3563 2360
 sales@sxalu.com
 +86 136 3563 2360
 português
 English
 français
 Deutsch
 русский
 español
 العربية
 ไทย
ไทย Việt
Việt Українська