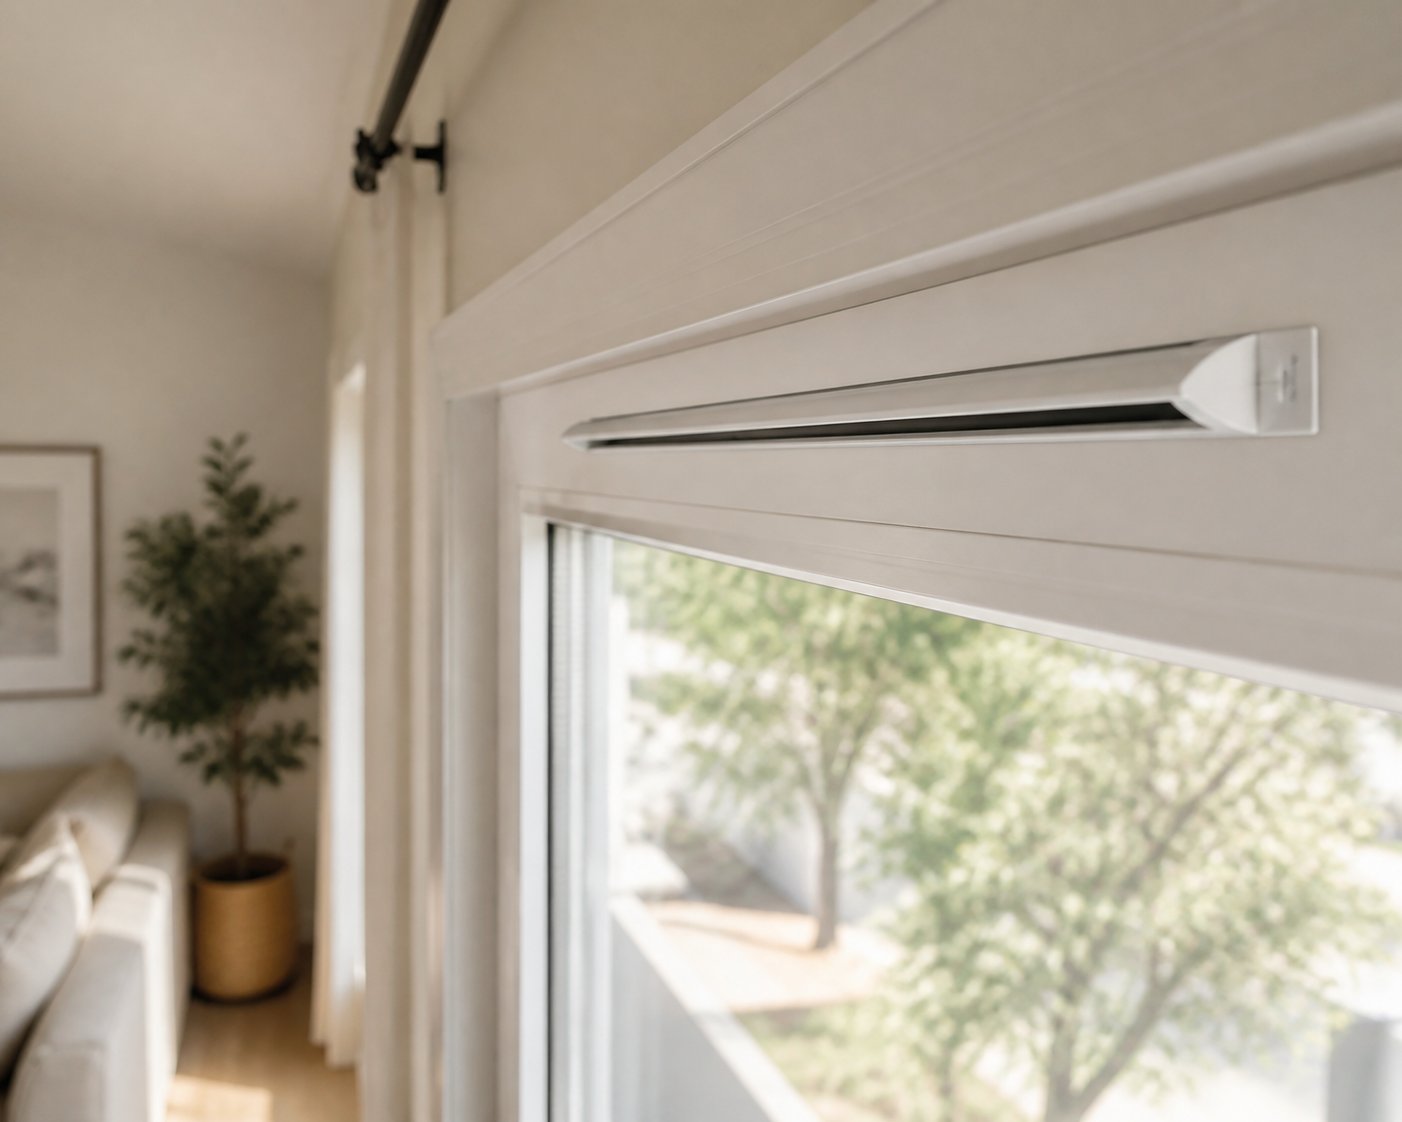
Ever noticed a slim, slotted strip running along the top of a window frame? Maybe you moved into a new home, spotted it, and wondered whether it was a design feature or something that needed fixing. That narrow strip is a trickle vent, and despite its modest size, it plays a surprisingly important role in keeping your home healthy and comfortable.
Trickle air vents for windows are small, adjustable openings built into or added onto window frames that allow a controlled trickle of fresh air into a room, even when the windows are fully closed. They provide continuous background ventilation without relying on electricity, mechanical systems, or compromising home security.
You might also hear them called drip vents, slot vents, or background ventilators. They all refer to the same thing, so if any of those terms brought you here, you are in the right place. This guide breaks down everything you need to know in plain language, whether you are a homeowner asking "do I actually need trickle vents in my windows?" or a builder looking for the right product spec.
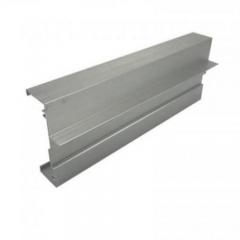
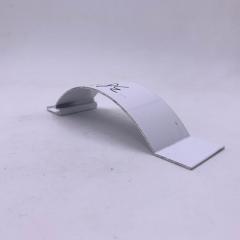
Physically, a trickle vent is a narrow, slotted unit typically fitted into the frame head at the very top of a window. It consists of two main parts: an external weathershield that faces the outdoors and an internal canopy that faces into your room. Between them sits the ventilation slot cut through the frame itself.
What makes these vents so practical is the adjustable flap on the internal canopy. You can slide or toggle it to open the vent fully, partially close it, or shut it off entirely. That puts you in control of airflow without ever needing to unlock or open the window. Unlike extractor fans, they require no electricity and produce zero noise. Unlike opening a window, they do not create a security risk or let rain pour in. And unlike full mechanical ventilation systems such as heat recovery ventilators, they involve no ductwork, no filters to replace, and no ongoing running costs.
Here is the challenge. Today's homes are built to be energy efficient. Double glazing, wall insulation, and thorough draught-proofing all do a fantastic job of keeping heat inside and reducing energy bills. The trade-off? Those same improvements seal up the natural gaps and cracks that older properties relied on for airflow.
When a home becomes airtight, moisture from cooking, showering, and even breathing has nowhere to go. CO2 levels climb, volatile organic compounds from paints and cleaning products linger, and condensation begins forming on cold glass surfaces. Left unchecked, that trapped moisture leads to mould growth on walls, window reveals, and ceilings. The Energy Saving Trust emphasizes that insulation and draught-proofing improvements need to be accompanied by proper ventilation to ensure fresh air can still enter the home. Background ventilation through trickle vents addresses exactly this problem, quietly exchanging stale indoor air for fresh outdoor air around the clock.
In the sections ahead, you will find a detailed look at how these vents actually move air and combat condensation, the building regulations that may require them, the different types available (including acoustic and humidity-sensitive models), how to match a vent to your window frame material, a step-by-step installation guide, maintenance tips, seasonal usage strategies, and a myth-busting section that clears up the most common misconceptions. By the end, you will have everything you need to decide whether trickle vents belong in your project and which type to choose.
Imagine two rooms side by side, separated by a wall with a small opening near the top. One room is warm, humid, and slightly pressurized from the heating system running. The other is cooler and drier. Air naturally wants to move from the higher-pressure side to the lower-pressure side, and that tiny opening is all it needs. A trickle vent works on exactly this principle, using your window frame as the dividing wall between indoor and outdoor environments.
The driving force behind this gentle exchange is the air pressure differential. Warm indoor air tends to rise and create slightly higher pressure near the ceiling, while wind movement across the exterior facade generates fluctuating pressures outside. These differences, often as subtle as 10 to 20 pascals in a typical home, are enough to push fresh outdoor air in through the vent slot and allow stale, moisture-laden indoor air to find its way out through other openings or exhaust points in the home. Laboratory testing at Riga Technical University confirmed this relationship clearly: as the pressure differential between indoors and outdoors increases, so does the volume of air flowing through a trickle vent, following a predictable and measurable pattern.
You will sometimes see the term equivalent area (abbreviated as EA) on vent specifications, and it is worth understanding what it means. Equivalent area is the effective free area, measured in square millimeters, through which air can actually pass. Think of it as the vent's breathing capacity. A vent with an EA of 4000 mm² allows twice the airflow of one rated at 2000 mm². Building regulations use EA values to calculate whether a room has enough background ventilation. For reference, habitable rooms like bedrooms and living rooms typically require a total of 8000 mm² EA, while bathrooms need around 4000 mm² EA. The higher the equivalent area, the more air the vent can exchange at any given pressure difference.
The key benefits of this quiet, continuous air exchange go well beyond simply "letting fresh air in." Here is what trickle ventilation actually delivers:
The airflow path through a trickle vent is straightforward, but each component plays a specific role. Picture this sequence: outdoor air first meets the external weathershield, a slotted cover mounted on the outside face of the window frame. The weathershield's job is to deflect rain and wind-driven water while still allowing air to pass through its narrow openings. Most weathershields also incorporate a fine mesh to keep insects out.
From the weathershield, air enters the slot cut through the window frame head. This slot is the core of the vent, and its dimensions directly determine the equivalent area. The air passes through this channel and emerges on the indoor side, where it meets the internal canopy. The canopy directs the incoming air upward toward the ceiling rather than straight at the occupant, which is why a properly installed trickle vent produces airflow that is virtually imperceptible as a draught. You will not feel a cold jet hitting your neck. Instead, the fresh air mixes gradually with the room's existing air, diluting moisture and pollutants without creating discomfort.
The adjustable flap on the internal canopy gives you manual control. Open it fully for maximum ventilation during high-humidity activities like cooking or drying laundry. Partially close it on a breezy day when the wind is driving more air through than you need. Or shut it entirely during extreme weather, keeping in mind that prolonged closure removes the ventilation benefit the vent is designed to provide.
Condensation is the single biggest reason homeowners search for information about trickle air vents for windows. Those droplets forming on your glass every morning are not just annoying. Left unmanaged, the resulting persistent dampness fuels mould growth, damages window seals, stains paintwork, and can even affect the structural integrity of timber frames over time.
Here is the science in simple terms. Warm air holds more moisture than cold air. When you cook, shower, or even breathe, you add water vapor to the indoor air. That moisture-laden warm air circulates through the room until it encounters a cold surface, usually the glass pane or the window frame itself. At that cold surface, the air temperature drops below its dew point, the temperature at which the air can no longer hold all its moisture. The excess water vapor condenses into visible droplets.
Trickle vents combat this process from two directions. First, they allow the humid indoor air to escape gradually, reducing the overall moisture content of the room. Second, they introduce drier outdoor air that mixes with and dilutes the remaining indoor humidity. The combined effect lowers the dew point relative to your glass temperature, meaning the air needs to cool much further before condensation can form. In practical terms, you will notice fewer or no water droplets on your windows in the morning.
This is not just theory. Industry data confirms that trickle vents reduce condensation by lowering indoor humidity levels, improving airflow around rooms, and reducing the stagnant, moisture-heavy air pockets that form in corners and against cold walls. The effect is especially noticeable in bedrooms, where hours of breathing with windows and doors closed can raise humidity dramatically overnight, and in kitchens and bathrooms, where steam production is concentrated during short periods.
A critical point to keep in mind: trickle vents work best as part of a broader moisture management approach. They are not a magic fix for structural damp, leaking gutters, or rising moisture from foundations. They address condensation-related dampness, which is the most common moisture problem in modern, well-sealed homes. When you combine them with consistent heating, proper use of extractor fans in wet rooms, and sensible habits like not drying laundry on radiators without ventilation, the results can be transformative.
The effectiveness of any individual vent depends on its equivalent area and the pressure conditions at your specific property. Homes on lower floors of multi-story buildings benefit from stronger stack-effect pressures that naturally drive more air through the vent, while upper-floor apartments may experience weaker pressure differentials. In those cases, pairing trickle vents with mechanical exhaust fans in kitchens and bathrooms creates the negative pressure needed to pull fresh air through the vents more reliably, a hybrid approach that building professionals increasingly recommend.
Understanding the mechanics is useful, but the practical question most homeowners face next is whether they are legally required to fit these vents, and that depends entirely on the type of building project involved.

Here is the question that trips up homeowners and installers alike: are trickle vents a legal requirement? The honest answer is "it depends." It depends on the type of project, the age of the property, and what ventilation was already in place. Building regulations in England set clear rules, but the way those rules apply to different scenarios is where confusion creeps in. Let's untangle it.
The regulations that govern ventilation in homes fall primarily under Approved Document F (Ventilation), which was significantly revised in June 2022. The updated rules responded to growing evidence that modern airtight buildings suffer from poor indoor air quality when background ventilation is inadequate. Under the current Approved Document F requirements, habitable rooms such as bedrooms, living rooms, kitchens, and dining rooms need a minimum of 8000 mm² equivalent area of background ventilation. Bathrooms and utility rooms require 4000 mm². In practical terms, a standard trickle vent typically provides around 4000 mm² EA, meaning most habitable rooms need at least two standard vents or one larger unit to satisfy compliance.
Alongside Part F, Part O (Overheating) also interacts with ventilation design. Introduced at the same time, Part O requires new residential buildings to demonstrate that they will not overheat, factoring in glazing orientation, shading, and the ability to purge excess heat through ventilation. While trickle vents alone do not solve overheating, they form part of the broader ventilation strategy that Part O assessments consider. A home designed to meet Part O may rely on trickle vents for background airflow while using openable windows for purge ventilation on hot days.
The table below breaks down the key regulatory scenarios so you can quickly identify where your project falls:
| Project Type | Trickle Vent Requirement | Key Detail |
|---|---|---|
| New-build dwellings | Required | Must meet full Approved Document F standards, including minimum EA per room |
| Replacement windows (originals had trickle vents) | Required | Replacements must replicate or improve the existing ventilation provision |
| Replacement windows (originals had no vents) | Usually required | Most Building Control bodies now expect compliance, though interpretation can vary locally |
| Extensions and conversions | Usually required | Building work that triggers Building Regulations brings ventilation into scope |
| Existing windows in unaltered homes | Not required | No obligation to retrofit vents if no building work is being carried out |
| Commercial and non-residential projects | Separate regulations apply | Governed by Approved Document F, Volume 2, with different ventilation standards |
The trigger points that bring trickle vent requirements into play are tied to building control oversight. Whenever your window project falls under the scope of Building Regulations, ventilation compliance becomes mandatory. Three main checkpoints enforce this:
A critical point that catches many homeowners off guard: non-compliance can create real problems when you sell your property. Conveyancing solicitors routinely check for building regulations completion certificates. Missing certificates or evidence of non-compliant window installations can delay or even derail a sale. The UK Government's own FAQ on Approved Document F makes this unambiguous — a homeowner signing a disclaimer stating they do not wish to have background ventilators installed is not a suitable way of complying with Building Regulations, and purchasing an indemnity policy is not an acceptable alternative either. The work must comply fully.
It is also worth noting that night-vent latches, where a window locks slightly ajar, do not qualify as background ventilation under the current regulations. The government guidance specifically states that windows locked on a night-latch do not provide a sufficiently secure means of background ventilation. Trickle vents or equivalent wall-mounted ventilators remain the accepted solution.
This distinction is where most of the confusion lives, so let's make it as clear as possible.
For new builds, the rules are straightforward. Every habitable room must meet the minimum equivalent area for background ventilation specified in Approved Document F. Trickle vents are the standard method, though wall-mounted background ventilators or whole-house mechanical ventilation systems like MVHR can also satisfy the requirement.
For replacement windows, the situation depends on what was there before. If your original windows had trickle vents, the replacements must provide at least the same level of ventilation. If your original windows had no vents at all, the picture becomes murkier. Strictly speaking, the regulations state that ventilation should not be made "less satisfactory" as a result of the replacement work. Since the originals provided no background ventilation, you might assume nothing needs to change. However, many Building Control bodies and FENSA-registered installers now interpret the updated regulations as requiring trickle vents in all replacement windows regardless. If a room already has a wall ventilator that meets the minimum EA, no further background ventilation needs to be added after replacing the windows.
For existing windows in unaltered homes, there is no legal obligation to retrofit trickle vents. You can live in a house with vent-free windows for decades without any regulatory issue, provided you are not carrying out building work that triggers Building Regulations. The moment you extend, convert a loft, or replace those windows through a regulated process, ventilation requirements come into play.
One final note: regulations can vary by jurisdiction across the UK, and interpretations differ between local authorities. Scotland, Wales, and Northern Ireland each have their own building standards documents with ventilation provisions that differ in detail from England's Approved Document F. Wherever you are, the safest approach is to verify the specific requirements with your local building authority or your installer's competent person scheme before finalizing your project specification. When in doubt, fitting trickle vents is the low-cost, low-risk option that keeps you on the right side of compliance.
Regulatory requirements tell you whether you need trickle vents. The next question is which type suits your situation best, because not all vents are created equal.
Walk into any building supply store and ask for a trickle vent, and you will likely be pointed toward a simple white plastic strip. That basic model covers the needs of many homes, but it is far from the only option. Three distinct categories of trickle air vents for windows exist, each engineered to solve a different problem. Picking the wrong type means either overspending on features you do not need or, worse, underspending and living with noise or moisture issues that a better-matched vent would have prevented.
The standard trickle vent is the workhorse of background ventilation. It is the model fitted in the vast majority of residential properties, and for good reason: it is affordable, effective, and simple to operate. Physically, it consists of a slot ventilator with a manually adjustable flap. You slide the flap open, air flows in. You slide it shut, airflow stops. No sensors, no automation, no moving parts beyond that single flap.
These vents are typically available in equivalent area ratings of 2500 mm², 4000 mm², and 5000 mm², letting you match the vent capacity to the room size and regulatory requirements discussed in the previous section. A habitable room needing 8000 mm² EA, for example, might use two standard vents rated at 4000 mm² each. Prices tend to sit firmly in the budget range, making them the default choice when noise and humidity are not primary concerns.
Where standard vents fall short is in environments with significant external noise. The straightforward air path that makes them inexpensive also means sound waves travel through the slot with very little resistance. If your bedroom faces a quiet garden, that is perfectly fine. If it faces a dual carriageway, you will hear every passing lorry through the open vent.
Imagine living on a street where traffic noise regularly tops 70 dB — roughly the volume of a vacuum cleaner running nonstop outside your window. A standard vent offers virtually no barrier to that sound. An acoustic trickle vent, on the other hand, is specifically built to attenuate noise while still delivering the same background ventilation.
The difference lies in the internal design. Where a standard vent provides a direct, open path between outdoors and indoors, acoustic models incorporate baffles, sound-dampening foam linings, or labyrinthine air channels that force sound waves to bounce, absorb, and lose energy before reaching your room. Fresh air still passes through because air can navigate turns and absorb into foam pockets, but the higher-frequency sound waves that carry traffic noise, aircraft rumble, and railway clatter cannot follow the same winding path without significant energy loss.
Acoustic performance is measured using a metric called Dn,e,w, which represents the element-normalized level difference in decibels. A higher Dn,e,w value means better sound insulation. According to independent testing by UKAS-accredited laboratories, well-designed acoustic vents can achieve Dn,e,w ratings that meaningfully reduce sound transmission while still meeting airflow requirements. Here is a rough guide to interpreting those numbers:
When reviewing product specifications, look for performance data that breaks down attenuation by frequency band. Low-frequency rumble from heavy goods vehicles (125 to 250 Hz) is harder to block than higher-frequency sounds, so a vent that performs well at mid and high frequencies might still let deep bass through. Testing reports from accredited labs like Sound Research Laboratories or BRE will show this frequency-by-frequency breakdown, giving you a much clearer picture than a single headline number.
Acoustic trickle vents are not always a choice — sometimes they are a requirement. Planning authorities in noise-sensitive areas, such as zones near airports or alongside major transport corridors, may impose conditions requiring acoustic ventilation as part of the planning consent. If you are developing or renovating a property in such an area, check the planning conditions before specifying standard vents, because swapping them out later is far more disruptive than fitting the right model from the start.
The trade-off? Acoustic models sit in the mid-range to premium price bracket and tend to have a slightly bulkier profile than standard vents due to the internal baffles. For most homeowners in noisy locations, though, the improvement in comfort and sleep quality makes the additional cost an easy decision.
Standard and acoustic vents both rely on you, the occupant, to adjust the flap manually. That works well enough if you are attentive to indoor air quality. But what happens when you forget? Or when you are asleep, at work, or simply do not realize the bathroom humidity has spiked after a long shower? This is the gap that humidity-sensitive trickle vents fill.
Inside a humidity-sensitive vent sits a mechanical sensor element, typically a polyamide (nylon) strip, that responds directly to the relative humidity of the indoor air passing over it. When humidity rises — say, from cooking, showering, or a room full of people breathing — the polyamide strip absorbs moisture from the air and physically expands. That expansion opens the vent aperture wider, allowing more damp air to escape and more dry outdoor air to enter. When humidity drops back to a comfortable level, the strip contracts and the vent partially closes, reducing unnecessary heat loss.
This automated cycle delivers several practical advantages. Research monitoring relative-humidity-controlled trickle vents in occupied dwellings found that these units tracked humidity changes closely and delivered energy savings of 30% to 55% during winter compared to permanently open vents, simply by avoiding excess ventilation when it was not needed. The vent breathes in proportion to demand rather than running at a fixed rate.
Humidity-sensitive vents are the better choice in several scenarios:
The polyamide sensing mechanism is entirely mechanical — no batteries, no wiring, no electronics. It does, however, sit at the premium end of the price spectrum, and the automatic operation means you sacrifice some direct control. In most cases, that trade-off is exactly the point.
Choosing between these three categories becomes much simpler when you see the key differences side by side:
| Feature | Standard Trickle Vent | Acoustic Trickle Vent | Humidity-Sensitive Trickle Vent |
|---|---|---|---|
| Airflow Control Method | Manual adjustable flap | Manual adjustable flap | Automatic via polyamide humidity sensor |
| Noise Reduction Capability | Minimal | Significant (30 to 50+ dB Dn,e,w) | Minimal to moderate |
| Price Range | Budget | Mid-range to premium | Premium |
| Ideal Use Case | Quiet residential settings with standard ventilation needs | Properties near roads, railways, or flight paths | Bathrooms, kitchens, rental properties, and homes with persistent condensation |
| Energy Efficiency | Depends on occupant behavior | Depends on occupant behavior | Optimized — ventilates on demand, reducing unnecessary heat loss |
A few homes will benefit from combining types. You might fit acoustic vents in street-facing bedrooms to keep noise out overnight while using humidity-sensitive vents in the bathroom and kitchen where moisture management matters most. Standard vents can handle quieter, drier rooms like hallways or spare bedrooms where neither noise nor humidity is a pressing concern.
Selecting the right type is half the equation. The other half is making sure the vent you choose is physically and aesthetically compatible with your window frame material, a factor that varies significantly between aluminium, uPVC, timber, and composite profiles.

You have picked the right type of trickle vent — standard, acoustic, or humidity-sensitive. But here is where many homeowners and even experienced builders stumble: will that vent actually fit your window frame? A trickle vent engineered for a uPVC profile will not necessarily clip into an aluminium section, and a unit designed for aluminium certainly will not sit flush on a timber frame without modification. Getting the material match wrong leads to poor seals, water ingress, rattling components, and an installation that looks like an afterthought rather than a professional finish.
Frame material affects far more than just the physical fit. It determines how the vent slot is created, how durable the installation will be over decades of use, whether the vent integrates visually with the window, and even which mounting method is appropriate. Let's walk through the four most common frame materials so you can match your chosen vent to your windows with confidence.
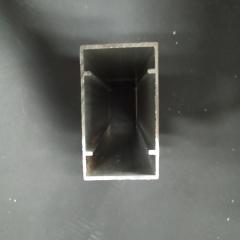
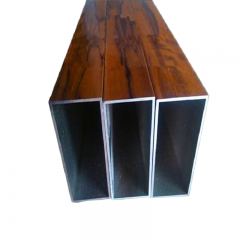
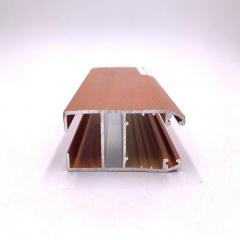
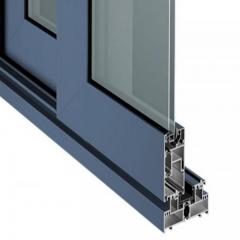
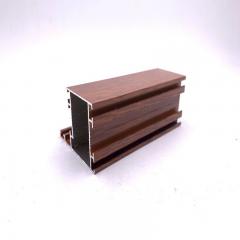
If your windows are uPVC or aluminium, you are working with the two easiest frame materials when it comes to fitting trickle vents. The reason is straightforward: manufacturers of these frame systems typically design the vent slot directly into the profile during the extrusion process. That means the frame head already has a cavity or routing channel engineered to accept a slot ventilator without any structural compromise.
For uPVC frames, the hollow profile construction provides ample depth for a vent slot to be machined into the frame head. The internal chambers of the profile give the plastic enough structural rigidity to tolerate the slot without weakening. Standard slot ventilators designed for uPVC systems clip or screw into this pre-cut channel, and because the dimensions of common uPVC profile systems are well established, finding compatible vents is rarely a problem. According to the Federation of Master Builders, uPVC frames are the most popular choice in modern construction, and trickle vents can easily be accommodated within them — either factory-fitted during manufacture or retrofitted later.
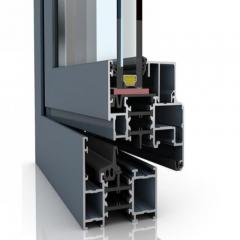
For aluminium frames, the picture is equally favorable but with a few nuances. Aluminium profiles tend to be slimmer and more precise than uPVC equivalents, which is one of their aesthetic appeals. That slim profile means the vent slot needs to be machined with tighter tolerances. Additionally, many modern aluminium window systems incorporate thermal breaks — insulating barriers within the frame that prevent heat transfer through the metal. Vent slots must be routed in a way that does not compromise these thermal breaks, or the energy performance of the entire window drops.
The critical factor for both materials is compatibility with the specific profile system. A vent that fits a 70 mm uPVC casement profile may not work with a 58 mm system. Similarly, aluminium vent slots must match the frame head dimensions of the particular extrusion series being used. Ordering a vent that is 2 mm too wide or too narrow creates gaps that invite water penetration, or forces an overly tight fit that cracks the housing during installation.
This is where sourcing vents and frames from aligned suppliers becomes a practical advantage. Shengxin Aluminium's adjustable slot ventilators are engineered specifically for both aluminium and uPVC profiles, which means the vent dimensions, fixing points, and weathershield designs are purpose-built to integrate with these frame types. For builders and window fabricators managing larger projects, the ability to order trickle air vents for windows alongside compatible window profiles from a single manufacturer streamlines procurement, eliminates guesswork around dimensional compatibility, and reduces the risk of mismatched components arriving on site.
Timber and composite frames present a different set of challenges. Neither material arrives with a pre-formed vent cavity the way extruded uPVC and aluminium profiles do. Instead, the vent slot must be created on site or at the joinery workshop, which demands more care and skill.
For timber frames, fitting a trickle vent means routing a slot into the solid wood of the frame head. This is not a five-minute job. The slot must be precisely positioned, cut to the correct depth without breaking through to the exterior glazing rebate, and sanded smooth to prevent splintering. Any exposed end grain needs to be sealed with a suitable primer or preservative to prevent moisture absorption and eventual rot. If the routing goes too deep or too wide, the structural integrity of the frame head is compromised, and the weather seal between the frame and the glass unit can fail.
Heritage and conservation projects add another layer of complexity. Many listed buildings and properties in conservation areas use timber windows to preserve architectural character. Listed Building Consent may be required before any modern feature like a trickle vent can be installed, and the visual impact of the vent on the window's appearance will be scrutinized. In these cases, timber-colored or custom-finished vent covers help the installation blend with the original joinery.
For composite frames, which combine materials such as aluminium cladding over a timber or insulating core, the installation approach varies by manufacturer. Some composite systems include a vent slot option in the standard profile. Others require the fabricator to machine a slot into the frame head during window assembly. Because composite frame construction differs widely between brands, there is no single universal vent that works across all composite systems. Always confirm compatibility with the frame manufacturer before ordering.
Regardless of your frame material, builders and window fabricators should always verify vent-to-frame compatibility before placing an order. Measure the frame head depth, width, and available mounting surface. Cross-reference those dimensions with the vent manufacturer's technical data sheet. A quick call to the vent supplier's technical team can save a costly return or a botched installation.
The following table compares the four main frame materials across the factors that matter most when selecting and installing trickle vents:
| Frame Material | Ease of Vent Installation | Durability Considerations | Aesthetic Integration | Typical Vent Mounting Method |
|---|---|---|---|---|
| Aluminium | High — profile designed for precision vent slots; factory fitting is standard | Excellent — corrosion-resistant, unaffected by UV; vent housing maintains integrity for decades | Seamless — slim vent profiles match the clean lines of aluminium frames; multiple finish options available | Clip or screw into pre-cut slot in extruded frame head |
| uPVC | High — hollow profile accommodates vent slots easily; retrofit-friendly | Very good — UV-stabilized plastic resists weathering, though cheaper vents may yellow over time | Good — wide range of colors and woodgrain foils available to match frame finish | Clip or screw into machined slot in frame head |
| Timber | Moderate — requires routing a slot on site or in the joinery workshop; risk of splitting if done carelessly | Good if sealed properly — exposed cut surfaces must be primed to prevent moisture ingress and rot | Variable — timber-colored or painted vent covers needed for a cohesive look; heritage projects may require custom finishes | Screw-fixed into routed slot; sealant applied to cut edges |
| Composite | Variable — depends on the specific composite system; some include pre-formed slots, others require fabrication | Good — outer cladding (often aluminium) protects the core, but vent routing must not compromise the insulating layer | Good to excellent — aluminium-clad composites accept slim vent profiles similar to full aluminium frames | Manufacturer-specific; may involve clip, screw, or adhesive fixing depending on composite construction |
A pattern emerges from this comparison. Aluminium and uPVC frames offer the most predictable, lowest-risk installations because the extrusion process builds vent compatibility into the frame from the start. Timber and composite frames can accept trickle vents just as effectively, but the installation demands more preparation, more skill, and more attention to sealing and finishing. Whichever material your windows are made from, the right vent matched to the right frame will look intentional rather than improvised — and it will perform reliably for the full lifespan of the window.
With the vent type chosen and frame compatibility confirmed, the practical question shifts to how these components actually go into the window. The installation process itself is more accessible than most homeowners expect, but a few common mistakes can turn a simple project into a costly problem.
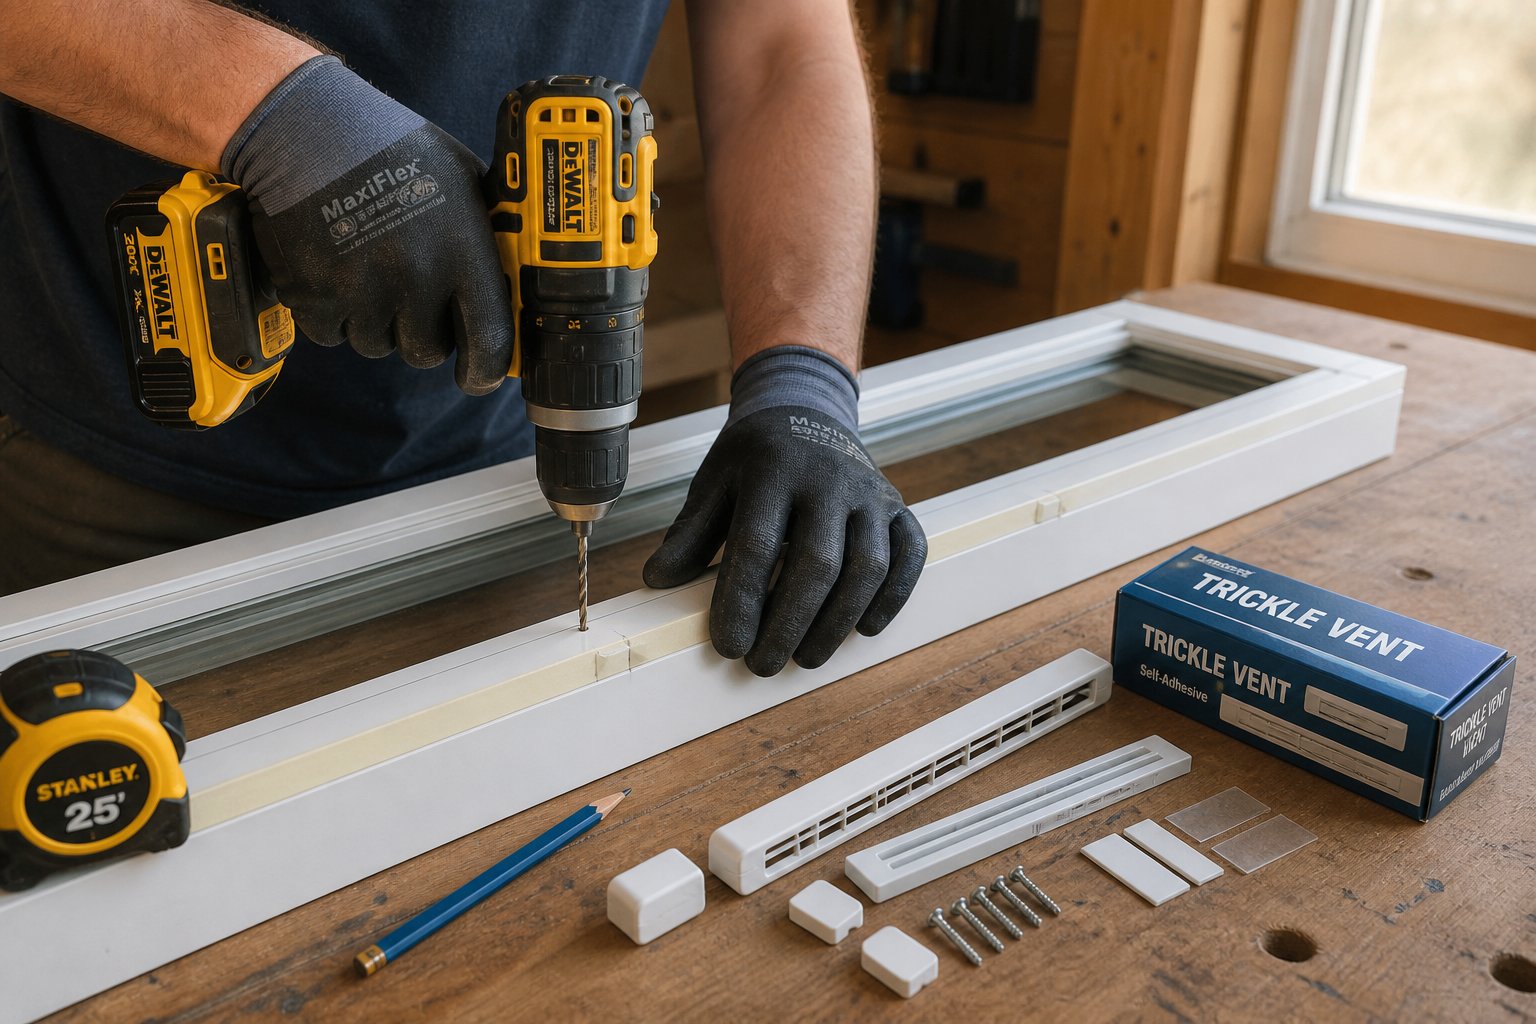
Fitting trickle air vents for windows is one of those rare DIY tasks that sounds more intimidating than it actually is. The process boils down to measuring, cutting a slot, and securing two components — one outside, one inside. A competent homeowner with basic power tool experience can handle it in under an hour per window. That said, mistakes here are not easily reversed. Cut the slot in the wrong spot, skip the sealant, or drill through a steel reinforcement bar, and you are looking at a compromised weather seal, a voided window warranty, or water trickling down your wall the next time it rains.
Before picking up a drill, check your window warranty documentation. Many manufacturers specify that any modification to the frame must be carried out by an approved installer. If your windows are relatively new and still under warranty, a quick call to the manufacturer can save you from an expensive lesson. With that caveat front and center, here is everything you need to know to fit trickle vents to existing windows the right way.
Gather everything before you start. Stopping mid-cut to rummage through the garage breaks concentration and invites errors. Here is your complete checklist:
If your vent came with a manufacturer's template, keep it close. Most quality products include a card or paper template that shows exact hole positions, slot dimensions, and screw locations. Using it eliminates guesswork and cuts your margin of error dramatically.
This trickle vent installation guide covers the standard through-frame method, which applies to the vast majority of residential uPVC, aluminium, and timber windows. Follow each step in sequence — skipping ahead is where most problems start.
Once the flap operates smoothly and both components feel secure, your installation is complete. Step back, look at it from both inside and outside, and verify the vent sits level and flush against the frame.
Even experienced DIYers make these errors. Knowing what to watch for is half the battle. Here are the pitfalls that cause the most callbacks and headaches:
A successful installation is quiet, invisible, and maintenance-free for years. A botched one announces itself with drips, draughts, and rattles every time the wind picks up. Take your time, follow the sequence, and resist the temptation to skip the dry-fit step — those extra five minutes of checking alignment before committing to screws and sealant will save hours of corrective work later.
Of course, even a flawless installation needs ongoing attention to keep performing at its best. Dust accumulates, flaps stiffen, and weathershields collect debris season after season. A simple maintenance routine keeps those problems from ever gaining a foothold.
Here is an irony that catches homeowners off guard every winter: the same trickle air vents for windows installed to prevent condensation and mould can actually cause those problems when they are neglected. A vent clogged with dust, cobwebs, or paint overspray is functionally identical to having no vent at all. The slot is still there, but air is not moving through it. Moisture builds, condensation returns, and mould follows close behind — often prompting the frustrated conclusion that "the vents do not work." In most cases, they work perfectly fine. They just need cleaning.
The good news? Maintaining trickle vents is one of the simplest upkeep tasks in your entire home. No special chemicals, no expensive tools, no professional service calls. A few minutes of attention twice a year keeps the airflow path clear and the vent mechanism operating smoothly for decades. Think of it as the ventilation equivalent of changing a smoke alarm battery — quick, easy, and far cheaper than dealing with the consequences of skipping it.
A practical trickle vent maintenance schedule aligns with the seasons when your vents matter most. Spring cleaning clears the debris that accumulated during winter, when vents worked hardest against high indoor humidity and windows stayed closed for months. Autumn cleaning prepares them for the cold season ahead, ensuring unrestricted airflow right when condensation risk peaks again. Twice a year is the minimum — if you live near a busy road, a construction site, or in an area with heavy pollen, quarterly cleaning keeps performance at its best.
Here is the cleaning process from start to finish:
The entire process takes five to ten minutes per window. If you clean your windows seasonally anyway, adding the vent to that routine requires almost no extra effort. The payoff is continuous, effective background ventilation that keeps condensation and stale air problems at bay year-round.
One detail worth highlighting: blocked vents are as useful as having no vent at all. If your vents start to block up, the first sign will typically be condensation reappearing on your window glass, by stuffy air indoors. Left blocked for too long, that persistent moisture creates the perfect conditions for mould growth — the exact problem the vents were installed to prevent.
Even well-maintained vents can develop issues over time. When something feels wrong — a persistent draught, water dripping inside, condensation returning despite open vents — the instinct is often to blame the vent itself. Before replacing anything, work through this troubleshooting guide. Most problems have simple fixes that take minutes rather than hours.
| Problem | Likely Cause | Solution |
|---|---|---|
| Excessive draught near the window | Vent fully open in an exposed location with high wind pressure on the facade | Partially close the adjustable flap to reduce airflow. If the problem persists on windy days, consider upgrading to an acoustic model with baffled air paths that slow incoming air |
| Condensation persists despite vents being open | Insufficient equivalent area for the room size, or other links in the ventilation chain are broken — blocked transfer routes, faulty extractor fans, or no extraction in wet rooms | Assess the whole-house ventilation strategy. A trickle vent is an inlet, not an extractor — it can only do its job if air has a complete route from supply through the dwelling to extraction. Check that bathroom and kitchen fans are working and internal doors allow air transfer |
| Noise or rattling from the vent | Loose internal canopy, missing or dislodged weathershield, or wind vibrating a poorly secured flap | Refit and tighten both the internal canopy and external weathershield. If components are damaged, replace them. For persistent wind noise, upgrade to an acoustic trickle vent with sound-attenuating baffles |
| Water dripping through the vent | Damaged, missing, or incorrectly fitted external weathershield; sealant failure around the vent slot | Inspect the weathershield from outside — look for cracks, displaced components, or gaps where sealant has degraded. Replace the external component and reseal with exterior-grade silicone |
| Vent stuck or jammed (will not open or close) | Paint overspray from decorating, accumulated grime in the flap track, or debris wedged in the mechanism | Clean the mechanism carefully using a thin brush or pipe cleaner. Gently work the flap back and forth to loosen it. If paint has sealed the flap shut, score along the paint line with a craft knife before trying to move it |
A recurring theme runs through this troubleshooting matrix: most problems trace back to either neglected cleaning or a misunderstanding of what the vent can and cannot do on its own. Remember, trickle vents provide background supply. They bring fresh air in. Getting stale, moist air out is the job of extractor fans, open windows during purge ventilation, or mechanical systems. When condensation persists despite open, clean vents, the problem almost always lies elsewhere in the ventilation chain — not with the vent itself.
Sooner or later, you will come across advice suggesting you "blank off" your trickle vents — or you will see blanking plates sold as accessories in hardware stores. A trickle vent blanking plate is simply a solid cover that replaces the internal canopy, sealing the vent slot completely and stopping all airflow through it.
Are there legitimate reasons to use one? In very limited scenarios, yes. If a property is undergoing major renovation and the vent slot needs to be temporarily sealed to prevent dust and debris from entering the room, a blanking plate keeps the interior clean during the work. If a mechanical ventilation system with heat recovery (MVHR) is being installed and the system designer specifies that background ventilators should not operate alongside the balanced mechanical system — as Approved Document F advises — then blanking plates may form part of a deliberate ventilation redesign overseen by a qualified professional.
Outside of those narrow situations, permanently blanking a trickle vent is strongly inadvisable. Sealing the vent eliminates the background ventilation your home's air quality depends on. Moisture levels rise, condensation returns, and the mould cycle restarts — sometimes in places you cannot see, like behind furniture or inside wall cavities. The small amount of heat you might save by stopping that trickle of fresh air is dwarfed by the cost of treating mould, repainting stained walls, or replacing damaged window seals down the line. Government ventilation guidance reinforces this point, recommending that intended background vents remain open and unblocked, including during winter.
If your vents feel genuinely intolerable — perhaps they create a noticeable draught in a bedroom or let in traffic noise that disrupts sleep — the right response is not to block them permanently. Instead, address the root cause. Swap a standard vent for an acoustic model. Partially close the flap rather than sealing it entirely. Adjust curtains or blinds so they do not channel cold air directly toward seating or sleeping areas. These targeted fixes preserve ventilation while solving the comfort problem that made blanking seem attractive in the first place.
Regular cleaning, sensible troubleshooting, and resisting the temptation to seal vents shut will keep your background ventilation performing exactly as designed. What remains is learning how to adjust your approach with the seasons — and clearing up the persistent myths that lead homeowners to misuse or distrust these unassuming little components.

Should trickle vents be open in winter when frost is forming on the outside of the glass? Should you close them in summer when windows are already wide open? These are the practical, everyday questions that no instruction manual answers — yet they determine whether your vents actually protect your home or just sit there doing nothing useful. Pair that uncertainty with a handful of stubborn myths circulating on homeowner forums, and it is no surprise that so many people end up using their vents incorrectly or, worse, sealing them shut entirely.
Let's fix both problems in one go.
Winter is when your trickle vents earn their keep. Heating systems run for hours, windows stay locked shut, and every shower, kettle boil, and breath adds moisture to air that has no natural escape route. This is precisely the season when condensation risk peaks — and precisely when many homeowners instinctively want to close every opening to keep heat in. Resist that instinct. HVAC professionals consistently recommend keeping vents open through the cold months. As Kevin Goude, an experienced HVAC expert, puts it: closing vents may lead to stale air and condensation inside windows, which can affect both your home and your health. The airflow from open trickle vents is minimal but essential — it keeps indoor air clean and healthy, which is always a priority during colder months. If you are worried about losing heat, focus on draft stoppers under doors and improved insulation rather than sacrificing the ventilation that prevents mould.
In high-moisture areas like kitchens and bathrooms, keep vents fully open throughout winter. For bedrooms, living rooms, and other habitable spaces, the partially open position strikes the right balance — enough airflow to manage humidity without any perceptible chill. Should I close trickle vents in cold weather? Only during extreme conditions like a severe storm driving rain horizontally against the window, and even then, reopen them once the weather passes.
Summer shifts the equation. Windows are open more frequently, providing generous purge ventilation that flushes heat and stale air far more aggressively than any trickle vent can. During the hottest days, vents supplement natural ventilation but are not a substitute for opening windows wide. Think of them as the baseline that keeps air moving even when you close up the house to leave for work or to keep out pollen on high-count days. On milder summer evenings when you might close windows for noise or security reasons overnight, those open vents maintain a gentle background exchange that prevents the bedroom from becoming stuffy by morning.
Spring and autumn are transitional seasons where indoor humidity fluctuates with unpredictable weather. The best approach is to adjust based on what you observe. If you notice morning condensation returning on your windows, open the vents wider. If the air indoors feels comfortable and dry, the partially open position is sufficient. These shoulder seasons are also ideal for the twice-yearly cleaning discussed in the previous section — clearing out winter's accumulated dust in spring and preparing the vents for heavy-duty winter use in autumn.
One detail that ties all four seasons together: trickle vents do not work in isolation. They interact with your home's other ventilation. When you switch on the extractor fan in your kitchen or bathroom, it pulls air out of the room and creates negative pressure. That negative pressure needs to be balanced by air entering from somewhere. If your windows and doors are all sealed tight, the fan works harder, becomes noisier, and may not extract effectively. Open trickle vents provide the makeup air the fan needs, drawn gently through the vent slot and across the room toward the extraction point. The trickle vent supplies, the extractor fan removes — together, they form a complete circuit that no single component can deliver alone.
Misinformation about trickle air vents for windows has been recycled across forums and social media for years. These myths sound plausible, which is exactly why they persist. Here are the trickle vent myths and facts that every homeowner should know:
Each of these myths shares a common root: the assumption that any opening in the building envelope is inherently bad. In reality, a carefully engineered, correctly sized opening is exactly what an airtight modern home needs. The trickle vent is not a flaw in your window — it is the feature that keeps everything else working properly.
With seasonal strategies clear and misconceptions set straight, the final piece is pulling everything together into a practical decision-making framework — matching your project type, noise environment, and frame material to the right vent and the right supplier.
You have covered a lot of ground — from the physics of airflow and condensation control to building regulations, vent types, frame compatibility, installation techniques, maintenance routines, and seasonal strategies. That is a dense amount of information, and the risk with any detailed guide is losing sight of the simple, actionable decisions that actually move a project forward. So let's distill everything into a clear framework you can use whether you are a homeowner tackling a single bathroom window or a builder specifying vents across an entire development.
Every trickle vent buying guide eventually circles back to the same truth:
Choosing the right trickle vent depends on three factors — your window frame material, your noise environment, and whether you are working on a new build, replacement, or retrofit project. Get those three right, and the rest falls into place.
Think of these three factors as a funnel. The first narrows your options to products that physically fit your frames. The second determines whether you need standard airflow or acoustic attenuation. The third tells you what the regulations demand and how much flexibility you have. Run your project through this sequence and you will arrive at the right product without second-guessing yourself.
Here is your action checklist, designed to walk you from decision to installation in the most logical order:
For builders, window fabricators, and project buyers working with aluminium or uPVC frames, Shengxin Aluminium's adjustable slot ventilators offer a practical advantage that simplifies this final step. Their vents are engineered for both aluminium and uPVC profiles, which means you can order trickle air vents for windows alongside compatible window extrusion profiles from a single supplier. That consolidation eliminates the back-and-forth of sourcing components from multiple vendors, reduces the risk of receiving mismatched parts, and streamlines procurement timelines — particularly valuable on multi-unit projects where consistency across every window matters.
Strip away the technical detail, and the message at the heart of this guide is remarkably simple. Trickle vents are a small, low-cost, zero-energy addition that protects both your building fabric and the health of everyone living inside it. They combat condensation, dilute pollutants, discourage mould, and maintain airflow around the clock — all without asking you to leave a window open or run a mechanical system.
The right product matched to the right frame makes installation straightforward, whether you handle it yourself over a weekend afternoon or hand it to a qualified installer. Maintenance amounts to a few minutes of cleaning twice a year. And the return on that modest investment? Drier windows every morning, fresher air in every room, and one fewer thing to worry about the next time you sell, refinance, or undergo a building inspection.
If condensation has been creeping across your glass, if your rooms feel stuffy despite a modern heating system, or if you are simply planning a window project and want to get ventilation right from the start — you already have everything you need to make a confident decision. Measure your frames, identify your noise environment, check the regulations, and choose a vent that fits. That small slot in your window frame really does make a massive difference.
In most cases, yes. Under the updated Approved Document F (June 2022), replacement windows installed through a FENSA-registered installer or under Building Control must provide background ventilation that matches or improves on what the original windows offered. Even if your old windows had no trickle vents, many Building Control bodies now interpret the regulations as requiring them in all replacements. Non-compliance can cause problems during property sales because conveyancing solicitors check for valid completion certificates. If your room already has a wall-mounted ventilator meeting the minimum equivalent area, additional background ventilation may not be needed. Always confirm with your installer or local building authority before finalizing your specification.
Keep them open. Winter is when condensation risk is highest because heating systems run constantly, windows stay shut, and moisture from cooking, showering, and breathing has no escape route. Closing vents traps that moisture indoors, leading to condensation on glass and eventual mould growth. The airflow through an open trickle vent is gentle enough that it will not create a noticeable chill at sitting or sleeping height. In kitchens and bathrooms, keep vents fully open. In bedrooms and living rooms, the partially open position balances humidity control with comfort. Only close them temporarily during severe storms driving rain horizontally against the window, and reopen as soon as conditions improve.
Yes, and condensation control is the primary reason most homeowners install them. Warm indoor air holds moisture that condenses into water droplets when it contacts cold glass surfaces. Trickle vents reduce condensation by allowing humid indoor air to escape gradually while drawing in drier outdoor air. This lowers the overall indoor humidity level and raises the threshold temperature at which condensation forms. The effect is most noticeable in bedrooms after overnight breathing and in kitchens and bathrooms where steam is produced. For best results, pair open trickle vents with working extractor fans in wet rooms, consistent heating, and sensible habits like avoiding drying laundry on radiators without ventilation.
Standard trickle vents use a simple manually adjustable flap and are the most affordable option, ideal for quiet residential settings. Acoustic trickle vents incorporate internal baffles and sound-absorbing materials that reduce external noise transmission while still allowing airflow, making them essential for properties near busy roads, railways, or airports. Humidity-sensitive trickle vents contain a polyamide strip that automatically opens the vent when indoor humidity rises and closes it when the air dries out, providing hands-free moisture management. Suppliers like Shengxin Aluminium offer adjustable slot ventilators compatible with both aluminium and uPVC frames, allowing builders to source vents alongside matching window profiles from a single manufacturer for streamlined project procurement.
A competent DIYer with basic power tool experience can retrofit trickle vents in under an hour per window. The process involves measuring and marking the vent position centrally on the frame head, checking for internal reinforcement bars, drilling pilot holes, cutting the slot with a jigsaw or oscillating multi-tool, and securing the external weathershield and internal canopy with screws and sealant. However, check your window warranty first, as some manufacturers require modifications to be done by approved installers. Common mistakes include cutting the slot off-center, skipping exterior-grade sealant, installing components upside down, and overtightening screws on uPVC frames. Using the manufacturer's template and dry-fitting components before final fixing helps avoid costly errors.



 serviço on-line
 0086 136 3563 2360
 sales@sxalu.com
 +86 136 3563 2360
 português
 English
 français
 Deutsch
 русский
 español
 العربية
 ไทย
ไทย Việt
Việt Українська