Imagine waking up on a cold morning, walking over to your bedroom window, and finding the glass dripping with condensation. You glance up at the slim slot along the top of the frame — the trickle vent — and notice the plastic housing is cracked right down the middle. The slider is jammed shut, and no air is getting through. Your first thought might be that you need a whole new window. You don't. You need a replacement trickle vent.
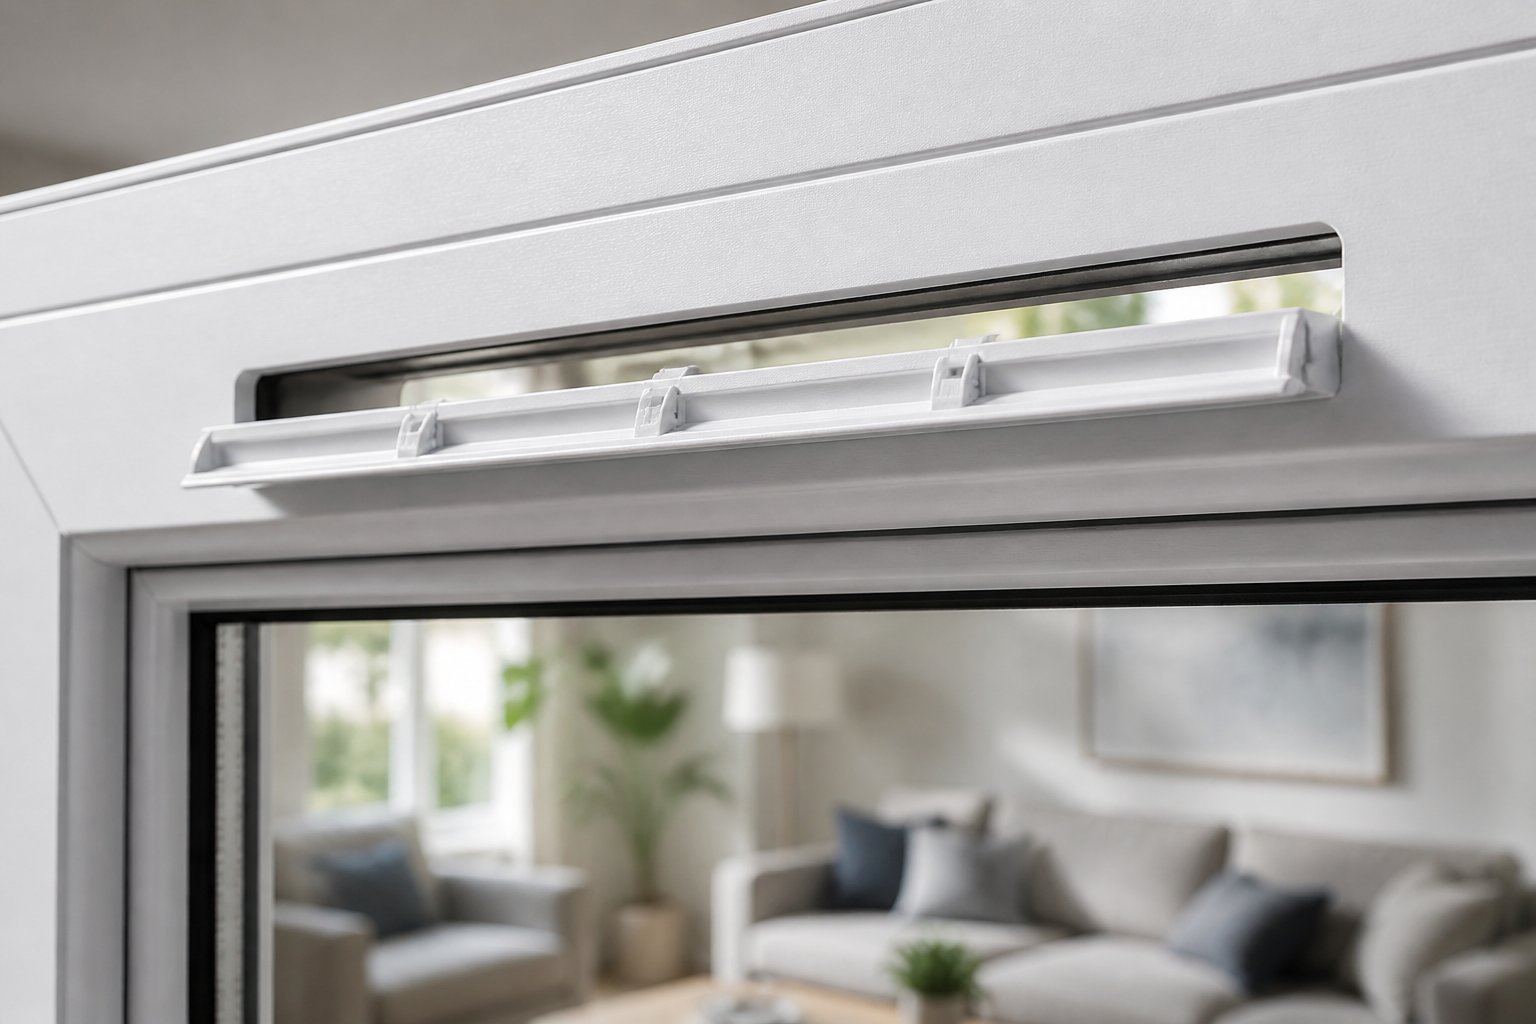
Replacement trickle vents for windows are aftermarket units designed to slot into the same routed channel your original factory-fitted vent occupied. They restore the background ventilation your window was built to provide, without the cost or disruption of tearing out the entire frame. The original vent that came with your window did the same job — but after years of UV exposure, temperature cycling, and general wear, these small plastic components often fail long before the window itself does.
Most trickle vents are designed to fit standard routed slots, meaning replacements can often be sourced independently of the original window manufacturer.
That single fact saves homeowners significant time and money. You are not locked into a proprietary part from the company that made your windows a decade ago. A compatible replacement vent, matched to the right slot dimensions and airflow rating, will do the job just as well.
A trickle vent is a small, slot-shaped device fitted into the top of a window frame. It allows a controlled, low-level flow of fresh air to pass through — even when the window is fully closed. Think of it as a narrow breathing channel for your home. Fresh air trickles in from outside while stale, moisture-laden air escapes, creating gentle but constant circulation.
Why does this matter? Modern homes are built to be airtight. Double glazing, insulation, and draught-proofing keep heat in brilliantly, but they also trap moisture, CO2, and airborne pollutants inside. Without adequate background ventilation, that trapped moisture condenses on cold surfaces — your windows, walls, and reveals — leading to mould growth and poor indoor air quality. Trickle vents solve this quietly and passively, requiring no electricity, no ducting, and no ongoing running costs.
The scope of this job is small. A replacement trickle vent typically costs between £10 and £30 per window, and fitting one is often a 10- to 15-minute task with basic tools. Compare that to the cost of a full window replacement — easily hundreds of pounds per unit, plus professional installation — and the value becomes obvious.
You are not altering the window structure, breaking any seals, or disturbing the glazing. You are simply removing a worn-out component and clipping or screwing a new one into the existing slot. It is one of the most straightforward home maintenance tasks you can tackle, and this guide is built to walk you through every step — from diagnosing the problem to choosing the right vent for your frame type.
The real question, of course, is whether your vent truly needs replacing or just a good clean. That distinction matters more than most people realize.
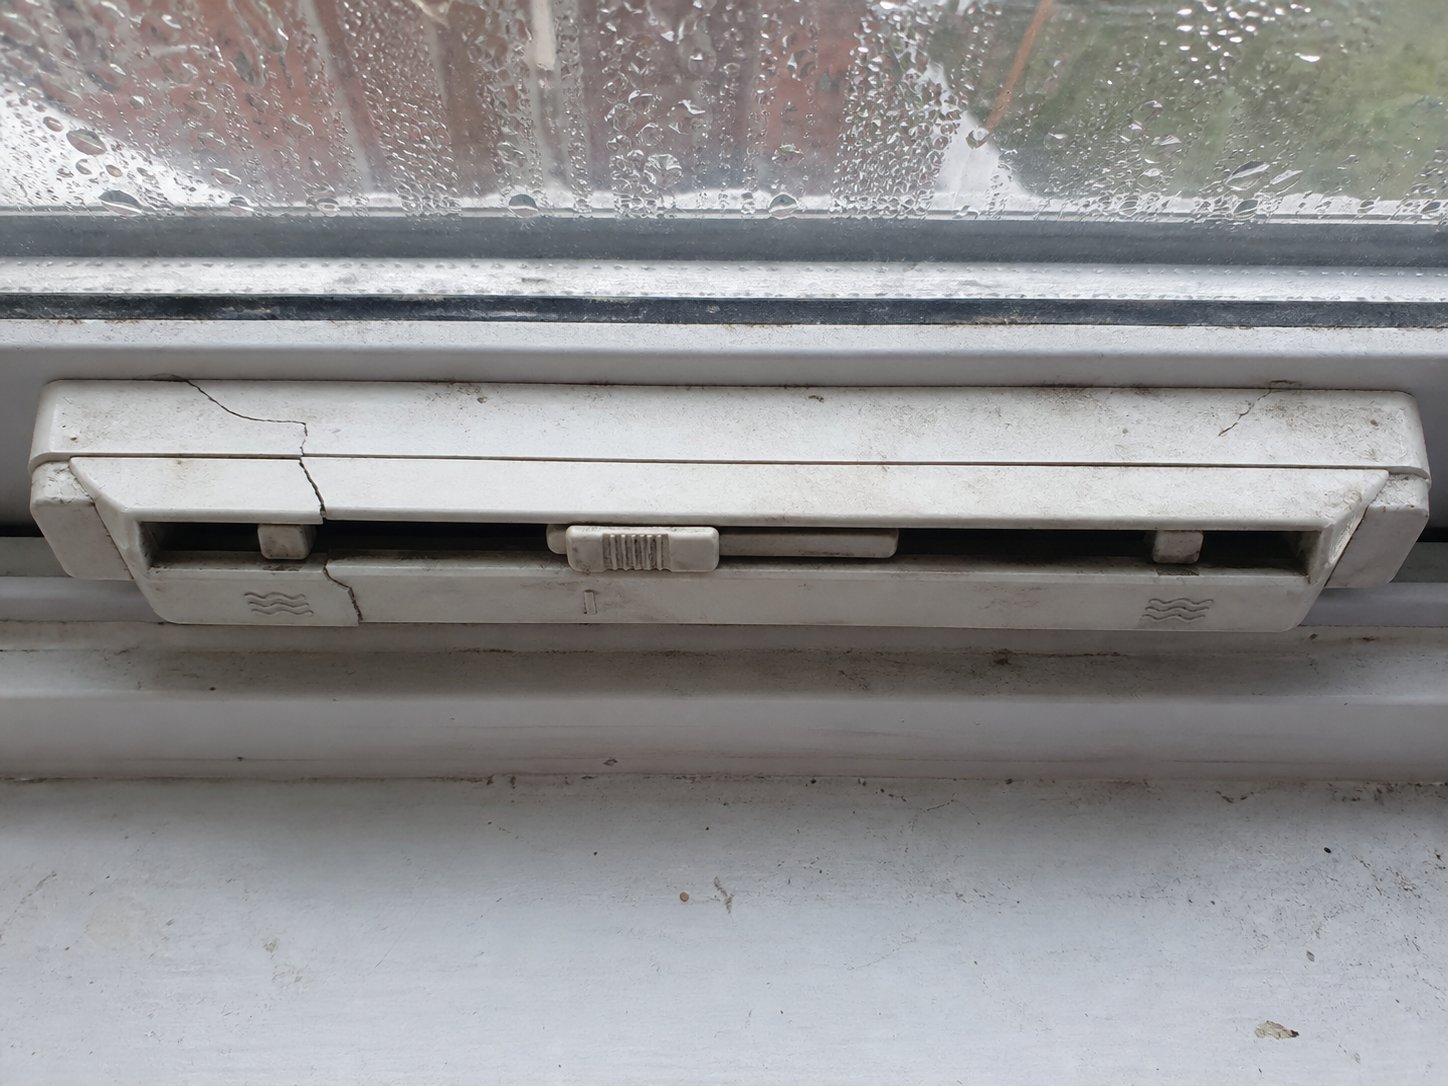
A cracked housing, a jammed slider, condensation creeping across the glass every morning — these symptoms all point in the same direction, but they do not always mean the same thing. Some failing trickle vents genuinely need to come out and be replaced. Others just need five minutes of attention with a soft brush. Knowing the difference saves you money and avoids an unnecessary trip to the hardware store.
Trickle vents fail for predictable reasons. The housings are typically made from lightweight plastic or uPVC, materials that perform well for years but gradually degrade under sustained UV exposure. South-facing windows take the worst of it. Over time, the plastic becomes brittle and discoloured, eventually cracking around screw fixings or along the slider track. Once the housing is compromised, the vent can no longer seal properly when closed — and it may let in rain or uncontrolled draughts regardless of the slider position.
Slider mechanisms are another common failure point. These small moving parts see regular use and exposure to temperature swings. A trickle vent slider stuck or not closing properly is one of the most frequent complaints homeowners report. Sometimes the slider has simply seized from lack of use; other times it has physically snapped off, leaving the vent permanently open or permanently shut. Either way, you have lost control over your background ventilation.
Then there are the vents that got caught in the crossfire of a decorating project. Paint overspray and careless brush strokes can work their way into the slot, gumming up the mechanism and effectively sealing the vent shut. A trickle vent painted shut is functionally identical to having no vent at all — and it is one of the most common causes of blocked ventilation in otherwise well-maintained homes.
If you are wondering whether your vent has reached the end of its useful life, work through the checklist below. Any single item is worth investigating; two or more together strongly suggest it is time for a replacement.
A trickle vent cracked or broken on a uPVC window is especially common in properties over ten years old. The combination of UV exposure and thermal cycling weakens the plastic progressively, and the failure often appears suddenly — a hairline crack becomes a full split after one sharp frost.
The consequences of ignoring these signs go beyond a draughty room. Blocked or non-functional vents directly contribute to condensation buildup, mould growth on window reveals, and stuffy indoor air. The moisture a typical household generates daily from cooking, showering, and even breathing needs a way out. When trickle vents cannot do their job, that moisture condenses on cold surfaces and creates the perfect environment for mould to establish itself.
Before you order a replacement, it is worth checking whether a simple clean might restore your vent to full working order. Dust, pollen, cobwebs, and airborne debris gradually accumulate inside the slot and around the internal baffles, restricting airflow without any visible damage to the housing itself. Can you clean a blocked trickle vent instead of replacing it? In many cases, yes.
Open the slider fully and use a soft brush, a thin duster, or the crevice attachment on your vacuum cleaner to clear any buildup from the internal openings. On the outside, check that the canopy is not blocked by dirt or insect nests. A quick wipe with a damp cloth and mild cleaning fluid is usually enough to shift stubborn grime. If the slider is stiff rather than broken, a tiny amount of silicone spray along the track can free it up without any need for removal.
If cleaning restores smooth operation and you see no cracks, warping, or missing components, your vent is fine — save your money. Honest diagnosis matters here: not every ventilation problem requires new parts. Sometimes all it takes is five minutes with a brush and a can of silicone.
Where things get more interesting is when you have confirmed a replacement is needed and start shopping for the right one. The type of window frame you are working with — uPVC, timber, or aluminium — changes what you need to buy and how the fitting process works.
Here is something most guides never mention: the replacement trickle vent that fits perfectly in your neighbor's uPVC window may not work at all in your timber casement or aluminium frame. Frame material is not just a cosmetic detail — it dictates the slot dimensions, the fixing method, and how easy (or difficult) the entire swap will be. Getting this wrong means ordering a vent that arrives, does not fit, and goes straight back in the box.
Each of the three main frame types — uPVC, timber, and aluminium — handles trickle vent installation differently. The routed slot cut into the frame head varies in length, width, and position. Fixing methods range from simple snap-fit clips to specialist screw fixings that require precise alignment. Even the availability of off-the-shelf replacement parts changes dramatically depending on what your frames are made from.
The comparison table below gives you a quick snapshot of how the three materials stack up across the factors that matter most when sourcing replacement trickle vents for windows.
| Factor | uPVC | Timber | Aluminium |
|---|---|---|---|
| Typical Slot Length | 400 mm or 412 mm (standardized) | Variable — depends on manufacturer and frame width | Variable — often narrower profiles with shorter or custom slots |
| Common Fixing Method | Snap-fit clips or screw-fix into existing pilot holes | Screw-fix (surface-mounted or recessed into routed channel) | Screw-fix with sealant or gasket; may need specialist fixings |
| Ease of DIY Replacement | Straightforward — most homeowners can handle it | Moderate — requires accurate measurement and may need pre-drilling | More involved — compatibility checks essential before purchasing |
| Availability of Replacement Parts | Widely available from multiple suppliers | Good, but sizing variety means fewer universal-fit options | More limited — may require manufacturer-specific or bespoke vents |
If you are working with uPVC frames, you are in luck. Replacement trickle vents for uPVC windows are the most widely stocked, the most standardized, and the simplest to fit. The vast majority of uPVC window manufacturers use one of two standard trickle vent slot dimensions — 400 mm or 412 mm in length — routed into the top of the frame head. This consistency across the industry means a replacement vent from almost any reputable supplier will drop straight into the existing slot, provided you have confirmed the length and fixing centres.
Fixing methods for uPVC frames typically fall into two categories. Snap-fit vents have small plastic lugs on the back of the internal body that clip directly into the routed slot, holding the vent in place without any screws. Screw-fix vents use pilot holes drilled through the frame, secured with small self-tapping screws. Many modern replacement vents offer both options, giving you flexibility depending on the condition of the existing fixings. If the original screw holes have worn out or cracked — common in older uPVC that has become brittle — a snap-fit alternative can save you from having to drill fresh pilot holes.
The sizing data available from specialist retailers shows just how standardized the uPVC market is. Internal vent lengths cluster around familiar dimensions — 265 mm, 305 mm, 400 mm, 411 mm — with fixing centres that correspond to common routed slot positions. This standardization is exactly why uPVC replacements are so accessible: you measure the slot, match it to a sizing table, and order with confidence.
Colour options for uPVC vents typically include white, brown, tan, anthracite grey, and occasionally chartwell green. Matching the finish to your existing frame keeps the replacement looking seamless rather than bolted-on as an afterthought.
Timber and aluminium frames introduce variables that uPVC largely avoids. The process is still manageable, but you will need to invest a little more time in measuring and verifying compatibility before committing to a purchase.
With timber window frames, trickle vent replacement comes down to how the original vent was fitted. Some timber windows use a routed channel cut into the frame head — similar to uPVC — and accept flush-fit vents that sit neatly within the recess. Others use surface-mounted vents fixed directly onto the face of the timber, sometimes with a separate external canopy screwed to the opposite side. Surface-mounted styles from suppliers like Reddiseals are available in both standard and slimline profiles, which is particularly useful for sash windows where frame height is limited. The critical point is that slot dimensions on timber frames vary more widely than on uPVC. Different manufacturers, different window styles, and even different eras of construction all produce slightly different measurements. You cannot assume a standard size — careful measurement is essential every time.
Aluminium frames present their own set of challenges. The aluminium window trickle vent slot size tends to be dictated by the specific profile system used by the fabricator, and these profiles are far less standardized than uPVC. Slot widths, depths, and fixing-hole positions can differ significantly from one aluminium system to another. In practical terms, this means you should always confirm compatibility with the vent supplier before purchasing. Some aluminium frames also require sealant or gaskets around the vent to maintain the frame's weather resistance — a step that is rarely needed with uPVC. In real-world retrofit work, aluminium frames are sometimes described as "too slim," but the limitation is usually about the specific profile design rather than a blanket impossibility.
For both timber and aluminium, there is a higher chance you will need a manufacturer-specific or bespoke vent rather than a universal off-the-shelf product. If you cannot identify the original vent model, photographing the slot and sharing the dimensions with a specialist supplier is the fastest route to finding the right match.
Frame material determines what you buy — but it does not tell you how much ventilation that vent needs to deliver. That is where airflow ratings come in, and understanding them is the difference between a replacement that meets regulations and one that falls short.
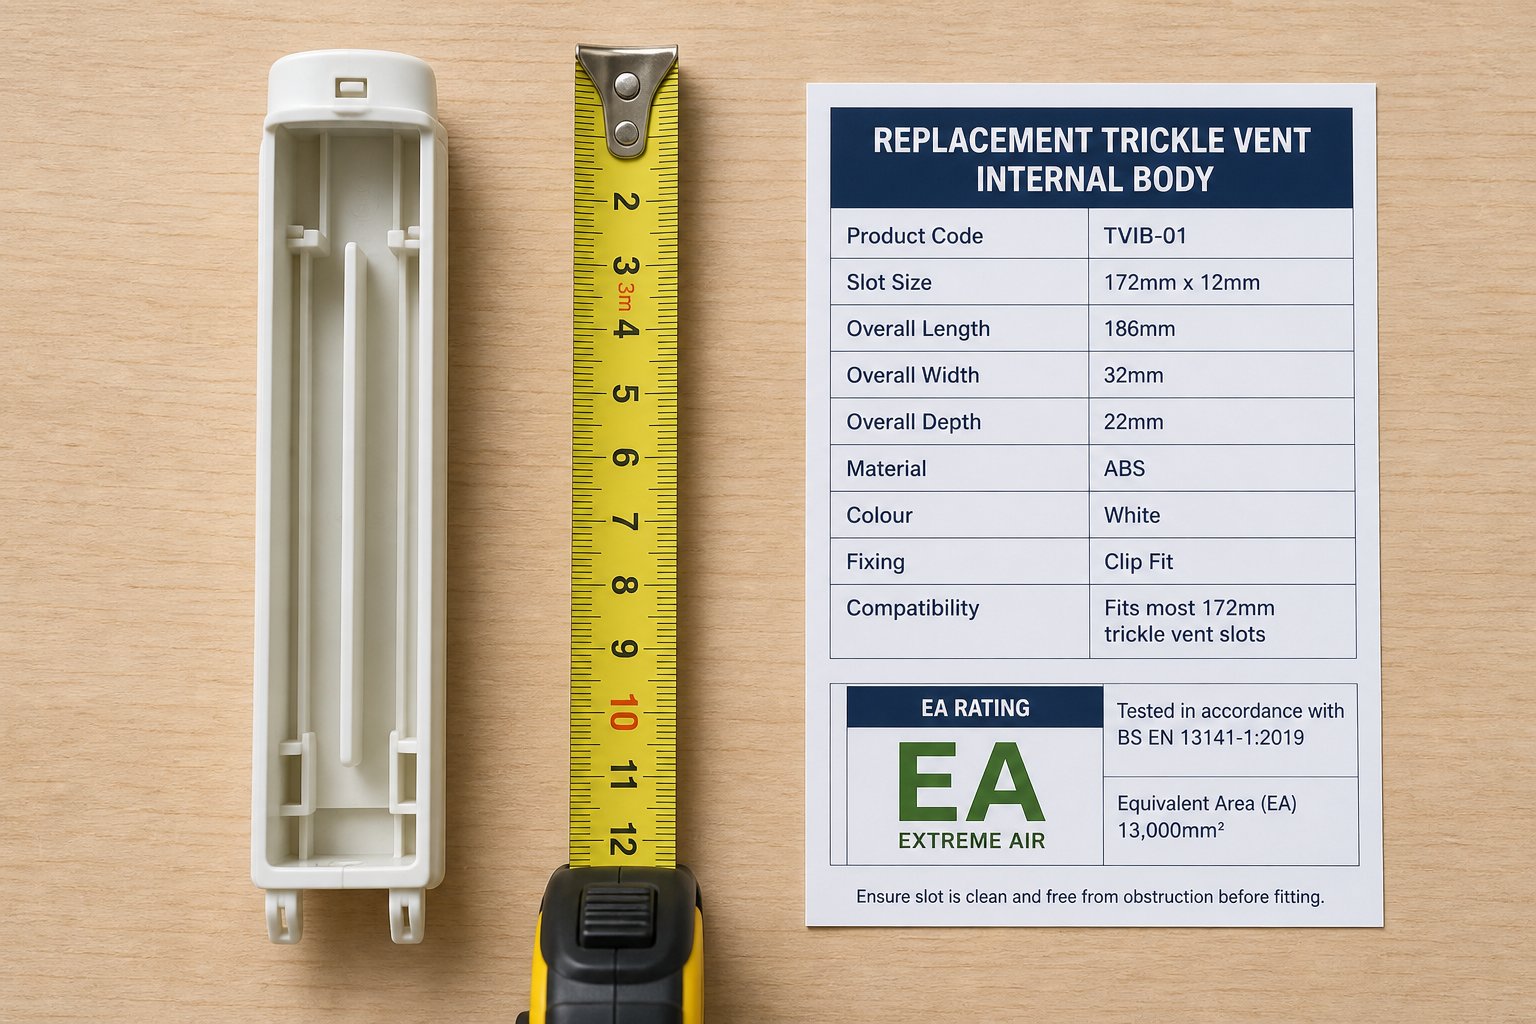
You have identified your frame material, confirmed the slot dimensions, and started browsing replacement vents online. Then you spot a specification that stops you mid-scroll: "Equivalent Area: 4,000 mm²." What does that actually mean? And does it matter when all you want to do is swap out a broken plastic vent?
The short answer is yes — it matters. Equivalent Area is the single most important performance metric on any trickle vent, and understanding it takes less effort than you might expect. It also connects directly to Building Regulations, which set minimum ventilation standards for homes across England. Ignoring the EA rating on your replacement vent will not cause your house to fall down, but it could leave you with a room that is either under-ventilated and prone to condensation or technically non-compliant with current standards.
Imagine poking a perfectly round hole in your window frame and measuring exactly how much air flows through it. The Equivalent Area rating tells you the size of that hypothetical hole — measured in square millimetres — that would let the same amount of air pass as your trickle vent does. A vent with an EA of 4,000 mm² delivers the same airflow as a single, unobstructed opening 4,000 mm² in size.
Sounds simple? It mostly is, with one important nuance. The EA is not the same as the physical size of the vent opening. A vent might have a visible slot that measures 5,000 mm² in raw aperture, but internal baffles, mesh screens, and airflow resistance reduce the effective throughput. The manufacturer tests the vent under controlled conditions and publishes the corrected figure — the Equivalent Area — which reflects real-world performance rather than just the dimensions of the opening. As technical guidance from Squote explains, a 2,500 mm² physical aperture vent might have an EA of only 2,000 mm² once internal baffle design is factored in.
When you are shopping for replacement trickle vents for windows, always reference the EA figure from the manufacturer's specification — not the physical slot size you can see on the product. Two vents that look identical in length and width can deliver very different amounts of airflow depending on their internal design. This distinction becomes especially relevant if you are considering an upgrade to an acoustic vent, where sound-dampening baffles deliberately reduce the effective area in exchange for noise reduction.
Most standard slot vents on the market fall into a few common EA brackets:
If your old vent has an EA printed on its label or housing — and many do — write that number down before you order the replacement. It is the benchmark you need to match.
England's Approved Document Part F sets out the ventilation requirements buildings must meet to maintain healthy indoor air quality. Updated regulations that came into force on 15 June 2022 tightened these requirements significantly, making trickle vents a legal obligation in all replacement windows fitted in habitable rooms — unless an equivalent alternative ventilation strategy, such as MVHR (Mechanical Ventilation with Heat Recovery), is already in place.
The minimum EA thresholds set by Part F are straightforward. Habitable rooms — living rooms, bedrooms, studies, and dining rooms — require a total background ventilation EA of at least 8,000 mm² per room, typically split across multiple windows. Wet rooms such as kitchens, bathrooms, and utility rooms require a minimum of 4,000 mm² per room, but that trickle vent provision must be paired with mechanical extract ventilation to handle moisture and odours effectively.
| Room Type | Minimum Total EA Required | Additional Requirement |
|---|---|---|
| Living room / bedroom / study | 8,000 mm² | None — trickle vents alone are sufficient |
| Kitchen | 4,000 mm² | Mechanical extract fan (min. 30 l/s) |
| Bathroom | 4,000 mm² | Mechanical extract fan (min. 15 l/s) |
| Utility room | 4,000 mm² | Mechanical extract fan (min. 30 l/s) |
Here is where the practical question lands for homeowners handling a straightforward vent swap: do building regulations Part F trickle vent requirements apply to you?
In most cases, a simple like-for-like replacement — removing a broken vent and fitting a new one with the same or higher EA into the same slot — does not trigger new regulatory obligations. You are not installing a new window. You are not altering the building's ventilation strategy. You are restoring the background ventilation that was already there, which is exactly what the regulations want.
The replacement vent's Equivalent Area should be at least equal to the original vent's EA to maintain compliant background ventilation.
Problems arise only when the replacement changes the ventilation profile of the room. Fitting a vent with a significantly lower EA than the original — perhaps choosing a smaller acoustic vent without checking its airflow rating — could leave the room below the minimum threshold. Similarly, if you are replacing vents as part of a larger window refurbishment project, the work may fall under the scope of Part F, and the total EA across all windows in the room needs to meet the minimums outlined above.
If your situation is straightforward — a single broken vent, swapped for a compatible replacement of equal or greater EA — you can proceed with confidence. If you are changing vent types, combining the work with window replacement, or dealing with an unusual property setup, it is worth checking with your local authority building control team or a registered FENSA installer to confirm your obligations.
Matching the original EA keeps you compliant, but it also raises a practical question: should you simply match, or is this the perfect moment to upgrade? A broken vent creates an opening — literally and figuratively — to improve your home's ventilation performance rather than just restoring it to where it was before.
Most homeowners treat a broken trickle vent as a like-for-like swap — remove the old one, fit the same thing, move on. That approach works perfectly well in many situations. But it also misses an opportunity. A failed vent means the slot is already there, the fixings are ready, and you are buying a new product regardless. Why not use that moment to solve a problem your original vent never could?
Three practical upgrade paths exist, each targeting a different issue. Choosing the right one depends on what is bothering you most — noise, moisture, or stuffy air.
Not every replacement needs to be an upgrade. If your existing vent was performing well before it failed — no condensation issues, no noise complaints, no stuffiness — matching the original spec is perfectly adequate. You already know that EA rating and slot size delivered acceptable ventilation for that room, so replicating it is a safe, cost-effective choice.
Like-for-like also makes sense when budget is tight. A standard replacement vent costs a fraction of an acoustic or humidity-sensitive model, and if the room's conditions do not demand better performance, spending more delivers no practical benefit. The goal is functional ventilation, not over-engineering a slot at the top of your window.
Acoustic trickle vents for noise reduction are the upgrade worth considering first if you live on a busy street or under a flight path. Standard vents are essentially open channels — they let air through, but they let sound through just as easily. Acoustic models reroute the airflow through a series of internal turns and sound-dampening chambers, reducing noise transmission significantly. According to Titon's acoustic vent guide, some dual-attenuator systems pair an internal ventilator with an external canopy, both engineered to minimize noise ingress. The trade-off is a slightly lower EA for a given slot size — those baffles that block sound also restrict airflow — so you will want to verify that the acoustic model you choose still meets the minimum EA threshold for the room.
A humidity-sensitive trickle vent replacement suits homes where condensation is the primary concern. Rather than relying on occupants to manually open and close the slider — which, in practice, most people never adjust — these vents respond directly to indoor moisture levels. The technology behind them is elegantly simple. Aereco, the company that pioneered humidity-sensitive ventilation in 1984, uses strips of polyamide fabric that physically lengthen as humidity rises and shorten as it falls. That mechanical movement opens and closes the vent's shutters proportionally, adjusting airflow in real time without any electrical connection. The system is self-correcting: a steamy bathroom triggers full opening, while a dry hallway stays at minimum ventilation. It is a particularly smart choice for rooms where condensation appears unpredictably or where occupants are unlikely to interact with the vent controls regularly.
Both upgrades cost more than standard vents — typically two to four times the price per unit. Whether that premium is justified depends entirely on the specific conditions in your property. A quiet suburban house with no condensation history gains nothing from acoustic or humidity-sensitive models. A ground-floor flat on a main road, or a north-facing bedroom that fogs up every November, is a different story entirely.
Before purchasing either type, check two things: confirm the replacement model fits your existing routed slot dimensions, and verify the EA rating meets or exceeds the minimum for the room. An acoustic vent that fits perfectly but delivers only 2,000 mm² of Equivalent Area will not satisfy Part F requirements in a habitable room that needs 8,000 mm² across all its ventilation openings.
It is also worth briefly considering whether trickle vents are still the right solution at all. Mechanical extract ventilation (MEV) and positive input ventilation (PIV) are alternatives that some properties benefit from — particularly older homes with widespread damp or modern airtight builds where passive airflow alone cannot keep up. MEV uses low-energy fans to continuously extract moist air from wet rooms, while PIV introduces filtered fresh air from the loft space, gently pressurizing the home and pushing stale air out through natural leakage points. Both are effective, but both require professional installation, electricity to run, and periodic maintenance. For the vast majority of homes, trickle vents vs mechanical ventilation for condensation is not a close contest on practicality: trickle vents are cheaper, simpler, require no power, and involve no ongoing running costs. They remain the most proportionate solution for background ventilation in most domestic settings.
Deciding between a like-for-like swap and an upgrade is one piece of the puzzle. The other is making sure whatever you choose actually fits your window — which means getting the measurements right before you order anything.
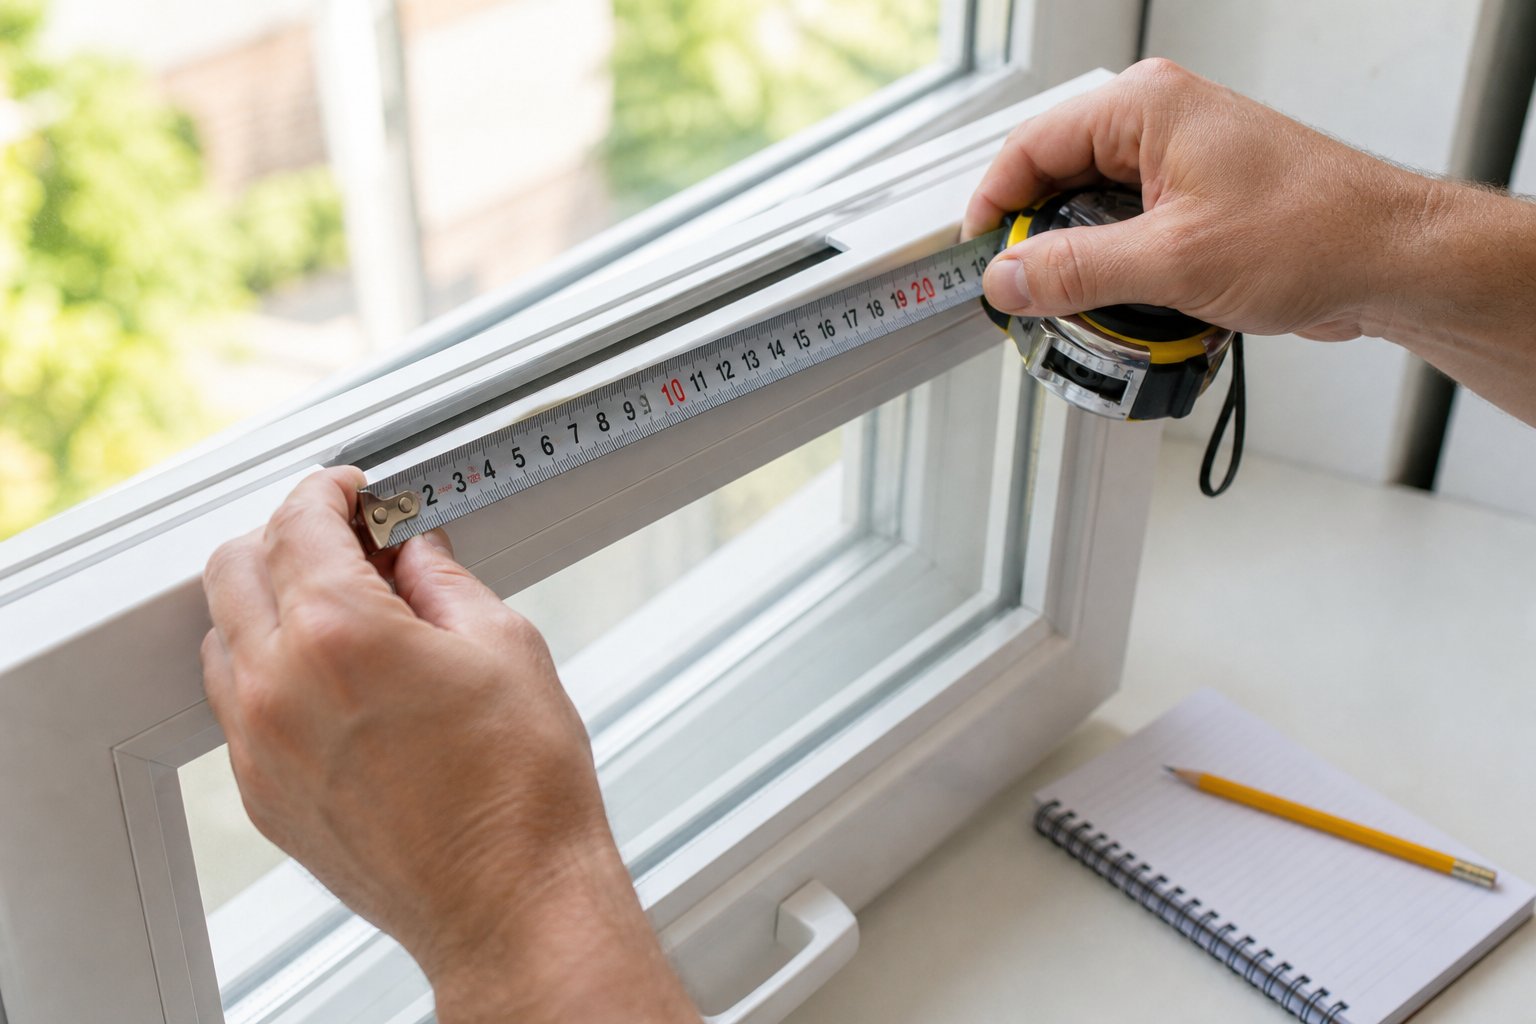
Getting the measurements right is the difference between a replacement vent that clicks into place in under a minute and one that sits in a returns envelope on your hallway table. The good news is that measuring a trickle vent slot is genuinely simple — you need a tape measure, a pencil, and about five minutes. The bad news is that skipping this step, or measuring the wrong thing, is the single most common reason replacement vents do not fit first time.
Every replacement trickle vent consists of two main components: the canopy (the external cover that shields the slot from rain and debris) and the internal vent body with a controllable slider that lets you regulate airflow from inside the room. Both parts must be compatible with the routed slot in your frame — and with each other. Buy a canopy from one manufacturer and an internal body from another without checking, and you may end up with misaligned screw holes or a gap that lets rain straight through. The safest approach is to purchase matched sets from a single supplier, ensuring trickle vent canopy and internal body compatibility from the outset.
Here is where most people make their first mistake: they measure the old vent itself instead of measuring the slot in the frame. The vent body overhangs the slot on both sides — it is always wider than the channel it covers. If you base your purchase on the vent dimensions, you will order something too large. Always measure the slot.
Follow these steps in order, and you will have every dimension you need to select a compatible replacement.
A quick tip: if you are replacing vents across multiple windows in the same property, measure every single slot individually. Even windows that look identical from the outside can have different slot lengths or fixing centres, particularly in homes where windows were installed in phases or by different contractors. Assuming one measurement applies to all is a reliable way to end up with at least one vent that does not fit.
With your measurements in hand, the selection process becomes a matching exercise. You are looking for a vent that satisfies four criteria simultaneously: correct slot coverage, correct fixing centres, adequate EA rating, and the right colour and material for your frame.
Start with the fixing centres — this is the dimension most likely to eliminate incompatible options immediately. If no exact match exists, a slightly longer screw-fix vent can sometimes be fitted by drilling new pilot holes, provided it covers the full length of the existing slot and sits comfortably within the available frame width. Snap-fit models are more forgiving here because they clip directly into the slot without relying on pre-drilled holes.
Next, confirm that the vent's overall length fully covers the routed channel. A vent shorter than the slot leaves exposed openings that allow uncontrolled draughts and rain ingress. A vent longer than the available frame space simply will not fit. The sweet spot is a body that extends slightly beyond the slot on both sides — enough to seal the edges without overhanging the frame profile.
Then verify the EA rating. As covered in the previous chapter, the replacement should match or exceed the original vent's Equivalent Area. If you could not read the EA on the old vent, err on the side of a higher rating rather than a lower one — more background airflow is almost always preferable to less, and it keeps you safely above Part F minimums.
Finally, consider colour matching — a detail no competitor guide addresses but one that makes a visible difference to the finished result. Replacement vents are commonly available in white, brown, tan, black, and anthracite grey. Selecting a colour that matches your existing frame avoids the jarring, bolted-on look of a mismatched vent against an otherwise uniform window. On uPVC frames, white and brown dominate. Aluminium frames increasingly use anthracite grey or black finishes that demand a vent in the same tone. Timber frames may call for a colour that complements the stain or paint finish — brown and tan are usually the closest visual matches.
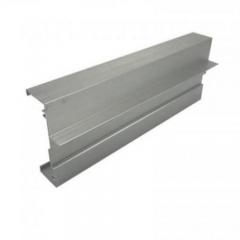
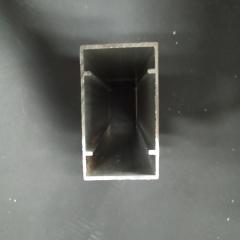
For homeowners working with uPVC or aluminium frames, products designed for cross-frame compatibility can simplify the decision. The Shengxin uPVC Window Trickle Vent, for example, is engineered to fit the standard routed slots found in both uPVC and aluminium frame systems. Its low-maintenance uPVC construction and compatibility across frame types reduce the risk of ordering a vent that only works with one material — a common frustration when sourcing replacements for mixed-frame properties or when the original frame manufacturer is unknown. Options like this illustrate why checking cross-compatibility early in the selection process saves time and avoids returns.
One final consideration before you click "buy": make sure your chosen product ships as a complete set — internal body and external canopy together. Some suppliers sell internal vents and canopies separately, which gives you flexibility but also introduces the risk of ordering mismatched parts. If you are replacing a vent for the first time, a matched set removes that guesswork entirely.
Measurements confirmed, vent selected, and the package is on its way. The next question is whether you can fit it yourself — and in most cases, the answer is a straightforward yes.
Your replacement vent has arrived, the measurements check out, and the packaging is open on the kitchen table. Do you really need to call someone to fit it? For the majority of uPVC window frames, no — you do not. A straightforward DIY trickle vent replacement on a uPVC window is one of the least intimidating home maintenance jobs you will ever tackle. The old vent unclips or unscrews, the slot gets a quick clean, and the new vent clips or screws into place. Start to finish, you are looking at 10 to 15 minutes per window — less time than it takes to brew a decent pot of tea and drink it.
That said, not every situation is quite so simple. Certain frame types, access issues, and project scopes push the job beyond comfortable DIY territory and into professional hands. Knowing where that line falls before you pick up a screwdriver protects you from mistakes that cost more to fix than the vent itself.
You will need minimal tools for this: a Phillips screwdriver, a flat-head screwdriver for popping off cover caps, a soft brush or vacuum with a crevice attachment, and a clean cloth. That is it. No drill, no sealant, no specialist equipment — unless the old fixings are damaged and you need to create fresh pilot holes, in which case a cordless drill and a small drill bit round out the kit.
Follow these steps in sequence, and the vent will be fitted and functional before your tea goes cold.
That is the entire process. Six steps, no specialist skills, and a result that looks and performs identically to a professionally fitted vent. If you are replacing vents across several windows in one session, you will find the second one takes half the time of the first — familiarity with the clip positions and screw angles builds quickly.
Confidence with a screwdriver covers most uPVC replacements, but some scenarios genuinely benefit from professional expertise. Recognizing these situations in advance saves you from a half-finished job, damaged frames, or — worst case — a window that no longer seals properly.
Consider hiring a professional installer when:
The cost of professional fitting typically runs between £30 and £50 per window on top of the vent itself — modest when weighed against the risk of cracking a frame or voiding a window guarantee. For a single ground-floor uPVC replacement, DIY is the obvious route. For a full house of aluminium or timber frames at height, a professional earns their fee many times over.
Whichever route you take, the vent is now in place and doing its job. Keeping it that way — quietly delivering clean, controlled airflow year after year — comes down to a small amount of regular maintenance that most homeowners overlook entirely.
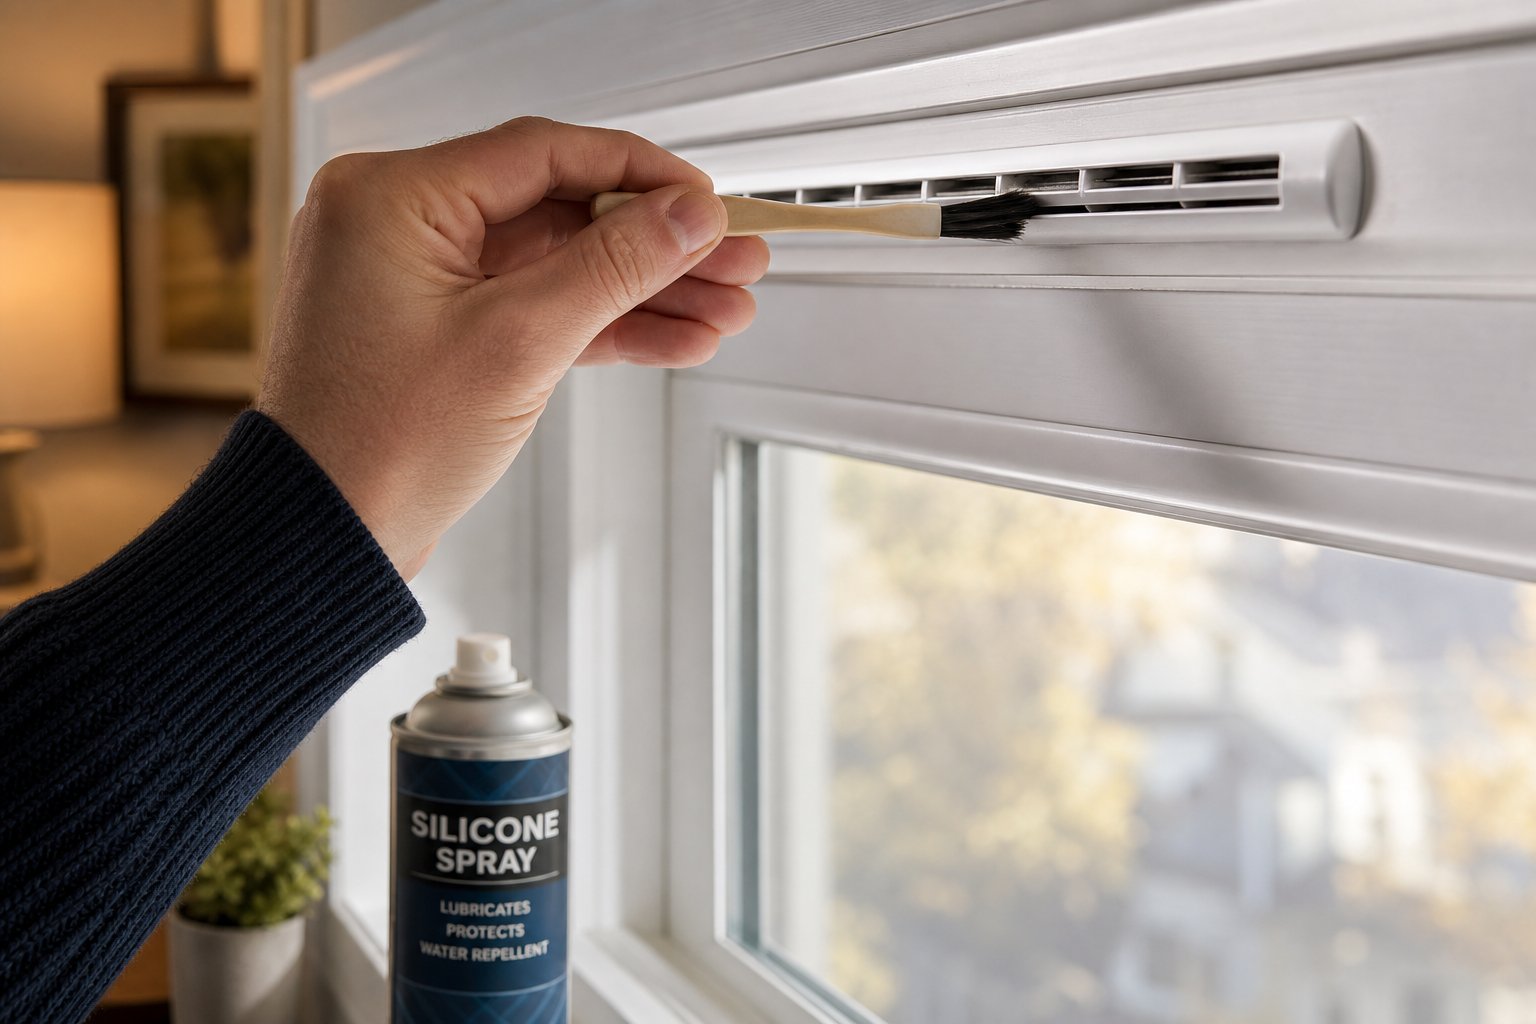
A freshly fitted replacement vent works beautifully — smooth slider, clear airflow, no condensation creeping across the glass. Six months later, dust has settled into the slot, a cobweb bridges the external canopy, and the slider feels a touch stiffer than it used to. This is not a fault. It is simply what happens when a small, exposed opening meets everyday life. The difference between a vent that lasts a decade and one that fails in half that time almost always comes down to a few minutes of basic upkeep each season.
The good news? Trickle vents are remarkably low-maintenance. There are no filters to replace, no motors to service, and no electrical components to worry about. A handful of simple habits keeps them performing at their best.
How often should you clean window trickle vents? A light clean every time you wipe down your windows — roughly every two to three months — is plenty to prevent blockages from building up. Homes in urban areas or near busy roads may accumulate grime faster than rural properties, so adjust the frequency to match your environment. Air Box UK recommends cleaning your vents at least twice a year as a bare minimum, coinciding with your regular window cleaning routine.
Here is a practical checklist you can follow each time:
That entire routine takes less than two minutes per window. Stack it onto your existing window-cleaning habit, and it becomes virtually effortless.
Most vent failures are not caused by manufacturing defects or bad weather. They are caused by well-meaning homeowners doing things that seem logical at the time but quietly destroy the vent's ability to function. Three mistakes account for the vast majority of premature failures.
Painting over the vent during decorating. This is the single most common cause of a trickle vent painted shut. A quick coat of emulsion rolls right over the internal body, sealing the slider track, blocking the airflow slots, and bonding the entire assembly to the frame. The vent looks tidier for about a week — then condensation starts appearing on the glass because the background ventilation has been eliminated. If this has already happened to you, the fix depends on how heavy the paint layer is. A light overspray can sometimes be freed by scoring along the slider edges with a craft knife and gently working the mechanism loose. A thick buildup usually means the vent is beyond saving, and a full replacement is the faster and cleaner solution. The prevention is simple: mask your trickle vents with painter's tape before you start decorating, just as you would mask the glass.
Forcing a stuck slider. When a slider resists, the instinct is to push harder. This often snaps the thin plastic tab clean off, leaving you with a vent that is either permanently open or permanently closed — and no way to adjust it without replacing the entire internal body. A stiff slider almost always responds to a gentle clean and a spray of silicone lubricant. If it still will not budge, the mechanism itself may be cracked internally, and forcing it only accelerates the break. Patience is cheaper than a new vent.
Permanently closing vents to reduce draughts. This is the mistake that carries the most consequences. Should trickle vents be open or closed in winter? They should be open — especially in winter. It sounds counterintuitive when cold air is the last thing you want, but winter is precisely when condensation risk peaks. Warm, moist air from cooking, showering, and breathing meets cold window surfaces and condenses into droplets. Without background ventilation to carry that moisture away, it accumulates — first as condensation on glass, then as damp on reveals, and eventually as black mould. Closing your trickle vents to stop a draught does not solve the cold problem; it trades a mild inconvenience for a much more damaging one. If the airflow feels uncomfortable, the issue is more likely a missing blanking plate or a poorly sealed housing than the vent doing its job correctly.
Avoid these three errors, stick to a basic cleaning schedule, and your replacement trickle vents will deliver quiet, reliable ventilation for years without needing any further attention. The only thing left is to pull together everything you have learned — diagnosis, measurement, selection, fitting, and upkeep — into a clear action plan you can follow from start to finish.
You started this guide with a cracked housing and a fogged-up window. You now know how to diagnose the problem, measure the slot, pick the right vent for your frame material, fit it yourself in under fifteen minutes, and keep it working for years. That is the entire replacement journey — five straightforward stages that take a broken component and turn it into a fully functioning ventilation solution without touching the rest of your window.
Replacing trickle vents remains one of the simplest and most cost-effective improvements you can make to your home's indoor air quality. No electrician, no structural work, no building control sign-off for a standard like-for-like swap. Just a tape measure, a screwdriver, and the right replacement part. The payoff — less condensation, fresher air, and a home that breathes the way it was designed to — arrives the moment you slide that new vent open for the first time.
Always measure the existing routed slot rather than assuming a standard size. Match or exceed the original EA rating. Choose a vent compatible with your frame material. Keep vents open and clean for best performance.
If you remember nothing else from this guide, these principles will steer you right every time you need to source replacement trickle vents for windows:
That checklist covers every decision point in the replacement process. Print it, bookmark it, or photograph it on your phone before you head to the window with your tape measure.
The first step is the simplest: grab a tape measure and check the slot on the window that is giving you trouble. Record the length, width, and fixing centres. Note the frame material and colour. If you can read the EA rating on the old vent, write that down too. With those numbers in hand, you can shop with confidence — knowing exactly what fits and what does not.
For homeowners and installers working with uPVC or aluminium frames, cross-compatible vents streamline the selection process considerably. The Shengxin uPVC Window Trickle Vent is one option worth evaluating — its low-maintenance uPVC construction fits the standard routed slots found in both aluminium and uPVC frame systems, making it a practical choice for mixed-frame properties, retrofit projects, or situations where the original window manufacturer is unknown. Whether you are a homeowner handling a single vent swap or a fabricator sourcing components for a batch of replacement windows, having a product that works reliably across frame types reduces the risk of ordering errors and returns.
Condensation on your windows is not something you have to live with. A failed trickle vent is not a reason to replace an entire window. And reducing condensation by replacing trickle vents is a fix measured in minutes and pounds rather than days and thousands. You have the knowledge. The tape measure is in the drawer. The only thing left is to start measuring.
Yes, replacing a trickle vent is entirely separate from replacing a window. The vent sits in a routed slot at the top of the frame and can be unclipped or unscrewed independently. A compatible replacement vent — matched to the slot length, width, and fixing centres — clips or screws into the same channel. The job typically takes 10 to 15 minutes per window using basic tools, and costs between £10 and £30 per unit, making it one of the most affordable home maintenance tasks available. Products like the Shengxin uPVC Window Trickle Vent are designed to fit standard routed slots across both uPVC and aluminium frames, further simplifying the process.
Always measure the routed slot in the frame head rather than the old vent body, which overhangs the channel on both sides. Record three key dimensions in millimetres: the slot length (commonly 400 mm or 412 mm on uPVC frames), the slot width (typically 13 mm or 16 mm), and the distance between fixing-hole centres. Also note the frame material, colour, and any Equivalent Area (EA) rating printed on the old vent. These measurements let you match a replacement precisely, avoiding the most common reason vents fail to fit first time — measuring the wrong component.
Trickle vents should remain open throughout winter, even when temperatures drop. Winter is when condensation risk is highest because warm, moist air from cooking, showering, and breathing meets cold window surfaces and condenses into water droplets. Background ventilation through open trickle vents carries that excess moisture away before it settles on glass, reveals, and walls. Closing vents to reduce draughts may feel logical but it traps moisture indoors, leading to persistent condensation and eventually mould growth — a far more damaging problem than a mild draught.
EA stands for Equivalent Area, measured in square millimetres. It represents the size of an unobstructed opening that would allow the same volume of airflow as the trickle vent delivers in practice. Internal baffles and mesh screens reduce airflow compared to the raw slot size, so the EA figure reflects real-world performance rather than physical dimensions. Building Regulations Approved Document Part F sets minimum EA thresholds — 8,000 mm² total for habitable rooms and 4,000 mm² for wet rooms. When replacing a vent, matching or exceeding the original EA ensures continued compliance and effective condensation control.
Acoustic trickle vents are a worthwhile upgrade if your property faces a busy road, railway line, or flight path. They use baffled or labyrinth airflow channels lined with sound-absorbing materials to reduce external noise — some models achieve over 40 dB of attenuation — while still delivering background ventilation through the same routed slot. They typically cost two to four times more than standard vents, so the value depends on your noise exposure. Before purchasing, verify that the acoustic model's EA rating still meets the minimum threshold for your room, as the sound-dampening baffles reduce effective airflow compared to standard vents.



 serviço on-line
 0086 136 3563 2360
 sales@sxalu.com
 +86 136 3563 2360
 português
 English
 français
 Deutsch
 русский
 español
 العربية
 ไทย
ไทย Việt
Việt Українська