You wake up on a chilly morning, pull back the curtains, and there it is - water streaming down the inside of your bedroom window. The bathroom mirror stays fogged for hours. A faint musty smell lingers in the corner where dark spots have started creeping along the wall. Sound familiar? These frustrating problems often share a surprisingly simple cause: the small ventilator sitting right at the top of your window frame is closed, stuck, or you never realized it was there in the first place.
This guide walks you through every step of operating your trickle vents - from figuring out which type you have, to sliding them open, adjusting airflow room by room, keeping them clean, and fixing them when they jam. No special tools are needed for most vents, and the whole process takes under a minute once you know what you are looking at.
A trickle vent is a small, slotted ventilator built into the head of a window frame. It allows a controlled trickle of fresh air into your home even while the window stays shut and locked. You might also hear them called "drip vents," "slot vents," or simply "window trickle vents" - they all refer to the same component. Typically, the unit consists of an external canopy on the outside of the frame and an adjustable internal cover on the inside, connected by a narrow channel cut into the frame itself.
As modern homes have become increasingly airtight through better insulation and energy-efficient glazing, natural air leaks that once provided passive ventilation have been sealed away. Trickle vents fill that gap. They deliver gentle, continuous background airflow without the heat loss, security risk, or noise that comes with cracking a window open. In fact, UK building regulations now require them in most replacement windows unless an alternative mechanical ventilation system is already in place.
Here is the catch: a trickle vent only works when it is actually open. Many homeowners either do not realize the vent is adjustable or assume it should stay closed to keep warmth in. The result? Moisture from cooking, showering, breathing, and drying laundry gets trapped inside with nowhere to go. That trapped humidity settles on cold glass as condensation, feeds mould growth in bathrooms and bedrooms, and gradually degrades indoor air quality. The U.S. Environmental Protection Agency identifies inadequate ventilation as a leading cause of poor indoor air quality, linking it to headaches, fatigue, and respiratory issues.
The good news? Opening your drip vents in windows is one of the quickest wins you can score for a healthier home. The airflow they provide is minimal enough that heat loss is negligible, yet sufficient to keep moisture moving and air feeling fresh. Below is the full lifecycle this article covers, so you can jump straight to the step you need:
Every vent mechanism looks a little different, and that visual confusion is exactly where most people get stuck. Recognizing which type sits on your window frame is the essential first move - and it is easier than you think once you know what to look for.

Stand in front of your window and look up. Along the very top of the frame - the section professionals call the "head" - you will notice a long, narrow strip that looks slightly different from the rest of the frame. It might be a slightly different shade of plastic, a thin metal channel, or a subtle ridge with tiny slots or perforations. That is your trickle vent. But here is where most people hit a wall: the way you open it depends entirely on the mechanism hiding behind that strip. Grab the wrong part, push when you should slide, and you will think the vent is stuck when it is simply a different design.
Four main mechanism types cover the vast majority of trickle vents on windows installed in homes today. Each one operates differently, sits on the frame in a slightly different way, and shows up on specific frame materials more often than others. Identifying yours takes about ten seconds once you know what visual clues to look for.
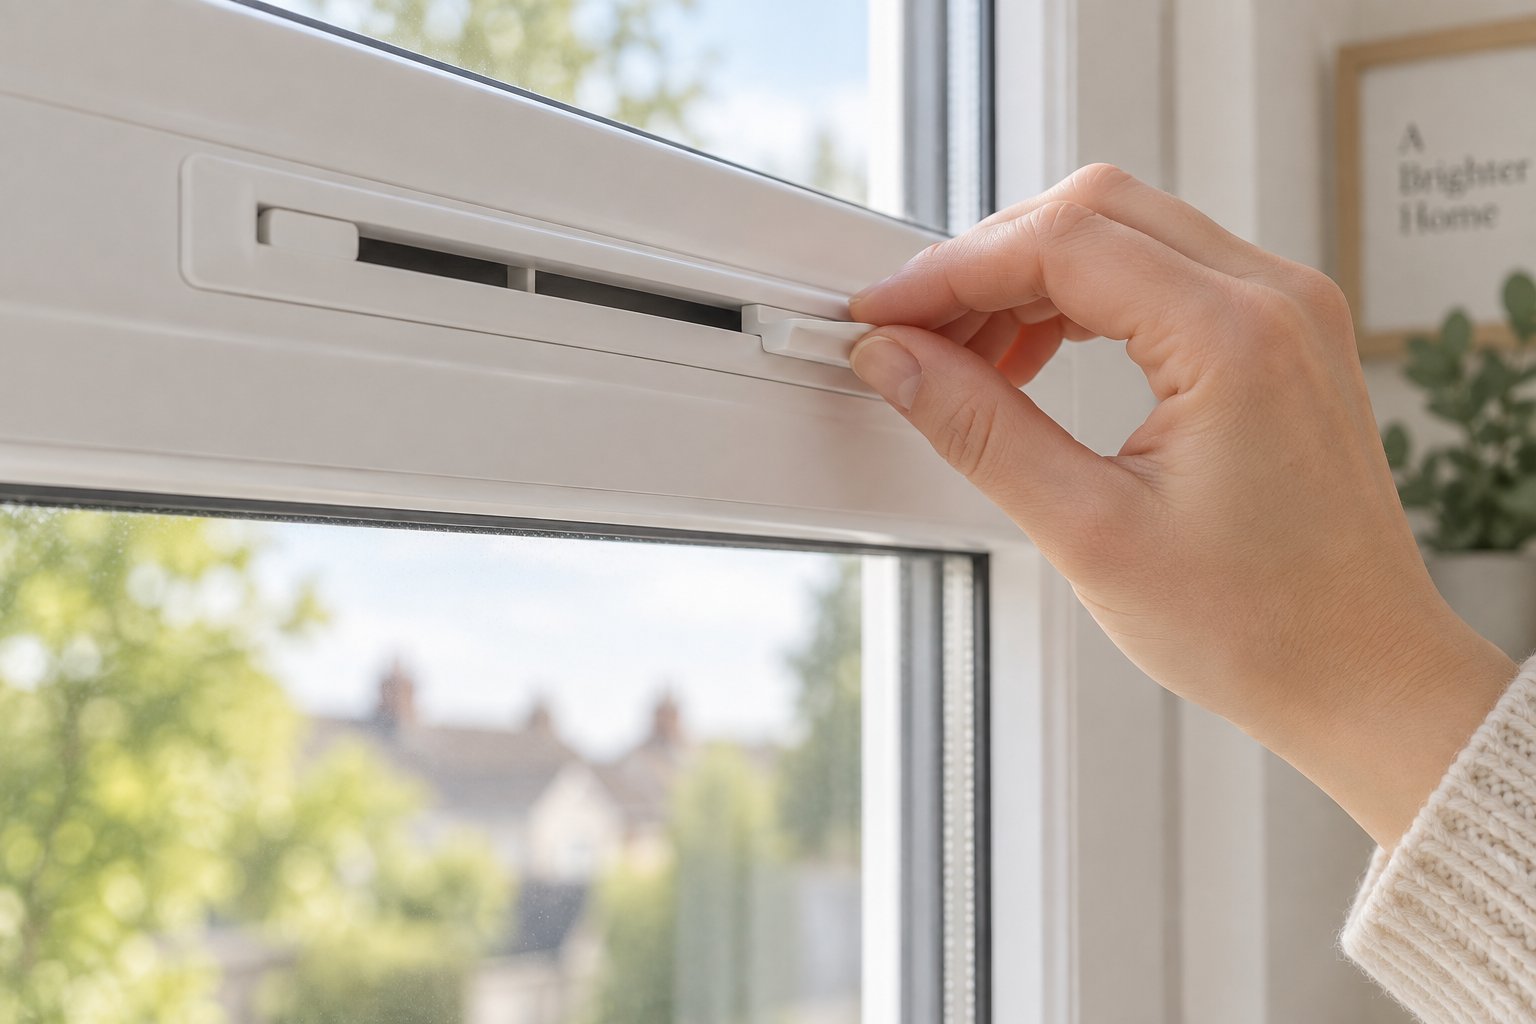
The slider vent is the most common window trickle vent you will encounter, especially on modern uPVC frames. Imagine a long, flat rectangular strip - usually white, brown, or grey - running almost the full width of the window head. The strip looks like a single piece at first glance, but look closely at one end and you will spot a small protruding tab, roughly the size of a fingertip. This tab sits in a shallow track and moves left or right along the length of the vent body.
When the slider is pushed to one side, it covers a row of narrow slots cut into the vent housing, blocking airflow. Slide the tab the other way and those slots are gradually exposed, letting fresh air pass through. You will often see a tiny arrow moulded into the plastic indicating the "open" direction. Some models have the tab in the centre rather than at the end, but the principle is identical - horizontal movement along a track.
If your window was installed in the last fifteen years and features a uPVC or aluminium frame, there is a strong chance you are looking at a slider. They are popular with manufacturers because they are inexpensive, reliable, and give the homeowner adjustable control over how much air passes through.
Not every trickle vent windows come fitted with uses a sliding motion. Three other mechanisms are equally common depending on the age, style, and material of your frames.
Push-pull tab vents look almost identical to slider vents from a distance - a long, narrow strip across the window head. The difference is in the tab itself. Instead of sliding sideways, this tab sticks out slightly from the face of the vent and moves toward you or away from you. Pull the tab outward and an internal baffle opens, creating a gap for air to flow through. Push it back flush with the strip and the baffle closes with a satisfying click. These are common on newer uPVC casement windows and some aluminium profiles where manufacturers want a cleaner look without a visible sliding channel.
Hinged flap vents are the easiest to recognize because they are the most visually distinct. Picture a flat, rectangular cover - often painted to match the frame - attached along its top edge by a small hinge. Pressing the bottom edge causes the entire flap to swing open, revealing the ventilation slot behind it. Older timber windows and some aluminium frames favour this design. A few models include a tiny latch clip along the bottom edge that you need to press or slide before the flap will release. If the flap does not budge when you press it, look for that clip before applying more force.
Rotary dial vents are the least common but still turn up on certain aluminium and timber frames. Instead of a tab or flap, you will spot a small circular disc - about the diameter of a coin - recessed into one end of the ventilator strip. Turning this dial clockwise gradually opens a series of slots inside the vent body; turning it counter-clockwise closes them. The dial gives precise control over airflow, but it can be easy to overlook if you do not know it is there.
The table below pulls all four types together so you can quickly match what you see on your frame to the correct mechanism:
| Mechanism Type | Visual Clue | Common Frame Material | Difficulty to Operate |
|---|---|---|---|
| Slider | Small tab at one end of a long strip; moves left or right in a track | uPVC, aluminium | Very easy |
| Push-pull tab | Tab protrudes slightly from the face of the strip; moves in and out | uPVC, aluminium | Very easy |
| Hinged flap | Flat cover that swings open on a top-edge hinge; may have a latch clip | Timber, aluminium | Easy (check for latch) |
| Rotary dial | Small circular disc at one end of the vent strip; turns to open or close | Aluminium, timber | Easy (can be stiff if unused) |
A quick rule of thumb: if your home has uPVC double glazing, start by looking for a slider or push-pull tab. Aluminium-framed windows can feature any of the four types, so the visual clues in the table are your best guide. Timber sash or casement windows - particularly those more than a decade old - frequently use hinged flaps that blend into the painted frame and can be surprisingly hard to notice at first.
Pinpointing your mechanism is half the battle. The actual opening technique for each type involves just a few deliberate movements - starting with the slider, since it is the one most homeowners will be reaching for.
The slider is by far the most widespread trickle vent mechanism on modern windows, yet plenty of homeowners stare at that thin plastic strip and wonder which bit actually moves. If you have already identified a small tab sitting in a horizontal track - great, you are in the right place. The steps below walk you through every micro-movement so you can go from sealed shut to fresh air in seconds, without risking a snapped tab or a scratched frame.
Before you touch anything, take a moment to study the vent up close. You will be looking at the inside face of the window - the side that faces into your room. Here is how to zero in on exactly what needs to move:
If the tab blends in so well that you cannot spot it visually, gently press your fingertip along the strip and feel for the one section that gives slightly or has a raised edge. That is your slider.
With the tab located, opening your trickle vent is a matter of gentle, deliberate pressure. Follow these steps exactly and you will hear - or feel - the mechanism respond:
Tip: If the tab feels too small or too slippery to grip comfortably, press a short strip of masking tape onto its face for instant traction. A rubber thimble - the kind used for sorting papers - works just as well and can be kept on the windowsill for repeat use.
One important caution: never force a stiff slider. If the tab resists more than light finger pressure, stop. Forcing it risks snapping the plastic tab clean off, turning a simple airflow adjustment into a replacement job. A slider that will not budge is usually blocked by paint, dust, or dried grime in the track - problems that are easy to solve with the right approach. Stiffness can also develop on trickle window vents that have not been moved for months or even years, especially in kitchens where grease-laden steam settles on surfaces.
If light pressure does not get the slider moving, try rocking the tab gently back and forth in tiny increments - a millimetre at a time - rather than pushing hard in one direction. This often breaks the seal created by dust or paint without stressing the plastic. A drop of silicone lubricant in the track can also free things up (more on that in the maintenance step later).
With slider windows trickle vents covered, three other mechanisms still need attention. Push-pull tabs, hinged flaps, and rotary dials each respond to a different hand movement - and mistaking one for another is the fastest route to a jammed vent.
A slider moves sideways. But what if the tab on your vent does not budge in either horizontal direction? You are probably looking at one of the three remaining mechanism types - and each one responds to a completely different hand movement. Pulling when you should push, or pushing when you should twist, is the single most common reason homeowners assume their trickle vents in windows are broken when they are actually working perfectly fine.
The instructions below cover every micro-step for push-pull tabs, hinged flaps, and rotary dials. All three operations are gentle, tool-free, and take just a few seconds once you know the motion. If you are unsure which type you have, glance back at the identification table in Step 1 before diving in.
From across the room, a push-pull tab vent looks almost identical to a slider. The strip runs along the window head, the colour matches the frame, and a small tab sits somewhere along its length. The giveaway is the tab itself - instead of sitting inside a horizontal track, it protrudes slightly outward from the face of the vent body, almost like a tiny handle waiting to be gripped. You will most often find it centred on the strip, though some models place it closer to one end.
A helpful test: hold the back of your hand near the vent strip after pulling the tab. If you feel a faint, cool draught filtering through, the baffle is open and air is flowing exactly as it should.
Push-pull tabs are popular on newer casement frames because they deliver a clean, streamlined look - no visible sliding channel, no exposed track to collect dust. The trade-off is that the click mechanism can feel stiff on vents that have not been operated in a long time. If the tab resists, do not yank it. Instead, wiggle it with small back-and-forth movements while applying gradual outward pressure. This usually frees the internal baffle without stressing the plastic.
Hinged flap vents are the ones most likely to go unnoticed. Because the flap is typically painted to match the timber or aluminium frame, it blends in so well that many homeowners never realise there is a moving part at all. Some window manufacturers even design their vents to sit flush against the frame and match the finish colour, making them practically invisible until you know where to look. Here is how to get a hinged flap open:
Rotary dial vents offer the most precise airflow control of any trickle vent mechanism, yet they are also the easiest to overlook. The dial is small, often recessed, and tucked away at one end of the ventilator strip where it can be mistaken for a screw cap or a decorative plug. Here is how to operate one:
Rotary dials can become stiff when they have sat unused for months. If yours resists, apply a tiny drop of silicone lubricant around the dial edge, wait a minute or two, and try again with gentle, steady pressure. Avoid using pliers or any metal tool - the dial housing is usually plastic or thin aluminium and cracks easily under concentrated force.
Regardless of which mechanism you just operated - push-pull, hinged flap, or rotary dial - the golden rule is the same: every movement should be gentle and tool-free. If any part of the vent feels jammed or refuses to budge under light finger pressure, pause and check for paint, debris, or a hidden latch before adding force. A little patience here saves you from a broken component later.
Getting the vent open is only half the equation, though. Knowing when to leave it open - and when closing it actually makes sense - depends on the room, the season, and a few common fears that are worth putting to rest.

You have figured out which vent type you have, and you know exactly how to slide, pull, flip, or twist it open. But a question lingers: should you leave it open all the time, or close it at night, in winter, or when the heating kicks on? The answer depends on the room you are standing in, the time of year, and what is happening outside your window. Getting this balance right is the difference between a home that breathes comfortably and one that swings between stuffy warmth and unnecessary draughts.
The general principle is simpler than most people expect. Energy Saving Trust recommends keeping trickle vents open all year round - even during the colder months - so your home receives a constant, controlled supply of fresh air. That guidance surprises many homeowners who instinctively seal everything shut the moment temperatures drop. Yet the logic is sound: trickle ventilation delivers such a small volume of air that the thermal impact is minimal, while the moisture-control benefit is enormous.
Every room generates different levels of moisture and has different comfort priorities. A kitchen pumping out steam from a boiling pot needs a very different ventilation strategy than a quiet living room on a Sunday afternoon. The table below gives you a practical starting point for each space in your home:
| Room | Recommended Vent Position | Reason |
|---|---|---|
| Kitchen | Open at all times | Cooking releases large amounts of steam and combustion byproducts (especially from gas hobs). Keeping the vent open alongside an extractor fan helps moisture escape before it condenses on cold surfaces. |
| Bathroom | Open at all times | Showers and baths flood the air with water vapour. Even with an extractor fan running, vented windows provide a secondary escape route that speeds drying and discourages mould growth on grout and sealant. |
| Bedroom | Open before sleep; close only if outdoor noise is disruptive | Each person exhales roughly 200 ml of moisture overnight. An open vent prevents that moisture from settling on cold glass as condensation. If street noise becomes an issue, close the vent and open it again first thing in the morning. |
| Living room | Open during the day; close during extremely cold or windy evenings if preferred | Daytime activity - breathing, drinking hot beverages, using a tumble dryer nearby - adds moisture steadily. Trickle ventilation keeps the room from feeling stuffy without a noticeable temperature drop. |
| Loft room / attic conversion | Open at all times | Heat rises and collects in loft spaces, accelerating condensation on roof-level glazing. Continuous airflow through the vent helps regulate temperature and humidity in a space that is naturally prone to both extremes. |
In cooler months, moisture-heavy rooms like the kitchen, bathroom, and utility room benefit most from permanent trickle ventilation. Poplar HARCA advises keeping window trickle vents open and air vents uncovered throughout winter as one of the most effective ways to prevent condensation and the mould that follows. Closing them to "trap heat" often backfires: you save a tiny sliver of warmth while creating conditions for damp patches and black mould that are far costlier to remediate.
During summer, the calculation shifts. Trickle vents can stay open around the clock in every room without hesitation. They supplement open windows to create gentle cross-ventilation - fresh air enters through the vent at head height and stale air exits through an open window or extractor on the opposite side of the room. On mild days when you do not want to leave a window wide open for security reasons, trickle ventilation windows alone can maintain a pleasant background airflow that keeps the space from feeling stagnant.
Two worries come up every time someone considers leaving their vents open in winter: "Won't I lose all my heat?" and "Won't street noise flood in?" Both fears are understandable - but both are largely overblown once you look at how these vents actually work.
Heat loss. A trickle vent is designed to introduce ventilation at higher levels in the room, near the ceiling, where warm air naturally collects. The slot opening is narrow - typically just a few square centimetres of equivalent area - so the volume of air exchanged per hour is a fraction of what you would lose by cracking a window even slightly. Energy Saving Trust points out that most of the heat in your home is stored in the walls, floors, and furniture rather than in the air itself. The small amount of cooled air introduced by a trickle vent warms up quickly once it mixes with the room environment. In practical terms, you are unlikely to notice any difference on your thermostat or energy bill.
Noise. A narrow slot does let in some sound, but well-designed vents attenuate noise far more effectively than an open window. If you live on a busy road or near a railway line, acoustic trickle vents are specifically engineered to dampen external sound while still allowing airflow. These units are tested under ISO standards and rated with a Dn,e,w value - the higher the number, the more decibels the vent blocks. Products rated above 40 dB provide good noise reduction for most urban environments, and some high-performance models exceed 50 dB, which is enough to make a noticeable difference even alongside heavy traffic.
Insects and intruders. The ventilation slot in a standard vent is far too narrow for anything larger than a tiny midge to pass through, and many models include a fine mesh filter behind the internal cover that catches even those. As for security, the slot is cut into the solid frame material - there is no opening large enough to reach a handle, a lock, or a latch. Your home remains fully secured with the vent wide open.
If outdoor pollution spikes - heavy traffic fumes, a neighbour's bonfire, nearby construction dust - close your vents temporarily and reopen them once the air clears. Short closures do no harm; it is the habit of leaving vents permanently shut that creates moisture problems.
Seasonal awareness and room-specific adjustments keep your trickle ventilation working in harmony with the rest of your home. Still, even the best ventilation strategy falls short if the vents themselves are clogged with dust, pollen, or cobwebs. A quick, twice-yearly cleaning routine is all it takes to keep every slot clear and every slider gliding freely.
Think about how much dust collects on your windowsill over a couple of months. That same dust - along with pollen, cobwebs, cooking grease, and tiny fibres from curtains and blinds - settles inside the narrow slots of your trickle vents for windows. The difference is you can see your windowsill; the inside of a vent channel is hidden from view. Over time, that invisible buildup narrows the already-small airflow gap, reduces ventilation performance, and eventually jams the slider, tab, or hinge so firmly that the vent feels like it is glued shut.
The fix is almost comically simple. A quick clean twice a year - ideally in spring and autumn, when you are already wiping down windows after the season change - keeps every slot clear and every moving part gliding freely. Air Box UK recommends cleaning your house window vents every time you clean your windows, or at minimum twice a year, noting that blocked vents are essentially as useless as having no vent at all. The entire routine takes five to ten minutes per window and requires nothing more than a few household items you probably already own.
Grab a vacuum cleaner with a soft brush attachment, a microfibre cloth, a cotton bud or two, and a small bowl of warm soapy water. That is your entire toolkit. Follow these steps for each vent in your home:
Five steps, five minutes, and your vents are breathing freely again. But cleaning alone does not guarantee a slider that glides or a hinge that swings. Moving parts need a little help to stay smooth - which is where a drop of lubricant makes all the difference.
Plastic and metal parts that rub against each other eventually generate friction, especially in a channel that collects fine particles. A tiny amount of the right lubricant dramatically reduces that friction and prevents the stiff, gritty feel that makes a vent seem broken when it is simply dry.
Keep a small can of silicone spray near your cleaning supplies. A single can lasts years since each vent needs only a drop or two per service.
Regular maintenance like this is the cheapest insurance against the stuck-vent headaches that fill online forums with frustrated posts. A vent that is cleaned and lubricated twice a year almost never seizes. One that has been ignored for several years, on the other hand, can feel permanently jammed - painted over, caked with grime, or stuck by a tab that finally cracked under forced pressure. Those tougher problems call for a slightly different approach, and each one has a straightforward DIY fix.
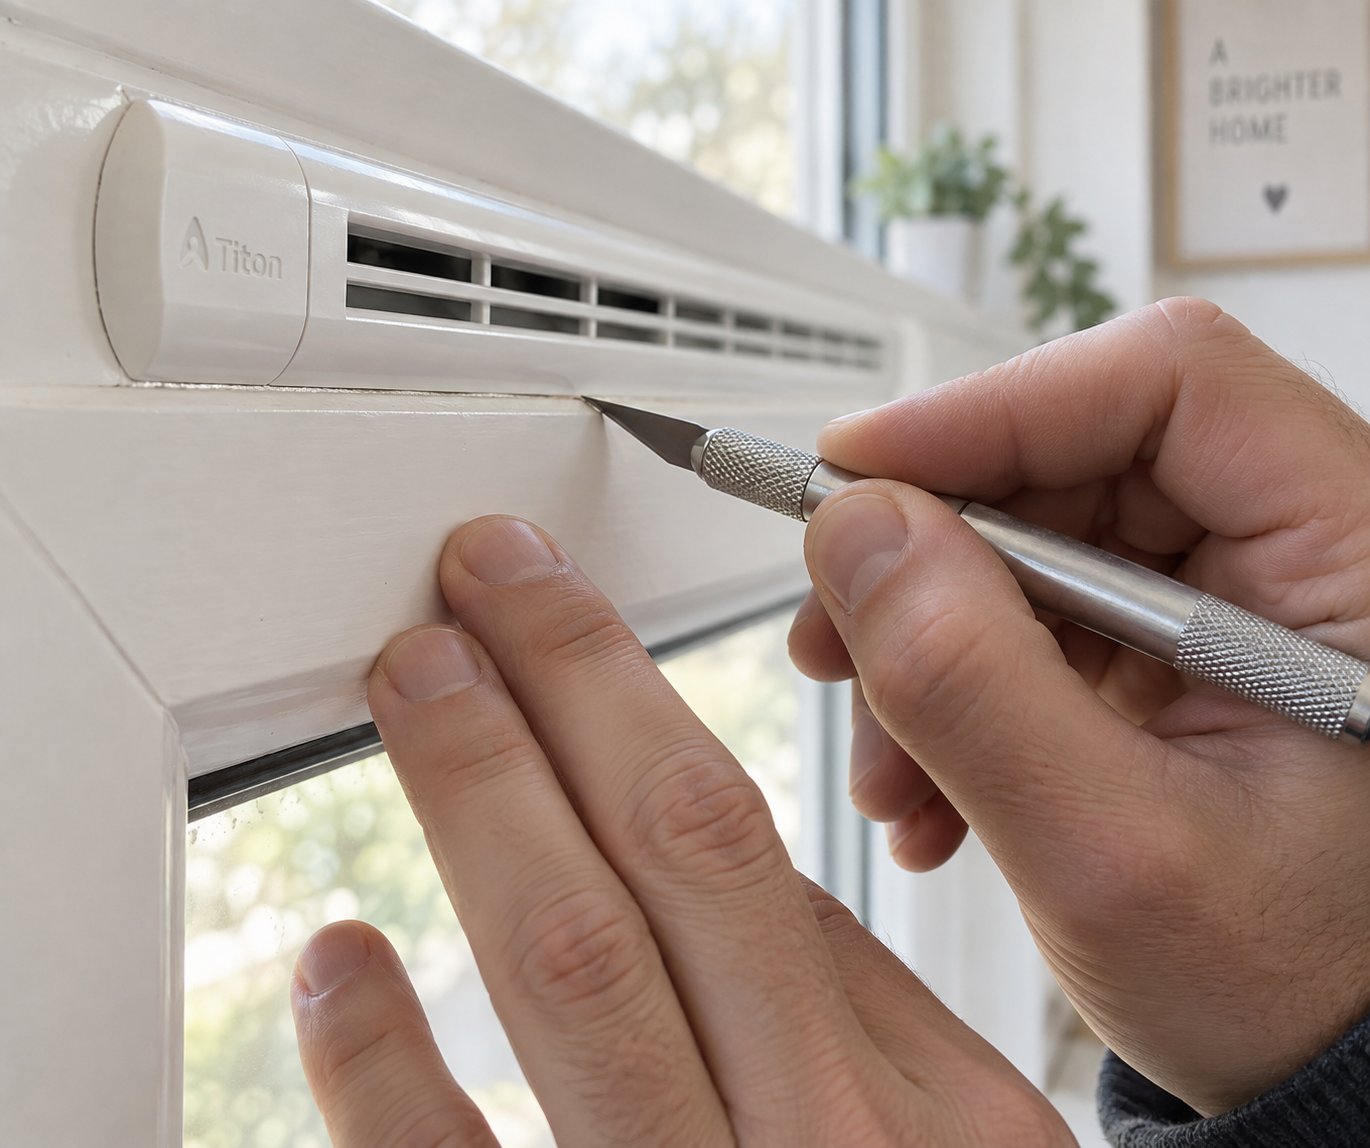
You have cleaned it, lubricated it, and tried every gentle nudge you can think of - yet the vent still refuses to budge. Or maybe the tab snapped off in your hand, or the whole strip looks like it was entombed under three layers of gloss paint during a past renovation. These are exactly the scenarios that drive homeowners to forums like Reddit's DIYUK searching for a stuck trickle vent fix, and the good news is that every one of them has a practical, tool-light solution you can handle in under fifteen minutes.
Four problems account for the vast majority of trickle vent for windows complaints. The quick-reference table below matches each issue to its likely cause and DIY remedy so you can jump straight to the fix that applies to your situation:
| Problem | Likely Cause | DIY Fix |
|---|---|---|
| Vent painted shut | Paint has sealed the slider track, flap edge, or dial into the vent body | Score along the paint line with a craft knife; wiggle the mechanism free; clean old paint from the channel |
| Stiff or stuck slider | Dust compaction, dried grime, or mild corrosion in the track | Apply silicone spray into the track, wait five minutes, and work the slider back and forth in tiny increments |
| Broken or snapped tab | Excessive force on a stiff mechanism, brittle plastic after years of UV exposure | Order a replacement vent cover to match the existing canopy width; most clip onto the same routed slot |
| Blocked vent with no visible movement | External canopy obstructed by render, sealant, expanding foam, or insulation from past renovation work | Inspect the outside face; carefully trim any obstruction with a utility knife to restore the airflow path |
Each fix is explained in detail below. Read through the one that matches your vent's symptoms - or work through all four if you are dealing with a combination of issues on older windows.
Painted shut. This is the number-one culprit discussed in trickle vents Reddit threads, and it happens more often than you might think. A decorator slaps a coat of paint across the window frame, the brush drags right over the trickle vent strip, and the wet paint flows into the hairline gap between the slider tab and the vent body. Once dry, that thin skin of paint acts like glue. Here is how to break it free without damaging the mechanism:
Prevention tip: the next time your windows are being painted, press a strip of low-tack masking tape over the trickle vent before the decorator picks up a brush. Peel it off once the paint is dry and the mechanism stays completely clear.
Stiff or stuck slider (no paint involved). If your vent has never been painted over but the slider still will not move, compacted dust and dried grime in the track are almost certainly the cause. Kitchens are especially prone to this problem - airborne cooking grease settles on every surface, mixes with dust, and forms a sticky film that hardens over time. The fix is straightforward:
If the tab still barely moves after repeated attempts, the track itself may be deformed - warped by heat exposure near a radiator or physically dented by an accidental knock. In that case, the internal cover needs replacing rather than repairing.
Broken or snapped tab. Tabs break for one reason: too much force applied to a mechanism that was already stiff. The plastic becomes brittle after years of UV exposure, and a hard shove can snap the tab clean off, leaving a stubby nub that is impossible to grip. Fortunately, you rarely need to replace the entire vent assembly. Most manufacturers sell the internal vent cover - the part containing the slider tab - as a separate component. Here is what to do:
No drilling, no sealant, no specialist tools. The external canopy on the outside of the frame stays in place throughout - you are only swapping the indoor-facing component.
Blocked vent with no visible movement. This one is sneaky. The slider moves, the tab pulls, the flap swings - but you feel zero airflow. Hold the back of your hand against the open slots and nothing comes through. The most likely explanation? The external canopy has been obstructed during past renovation work. Render, silicone sealant, expanding foam, or external wall insulation applied too close to the window can completely cover the outdoor side of the vent without anyone noticing at the time.
If the entire vent body is cracked, warped beyond repair, or the routed slot in the frame itself is damaged, a simple cover swap will not be enough. A full vent replacement is the next logical step - and it is far more straightforward than most homeowners expect, especially when you choose a replacement unit sized and styled for your specific frame.
A cracked housing, a snapped tab that no amount of lubricant can resurrect, or an old vent that simply does not deliver enough airflow anymore - sometimes repair gives way to replacement. The good news? Swapping a trickle vent is one of the most approachable DIY tasks on a window. Modern slot ventilators are engineered to clip directly into the routed channel already cut into your window head, so the entire job can be done in minutes with nothing more than your hands and a measuring tape. The harder part is choosing the right unit from the dozens available.
Pick the wrong size and it will not seat properly. Pick the wrong material compatibility and it may rattle, leak, or look out of place. Skip the airflow rating and you could fall short of building regulation minimums. The checklist below covers every criterion you need to evaluate before ordering a replacement trickle vent uPVC, aluminium, or timber - so you only make this purchase once.
Replacement vents are not one-size-fits-all. A unit designed for a slim aluminium profile will not fit a chunky uPVC head, and a 260 mm cover cannot span a 400 mm routed slot. Before browsing any product pages, gather these five details from your existing vent - or from the empty channel left behind after removing a damaged one:
Colour is worth a brief mention too. Most manufacturers offer white, brown, and woodgrain finishes as standard, which cover the vast majority of domestic window frames. If your frames are an unusual shade - anthracite grey aluminium, for example - check whether the supplier offers a colour match before committing. A mismatched vent strip is not a functional problem, but it is visually jarring on an otherwise clean frame.
Imagine you have measured the routed slot, confirmed your frame is uPVC, and decided you want an adjustable slider with decent airflow. Where do you start looking? This is where many homeowners stall, because generic hardware-store vents rarely list detailed compatibility information. Specialist window component suppliers tend to provide far clearer specifications.
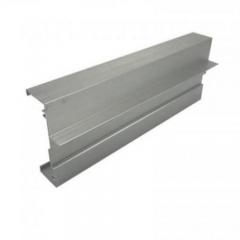
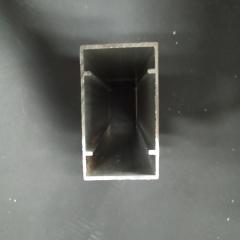
As a concrete example, Shengxin Aluminium's Trickle Air Vents for Windows are adjustable uPVC slot ventilators designed to fit routed channels on both aluminium and uPVC frames - a dual compatibility that simplifies the search if you are unsure which category your frame falls into. Units like these clip into the existing routed slot with no drilling or adhesive required, and they feature a manual slider for precise airflow control. The dual-frame design is particularly useful in homes where different rooms have different frame materials - a uPVC kitchen window alongside aluminium bifolds in the living area, for instance - because a single product line covers both.
Whatever brand or supplier you choose, the selection process follows the same logic:
The external canopy - the weather shield on the outside face of the frame - usually stays in place during a cover swap. If the canopy itself is cracked or missing, replacements are available in matching lengths and simply screw or clip onto the outer frame. Make sure the canopy's slot alignment corresponds with the internal cover so air can travel through the full channel unobstructed.
Ordering tip: buy one replacement vent first and test-fit it before ordering for every window in your home. Frame tolerances vary slightly between manufacturers, and confirming a clean clip-in on one window saves you the hassle of returning a batch that does not quite fit.
Replacing a worn-out trickle vent brings you full circle - back to a component that slides smoothly, seals properly when closed, and delivers the controlled background airflow your home needs to stay dry, fresh, and comfortable. Whether you stick with a straightforward standard unit or upgrade to an acoustic model for quieter rooms, the selection criteria above ensure the new vent matches your frame, meets your ventilation requirements, and lasts for years before the cycle starts again.
Trickle vents should generally stay open throughout winter, especially in moisture-heavy rooms like kitchens, bathrooms, and bedrooms. The slot opening is so narrow that heat loss is negligible - most household warmth is stored in walls, floors, and furniture rather than the air itself. Keeping vents closed traps humidity from cooking, showering, and breathing, which condenses on cold glass and fuels mould growth. Energy Saving Trust recommends year-round use for continuous background ventilation. If extreme wind or outdoor pollution is a concern, close them temporarily and reopen once conditions improve.
Start by scoring along the paint line with a sharp craft knife at a shallow angle, cutting through only the paint film sealing the slider tab or flap to the vent body. Make two or three light passes. Then wiggle the mechanism gently back and forth in tiny increments - a millimetre at a time - until it breaks free. Clean residual paint from the track with a toothpick or cotton bud. For vents stuck by dust or grime rather than paint, spray a short burst of silicone lubricant into the track, wait five minutes, and work the slider in small movements until resistance fades. Avoid petroleum-based sprays like WD-40, as they attract fresh dust.
Four main mechanism types cover most residential windows. Slider vents feature a small tab that moves left or right along a horizontal track to expose or cover airflow slots - these are the most common on uPVC frames. Push-pull tab vents have a tab that pulls outward to open an internal baffle and pushes flush to close. Hinged flap vents use a flat cover that swings open on a top-edge hinge, commonly found on timber and aluminium frames. Rotary dial vents use a small coin-sized disc at one end of the strip that turns clockwise to open and counter-clockwise to close. Identifying yours correctly ensures you apply the right motion instead of forcing the wrong part.
Standard trickle vents let in some sound but far less than an open window because the ventilation slot is extremely narrow. For homes on busy roads, acoustic trickle vents incorporate baffled chambers and sound-absorbing materials, with high-performance models blocking over 50 dB of external noise. Regarding insects, the slot is too narrow for anything larger than a tiny midge, and many vents include a fine mesh filter behind the internal cover that catches even those. The slot is also far too small for anyone to reach a window handle or lock, so security remains uncompromised with the vent fully open.
Yes - replacing a trickle vent is a straightforward DIY task. Modern slot ventilators clip directly into the routed channel already cut into your window head, so no drilling, adhesive, or specialist tools are needed. Measure your existing slot length (typically 260 mm or 400 mm), confirm your frame material (uPVC, aluminium, or timber), and order a compatible replacement cover. Pull the old cover toward you to unclip it, align the new one over the channel, and press firmly until the clips engage. Products like Shengxin Aluminium's adjustable uPVC slot ventilators are designed for both aluminium and uPVC frames, which simplifies sourcing if your home has mixed frame types.



 serviço on-line
 0086 136 3563 2360
 sales@sxalu.com
 +86 136 3563 2360
 português
 English
 français
 Deutsch
 русский
 español
 العربية
 ไทย
ไทย Việt
Việt Українська