
Have you ever noticed water droplets forming on your windows every morning? Or perhaps a musty smell that lingers no matter how often you clean? These frustrating problems often share a common cause: inadequate ventilation. A double glazed window vent offers an elegant solution, allowing your home to breathe while keeping it secure and energy-efficient.
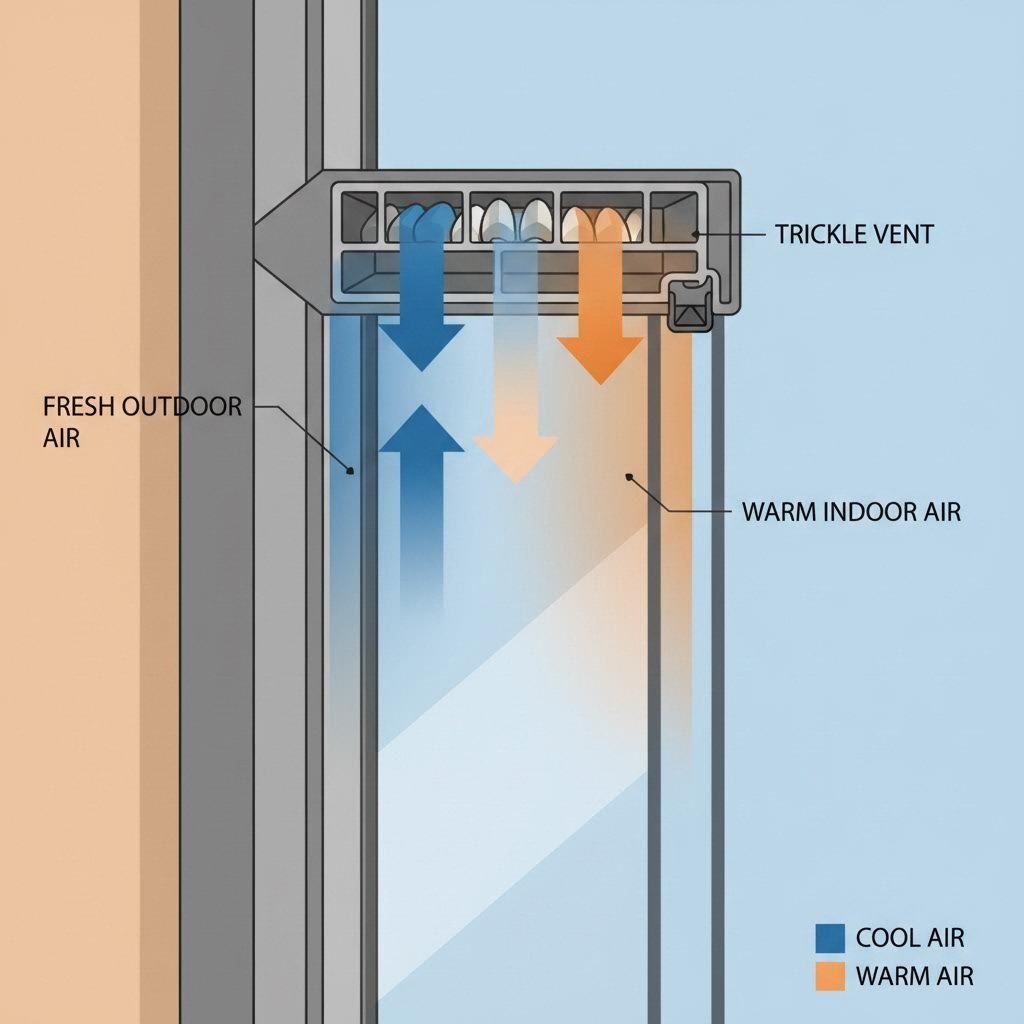
So, what is a trickle vent? Simply put, trickle vents are small, purposely designed openings integrated into window frames that provide background ventilation. Typically positioned along the top of the frame, these slot-shaped components allow fresh air to circulate continuously, even when your windows remain fully closed and locked.
You might also hear them called trickle ventilators, head vents, window vents, or slot vents. Regardless of the name, their function remains the same: providing a controlled, consistent flow of fresh air into your living spaces. Unlike throwing open a window, trickle ventilation works quietly in the background, maintaining air quality without creating security concerns or significant heat loss.
Most modern air vents in double glazed windows come in two main varieties. Some are permanently open, providing constant airflow. Others feature a controllable mechanism, allowing you to open or close them based on your needs. Both types are designed to improve indoor air quality while working seamlessly with your home's thermal envelope.
Imagine building the most energy-efficient home possible. You've installed premium insulation, draught-proofed every gap, and fitted high-performance double glazing. Sounds perfect, right? Here's the catch: all that airtightness creates what experts call a "ventilation paradox."
Modern construction methods and materials have made our homes incredibly efficient at retaining heat. According to building performance specialists, this improved insulation is excellent for reducing energy bills, but it also means air can no longer escape naturally. The result? Stale air, excess moisture, and potential health concerns from poor indoor air quality.
Older, draughtier homes allowed air to exchange naturally through gaps and cracks. While this meant higher heating bills, it also meant moisture and pollutants had an escape route. Today's airtight construction traps everything inside, from cooking steam and shower moisture to carbon dioxide from breathing and volatile organic compounds from furniture and cleaning products.
Poor indoor air quality is caused by inadequate ventilation, not the airtightness of a building. Airtightness is part of the solution, providing an opportunity to prevent excess heat loss and ensure good, well-regulated ventilation.
This is precisely where trickle ventilation becomes essential. These unassuming components bridge the gap between energy efficiency and healthy indoor environments. They provide the continuous, low-level airflow that modern homes desperately need without undoing the benefits of your insulation investment.
The key benefits of installing proper window ventilation include:
Understanding this balance between thermal performance and air quality is the first step toward creating a healthier home. Whether you're dealing with existing condensation problems or planning ahead for a new build, proper ventilation through well-designed window vents makes a genuine difference to both your comfort and your property's long-term condition.
Now that you understand why ventilation matters, you're probably wondering: what options are actually available? The truth is, not all window trickle vents are created equal. From basic slot designs to sophisticated acoustic solutions, each type serves specific needs and environments. Choosing the right one can mean the difference between a comfortable, condensation-free home and ongoing moisture problems.
When most people think about vented windows, they're picturing standard trickle vents. These are the most common type you'll encounter, and for good reason: they're simple, effective, and relatively affordable.
Picture a slim, elongated opening positioned along the very top of your window frame. That's your typical trickle vent. The slot design isn't arbitrary. Placing these vents at the frame head allows warm, rising air to naturally escape while drawing fresh air into the room. This positioning takes advantage of basic thermodynamics, making the ventilation process passive and energy-efficient.
According to industry specialists at Titon, standard trickle vents typically cover a ventilation area between 2000mm² and 8000mm². This equivalent area (EA) rating determines how much air can flow through when the vent is fully open. For habitable rooms and kitchens, building regulations generally require a minimum of 8000mm² EA, while bathrooms need at least 4000mm².
Trickle vents windows can be fitted in three main ways:
Most modern window trickle vents feature manual open/close operation, giving you control over airflow. Leave them open for continuous background ventilation, or close them during severe weather or when maximum heat retention is needed.
Ever noticed that some windows can be locked in a slightly open position? This feature is called the "night vent" or "two-stage locking" position, and it's important to understand how it differs from proper trickle ventilation.
The night vent facility allows you to partially open a casement window by around 10mm or more, then lock it in place. This provides additional ventilation beyond what trickle vents offer, which can be useful during warmer months or after cooking. However, as ventilation experts note, this feature should not be considered an alternative to proper background ventilators.
Why not? Consider these important distinctions:
Dedicated background ventilators serve a distinct purpose. They provide what's called "background ventilation," a constant, gentle air exchange that happens automatically. This differs from "purge ventilation," which involves opening windows wide for rapid air changes. Think of trickle vents as the marathon runners of ventilation—steady, consistent, and always working—while night vents and open windows are sprinters, useful for quick bursts but not sustainable long-term.
Living near a busy road? Under a flight path? Close to nightlife venues? You'll understand the challenge: you need fresh air, but opening any gap in your windows lets in unwanted noise. This is where acoustic trickle vents become essential.
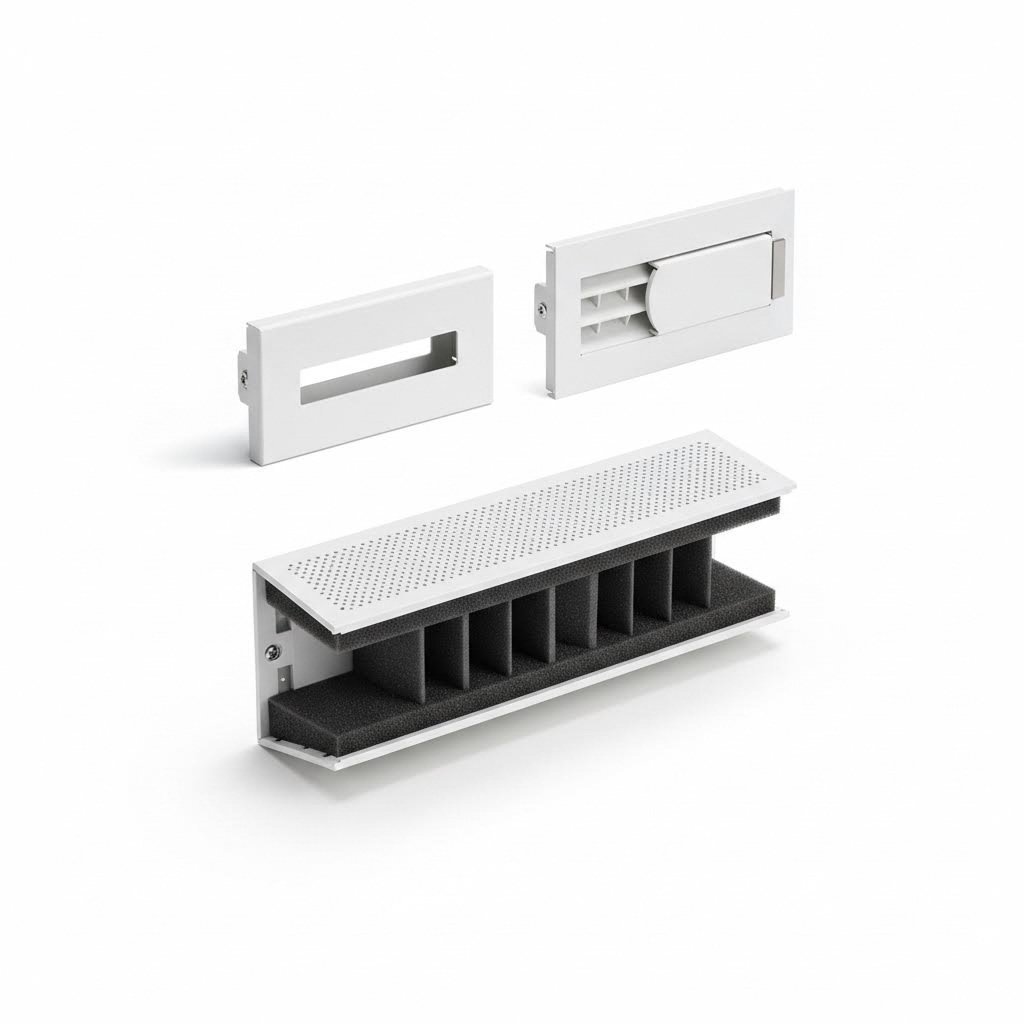
Wondering if you can find a soundproof vent but still let air through? The good news is that modern acoustic vents are specifically engineered to solve this exact problem. They look similar to standard trickle vents but incorporate sophisticated internal designs that attenuate sound waves while maintaining adequate airflow.
How do they achieve this? Acoustic vents typically feature:
Acoustic performance is measured using the Dn,e,w rating, expressed in decibels (dB). Higher values indicate better sound reduction. A standard trickle vent might offer minimal noise attenuation, while a quality acoustic vent can achieve ratings of 35dB to 44dB or more. For context, the World Health Organization considers noise levels above 65dB as noise pollution, and UK guidance recommends keeping bedroom noise below 30dB for restful sleep.
With several vent types available, how do you choose? The following comparison breaks down the key differences to help you make an informed decision:
| Type | Airflow Rate (EA) | Noise Reduction | Best Application | Typical Cost Range |
|---|---|---|---|---|
| Standard Trickle Vent | 2000-8000mm² | Minimal | Quiet residential areas, general rooms | £5-£15 per unit |
| Slot Vent (Adjustable) | 2500-5000mm² | Low to Moderate | Rooms requiring variable airflow control | £8-£20 per unit |
| Night Vent Position | Variable (depends on opening) | None | Upper floors, supervised ventilation only | Included with window hardware |
| Acoustic Trickle Vent | 2500-5000mm² | 35-44dB+ | Urban properties, near roads or airports | £25-£60 per unit |
| Dual Attenuator System | 2500-4000mm² | 40-50dB+ | High-noise environments, sound-rated windows | £40-£80+ per unit |
Your ideal choice depends on your specific circumstances. For a suburban home in a quiet neighbourhood, standard trickle vents will likely meet your needs at minimal cost. But if you're battling traffic noise or live beneath a flight path, investing in acoustic options pays dividends in comfort and quality of life.
Understanding these different vent types puts you in a strong position to address ventilation issues effectively. But how exactly do these vents tackle the condensation problem that plagues so many homes? Let's explore the science behind moisture control and why consistent airflow makes such a dramatic difference.
You've seen it countless times: wake up on a cold morning, and your windows are streaming with water. Maybe you wipe them down, only to find the same problem the next day. But have you ever wondered what's actually happening? Understanding the science behind condensation reveals why trickle air vents for windows are so effective at stopping this frustrating cycle.
Condensation isn't random. It follows predictable physics, and once you understand the mechanism, the solution becomes obvious.
Here's what happens: air contains water vapour, invisible moisture that floats all around us. Warm air can hold significantly more moisture than cold air. When warm, humid indoor air comes into contact with a cold surface, like your window glass, the air temperature drops rapidly at that contact point. As it cools, the air can no longer hold all its moisture. The excess water vapour has nowhere to go, so it transforms into liquid droplets on the glass. That's your morning condensation.
According to research published by the World Health Organization, when air at a temperature of 20°C and a relative humidity of 58% is cooled to 11°C, the relative humidity reaches 100%, and water condenses on surfaces at such temperatures. Your double glazed windows, while far better insulated than single pane glass, still present a cooler surface than your room's ambient temperature during cold weather.
But where does all this indoor moisture come from? The answer might surprise you. Your daily activities generate remarkable amounts of water vapour:
Research by Kalamees (2006) measured average indoor moisture generation rates of 5.9 kg per day per house and 1.9 kg per day per person in studied Finnish homes. That's nearly 6 litres of water being added to your indoor air every single day. Without adequate window air circulation, this moisture accumulates, relative humidity rises, and condensation becomes inevitable.
So how do trickle vents in windows actually solve this problem? The mechanism is elegantly simple yet remarkably effective.
Trickle ventilation windows work by maintaining continuous, low-level air exchange between your home and the outdoors. When fresh outdoor air enters through the vent, it mixes with the warmer, more humid indoor air. This process serves two critical functions: it dilutes the moisture concentration and carries excess humidity outside before it has a chance to condense.
The WHO guidelines on indoor air quality explain this perfectly: ventilation removes humidity at a rate proportional to the difference between indoor and outdoor moisture levels. Cold outdoor air is particularly effective because it contains less absolute humidity than warm air. When that cold, dry air enters your home and warms up, it has significant capacity to absorb excess moisture. The now-humid air then naturally escapes through gaps, other vents, or exhaust points, taking the problematic moisture with it.
Continuous background ventilation through trickle vents is far more effective at controlling moisture than occasionally throwing windows wide open. Consistent, low-level airflow prevents humidity from ever building to problematic levels, while intermittent purge ventilation only temporarily reduces moisture that quickly rebuilds once windows close.
Think of it this way: imagine filling a bathtub with the plug in versus filling it with a small drain constantly open. The constantly draining tub never overflows because water leaves as fast as it enters. Trickle ventilation does the same with moisture. Your cooking, showering, and breathing continuously add humidity, but the vent continuously removes it. Balance achieved.
The relationship between air changes and humidity control is well established. According to ventilation research, maintaining even modest but consistent airflow dramatically reduces relative humidity levels. The key word is consistent. Sporadic window opening might drop humidity temporarily, but levels quickly rebound once you close up again. Trickle vents eliminate this yo-yo effect by providing steady, reliable air exchange around the clock.
How do you know if your current ventilation is inadequate? Your home will tell you, if you know what to look for. Watch for these warning indicators:
The WHO research highlights that relative humidity greater than approximately 50% increases indoor dust mite levels, while mould fungi thrive above 75-80% relative humidity. If you're seeing any of the symptoms above, your indoor humidity is likely exceeding these thresholds regularly.
The good news? Properly functioning trickle vents can address all these issues. By maintaining consistent air exchange, they keep relative humidity within the safe zone, protecting both your health and your property. But what if your existing windows lack vents, or you're planning a window upgrade? Understanding the difference between retrofit and factory-fitted options will help you choose the right approach for your situation.
So you've decided your home needs better ventilation. Now comes the practical question: should you add vents to your existing windows, or is it time for complete window replacements with integrated ventilation? This decision affects everything from your budget to your home's appearance, and getting it right can save you significant money and hassle.
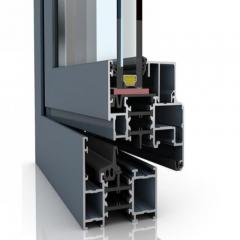
When manufacturers install trickle vents during the window production process, the results are noticeably superior in several ways. These double glazed windows with ventilation feature vents that are precisely positioned, structurally integrated, and aesthetically seamless.
Why does factory fitting matter? Consider what happens during manufacturing. The window frame is designed from the outset to accommodate the vent, meaning:
Since June 2022, UK building regulations have required trickle vents on most new and replacement window installations. According to Leeds Glass Group, these regulations under Building Regulations Document F state that all habitable rooms need background ventilation, and the installed vents must meet performance standards including BS EN 13141-1:2019. This means if you're ordering new windows today, factory-fitted vents aren't optional—they're a legal requirement in most cases.
The exception? Listed buildings and some properties in conservation areas may be exempt from these requirements. If your home falls into these categories, you'll want to discuss options with your local planning authority before proceeding.
What if your current windows are perfectly functional but lack adequate ventilation? This is where drip vents in windows through retrofit installation become relevant. Yes, it is possible to add trickle vents to existing windows, provided certain conditions are met.
According to Double Glazing Direct, retrofit is viable when the top of the window frame is wide enough to accommodate the vent. The process involves carefully drilling holes into the frames to create an opening for the vent unit. For uPVC windows, installers look for existing channels or slots that may have been designed for potential vent installation—many modern frames include these features even when vents weren't originally fitted.
The retrofit installation process typically follows these steps:
When does retrofit make sense? Consider this approach if you're:
Cost is another consideration. Homeowners should typically expect to spend around £30 to £80 per window for retrofit vent installation, including the fitting fee. Compare this to hundreds or even thousands of pounds per window for complete replacement, and the financial logic becomes clear for otherwise sound glazing.
However, retrofit isn't suitable for every situation. Older timber frames may be too narrow or structurally compromised to safely accommodate cutting. Some specialist or heritage window designs simply won't accept standard retrofit solutions. And if your window seals are already failing or frames showing significant wear, adding vents to deteriorating units makes little sense.
How do you decide which approach suits your situation? This decision shouldn't be rushed. Consider these key factors:
Here's the practical reality: retrofit is cost-effective for otherwise sound windows that simply need better ventilation. It's a sensible choice when your glazing has years of life remaining but lacks the airflow modern living demands. On the other hand, replacement makes sense when windows are approaching end of life, when you want the cleanest possible appearance, or when you're planning broader home improvements anyway.
A qualified window professional can assess your specific situation. As experts from Leeds Glass note, while retrofitting is possible, it's not always the best solution—in many cases, new windows with integrated trickle vents offer the best long-term result while ensuring full regulatory compliance.
Whichever route you choose, getting the specification right matters enormously. Understanding vent sizes, materials, and performance ratings ensures you select components that actually solve your ventilation challenges rather than creating new problems.
You've decided your home needs better ventilation, and you understand the options available. But here's where many homeowners get stuck: how do you actually choose the right vent for your specific situation? Walk into any hardware store or browse online catalogues, and you'll encounter a bewildering array of specifications. Equivalent area ratings, airflow measurements, material choices—it can feel overwhelming. Let's cut through the confusion and give you the practical knowledge to select house window vents that genuinely solve your ventilation problems.
Ever looked at a trickle vent specification and seen numbers like "5000mm² EA" or "8000mm² equivalent area"? Sounds technical, right? Here's the simple explanation: equivalent area (EA) tells you how much air can actually flow through the vent when it's fully open.
Think of it this way. Imagine a hole in a wall. A 100mm square hole has a geometric area of 10,000mm². But if you put a grille over that hole with slats and mesh, less air can pass through than if the hole were completely open. The equivalent area measures the actual effective opening—the portion that's genuinely available for airflow. It's essentially the size of a simple, unobstructed hole that would allow the same amount of air to pass.
According to VENTI Group's technical guidance, equivalent area is critical because it determines whether a vent will actually deliver adequate ventilation for your room. A vent that looks large but has a restrictive internal design might have a surprisingly small EA rating—and won't ventilate as effectively as its size suggests.
Why does this matter for you? Because building regulations specify minimum EA values for different room types. Selecting a vent with insufficient equivalent area means you won't achieve the ventilation rates your home needs, regardless of how the vent appears externally. Conversely, understanding EA ratings lets you compare products objectively rather than being misled by physical dimensions alone.
Airflow rates provide another perspective on vent performance. While EA is measured in square millimetres, airflow is typically expressed in litres per second (l/s). The relationship between the two depends on pressure difference between inside and outside—the greater the pressure differential, the more air moves through a given equivalent area. For practical purposes, manufacturers often provide both ratings, allowing you to verify compliance with regulations that may specify either measurement.
Now for the practical application: how much ventilation does each room in your home actually need? The answer depends on room type, size, and how you use the space.
UK Building Regulations Approved Document F provides clear guidance on minimum requirements. According to VENTI Group's regulatory analysis, the requirements differ based on dwelling type:
Why the difference? Single-storey properties lack the natural stack effect that helps drive ventilation in multi-floor buildings. Warm air rises, and in a two-storey home, this creates natural pressure differences that assist airflow. Bungalows and flats don't benefit from this effect, so they need larger vent openings to achieve the same ventilation rates.
Room usage also influences requirements. Kitchens and bathrooms generate significantly more moisture than bedrooms or living areas. While the base EA requirement might be the same, practical experience suggests prioritising generous ventilation capacity in wet rooms. If you're retrofitting window air vents and can only address certain rooms, start with those generating the most humidity.
What about small window vent options for compact frames? This is where careful product selection becomes crucial. Some windows, particularly those in older properties or smaller rooms, may not accommodate full-size vents. In these cases, you have several options:
According to EnviroVent's building regulations guidance, background ventilators should be positioned at least 1.75 metres above floor level. This ensures the incoming fresh air mixes properly with room air rather than creating uncomfortable low-level draughts. When selecting windows with vents, verify that the vent positioning meets this requirement.
One common mistake: assuming that one large vent will serve an entire floor or open-plan space. Regulations typically require background ventilation in each habitable room. An open-plan kitchen-diner might present complexities—seek professional advice if your layout doesn't fit standard categories.
Beyond size and airflow, the material your vent is made from significantly affects performance, appearance, and longevity. Let's explore the main options and which suits different window types.
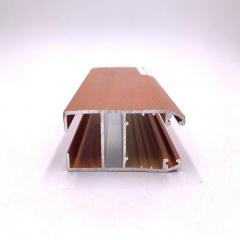
uPVC Vents: The most common choice for modern double glazing, uPVC (unplasticised polyvinyl chloride) vents are designed to match the material used in most contemporary window frames. They're lightweight, affordable, and resistant to moisture—important qualities for components exposed to condensation and weather. Most uPVC vents come in standard white, but manufacturers increasingly offer brown, black, grey, and woodgrain finishes to match popular frame colours.
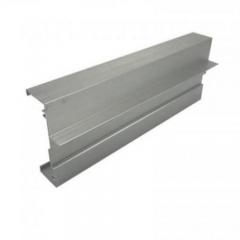
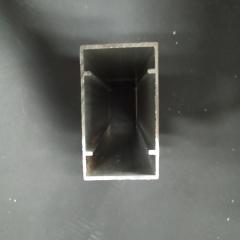
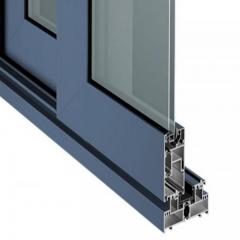
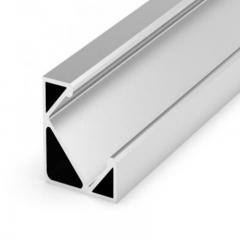
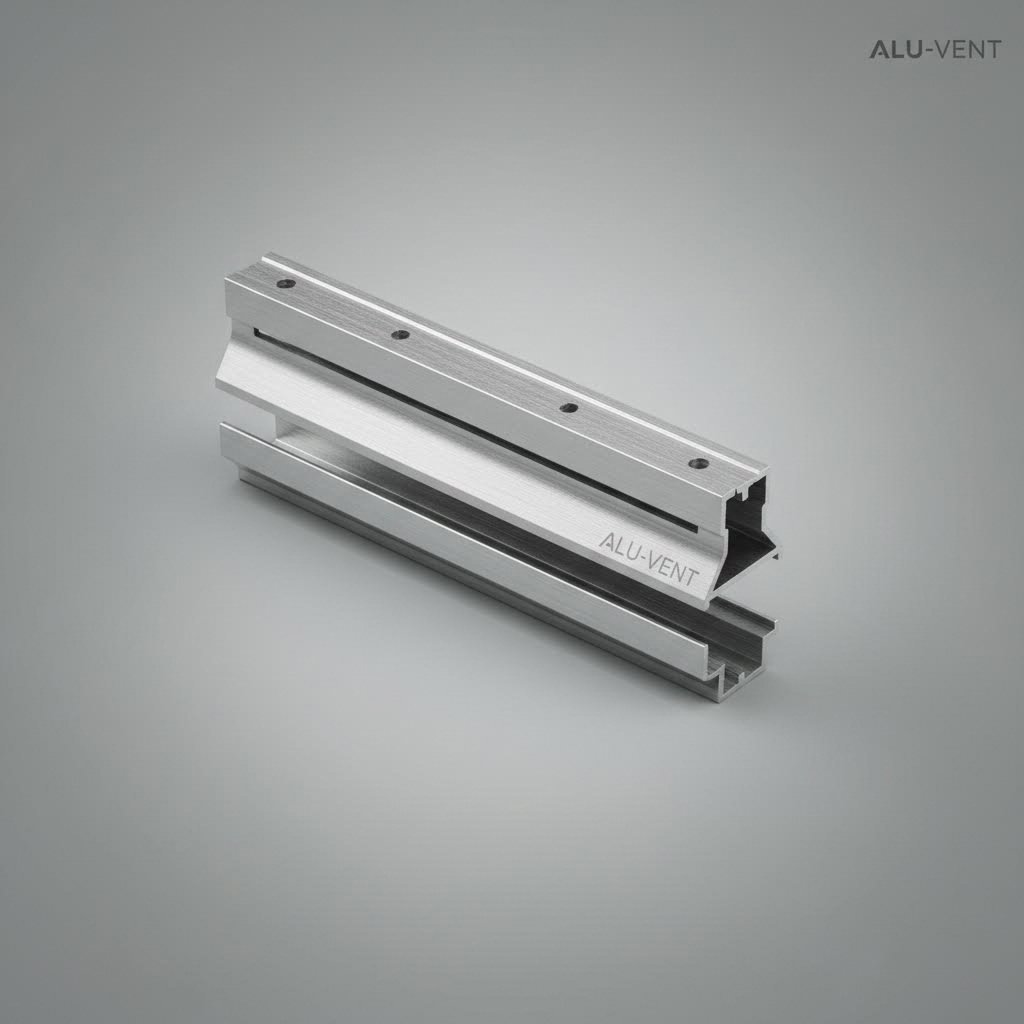
Aluminium Vents: For premium applications or where slim profiles matter, aluminium offers distinct advantages. It's stronger than plastic, allowing for thinner designs that admit more light. Aluminium's durability means these vents maintain their appearance over decades rather than years. They're ideal for aluminium-framed windows, obviously, but also work well on timber frames where a contemporary aesthetic is desired. Powder-coated finishes provide excellent colour matching and weather resistance.
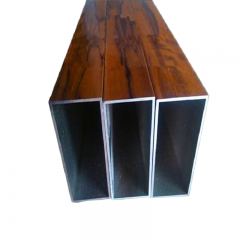
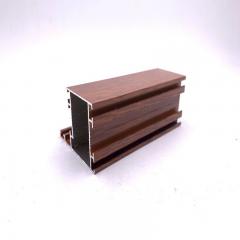
Timber-Compatible Options: If you have wooden window frames, you'll want vents that complement the natural material. Options include painted timber vents for period properties, or aluminium vents with woodgrain finishes that blend with stained frames. Genuine timber vents require more maintenance than synthetic alternatives—occasional repainting and checking for rot—but deliver an authentic appearance that matters in heritage properties.
The following comparison helps clarify which material suits your needs:
| Material | Durability | Appearance | Best Window Type Match | Maintenance Needs |
|---|---|---|---|---|
| uPVC | Good (15-25 years) | Standard profile, wide colour range | uPVC windows, most modern frames | Low—occasional wipe clean |
| Aluminium | Excellent (25+ years) | Slim, contemporary, premium finish | Aluminium windows, timber (modern style) | Minimal—clean and check seals |
| Painted Timber | Moderate (10-20 years with care) | Traditional, period-appropriate | Heritage timber windows | Higher—repaint every 3-5 years, check for rot |
| Composite/Hybrid | Very Good (20+ years) | Various finishes including woodgrain | Mixed frame types, retrofit applications | Low to moderate |
A vent that works perfectly but looks wrong on your windows is only half a solution. Aesthetic integration matters, especially for visible elements on your home's facade.
Start by identifying your window frame colour precisely. "White" isn't just white—uPVC manufacturers offer various shades from brilliant white to cream to traffic white. If you're ordering vents separately from windows, request colour samples or RAL codes to ensure accurate matching. Major vent suppliers stock their products in the most common frame colours, but special orders may be available for unusual shades.
For timber frames, consider whether you want the vent to match the frame exactly or provide subtle contrast. A white vent on a dark stained frame can look intentional and modern. Alternatively, selecting a vent with a close woodgrain finish creates visual continuity.
Internal and external colours don't have to match. Some homeowners choose a frame-matching external colour with white internal faces for consistency with interior decor. Many vent designs accommodate this dual-colour approach.
Finally, think about hardware finishes. If your window handles and hinges are chrome, silver-effect vent controls look cohesive. Black ironmongery pairs better with darker vent finishes. These details might seem minor, but they contribute to the overall professional appearance of your installation.
With specifications, sizes, and materials now clear, you're well-equipped to select the right vents for your home. But knowledge is only part of the equation. Getting these components properly installed determines whether they'll actually deliver the ventilation benefits you're seeking.

Ready to take action? You've learned what trickle vents do, which types suit your needs, and how to select the right specifications. Now comes the hands-on part: actually getting these vents installed in your windows. Whether you're a confident DIY enthusiast or wondering if this project is within your capabilities, this section gives you the honest guidance you need to proceed with confidence.
Before reaching for your toolbox, take a moment for honest self-assessment. Installing a window trickle vent isn't the most complex home improvement task, but it does require specific skills and conditions. Getting this evaluation right prevents frustration, wasted materials, and potential damage to your windows.
Ask yourself these practical questions:
According to installation guidance from DIY Direct, if your frame contains steel reinforcement or you're unsure about drilling, consider getting professional advice. This isn't defeatist—it's practical. A botched installation can compromise your window's weatherproofing, void warranties, and create problems far more expensive to fix than professional installation would have cost initially.
Still feeling confident? Good. Let's walk through the installation process step by step.
Fitting tickle vents to existing windows follows a logical sequence. Each step builds on the previous one, so resist the temptation to skip ahead. Before starting, gather everything you'll need:
With your materials ready, follow these steps:
Always follow the manufacturer's specific instructions for your vent model. While the general process remains consistent, individual products may have particular requirements for hole spacing, screw types, or installation sequence that differ from generic guidance.
A few additional safety reminders: wear safety glasses whenever drilling to protect against flying debris. Use a dust mask, especially when drilling uPVC, which produces fine plastic particles. If working at height, ensure your ladder or platform is stable and ideally have someone spotting for you. Never overreach—reposition your access equipment rather than stretching dangerously.
There's no shame in recognising when a job exceeds your capabilities or comfort level. In fact, knowing when to step back and call in expertise is a sign of good judgment. Here are the situations where professional installation makes clear sense:
What does professional installation typically cost? According to industry estimates, expect to pay around £30 to £80 per window for retrofit vent installation, including labour and materials. While this exceeds the DIY material cost alone, you're paying for expertise, proper tools, and peace of mind. For many homeowners, that represents excellent value.
Finding a suitable installer is straightforward. Window companies that supplied your original glazing can often add vents to their products. General glazing contractors and some UPVC specialists offer retrofit services. Ask for references, check reviews, and confirm they're insured before commissioning work.
With your vents successfully installed—whether through your own efforts or professional assistance—you're now enjoying the benefits of improved ventilation. But installation is just the beginning. Keeping those vents working effectively requires some ongoing attention, which we'll cover next.
Your trickle vents are installed and working beautifully. But here's a question many homeowners forget to ask: what happens six months, a year, or five years down the line? Like any component of your home, windows vents need occasional attention to keep performing at their best. The good news? Maintenance is straightforward, takes minimal time, and prevents the frustrating problems that arise when vents become neglected.
Think about what your vents encounter daily. Dust floating through your rooms, cooking grease drifting from the kitchen, pollen during spring, and particles carried on incoming air from outside. Over time, this debris accumulates in the narrow slots and chambers of your venting window components, gradually restricting airflow.
According to SDS London's maintenance guide, blocked vents can undo all the benefits you've worked to achieve. Reduced airflow means moisture builds up again, condensation returns, and you're back to square one. The solution? Simple, regular cleaning that takes just minutes per window.
Here's what effective vent maintenance looks like:
How often should you perform this maintenance? For most homes, cleaning your window vents every six months provides adequate care. However, if you live in a particularly dusty area, near busy roads, or in environments with high pollen counts, consider quarterly cleaning. Kitchens and bathrooms, which generate more airborne grease and moisture, may also benefit from more frequent attention.
The difference between a window and ventilator maintenance requirements is worth noting. Standard windows need occasional cleaning and seal checks. Ventilators—including trickle vents—require the same plus specific attention to their airflow paths. Incorporate vent cleaning into your regular window maintenance routine, perhaps when you wash the glass seasonally, and the task never feels burdensome.
Even well-maintained vents occasionally develop problems. Recognising these issues early and knowing how to address them keeps your ventilation system functioning effectively. Here are the most common problems homeowners encounter, along with practical solutions:
If problems persist after trying these solutions, consider consulting a ventilation specialist. Persistent condensation despite adequate venting may indicate underlying issues—poor insulation, thermal bridges, or inadequate heating—that require broader assessment.
Here's a concern we hear frequently: "Won't leaving vents open all winter just let expensive heat escape?" It's a fair question. After all, you've invested in quality double glazing precisely to keep warmth inside. Opening holes in your windows seems counterintuitive.
The reality is more nuanced. Yes, trickle vents allow some heat exchange with the outdoors. But the amount is surprisingly modest compared to the problems they prevent. Condensation damage, mould remediation, and the health costs of poor air quality far exceed the marginal heating cost of background ventilation. Think of it as a small, worthwhile insurance premium for your home's wellbeing.
That said, you can adjust your approach seasonally to optimise the balance:
During colder months: Keep vents open, especially in bedrooms overnight and in kitchens and bathrooms during high-moisture activities. The continuous low-level airflow removes moisture before it condenses, which is precisely when you need it most—cold external surfaces create the greatest condensation risk in winter. If specific rooms feel uncomfortably draughty, partially close vents in those spaces while maintaining full ventilation elsewhere.
During warmer months: With less temperature differential between inside and outside, condensation risk decreases. You can be more flexible with vent positions. Many homeowners leave vents fully open during summer, supplementing with open windows for enhanced airflow on pleasant days.
In response to specific activities: Cooking a big meal? Showering? Drying laundry indoors? These activities spike indoor humidity. Ensure vents are fully open in affected rooms during and for a period afterward. Consider briefly opening windows for purge ventilation during heavy moisture generation, then rely on trickle vents for ongoing background ventilation once the activity ends.
What about the draught concern? Modern trickle vents, particularly thermally broken designs, create far less draught sensation than older or cheaper alternatives. The key is correct positioning—vents at frame head level, at least 1.75 metres above floor level, introduce air that mixes with warm room air before descending to occupied zones. You shouldn't feel a cold stream directly from a properly specified and installed vent.
If you do experience uncomfortable cold spots, check vent positioning first. Ground-level or low-positioned vents will create noticeable draughts. Also consider your room's heating layout—vents positioned far from heat sources may produce local cold areas that proper radiator placement would eliminate.
The bottom line? Don't overthink it. For most households, simply leaving vents open throughout the year delivers excellent results. The small heat loss is vastly outweighed by prevented moisture damage and improved air quality. Your vents work quietly in the background, protecting your home while you focus on living in it.
With your ventilation system now installed, understood, and maintained, you're well-positioned to enjoy a healthier, more comfortable home. But before we conclude, let's ensure you have the knowledge to make confident purchasing decisions when the time comes to buy or upgrade your window vents.
You've journeyed through everything from understanding what trickle vents for windows actually do, to comparing vent types, exploring installation options, and learning maintenance best practices. Now comes the moment that matters most: turning that knowledge into action. Whether you're addressing existing condensation problems or planning ahead for a healthier home, choosing the right air vents for double glazed windows requires bringing together everything you've learned.
Before placing any order, pause and review these essential factors. Getting them right ensures your investment delivers genuine, lasting benefits rather than disappointment.
Vent type matters for your situation. Are you in a quiet suburban neighbourhood where standard trickle vents will suffice? Or does your urban location demand acoustic options that reduce noise while maintaining airflow? Perhaps you need adjustable vents for rooms where moisture levels vary dramatically throughout the day. Match the vent type to your specific circumstances rather than defaulting to the cheapest option.
Size determines performance. Remember those equivalent area (EA) ratings we discussed? They're not marketing jargon—they directly determine whether your vents will actually solve your ventilation problems. Building regulations specify minimum requirements for good reason. For habitable rooms in multi-storey homes, you'll typically need at least 8,000mm² EA per room. Single-storey properties require 10,000mm² or more. Undersized vents might look the part but won't deliver the airflow your home needs.
Material compatibility affects longevity and appearance. A white uPVC vent on anthracite grey aluminium frames looks mismatched and unprofessional. More importantly, materials that don't suit your window type may not seal properly or could deteriorate prematurely. Match uPVC vents to uPVC frames, consider aluminium options for contemporary windows or where durability is paramount, and ensure timber-framed properties receive appropriately styled components.
Installation method shapes your approach. Are you confident tackling a DIY retrofit, or would professional installation give you peace of mind? New window orders should include factory-fitted vents for the cleanest integration. Retrofit projects require honest assessment of your skills and your window frames' suitability. As Handle Store's installation guidance notes, retrofit is viable for many windows, but complex frame constructions or steel reinforcement may require professional expertise.
The purpose of a trickle vent is to provide permanent ventilation into rooms. Should you get a gas or carbon monoxide leak, these vents could play an important part in saving your life. Trickle vents also help reduce condensation and reduce mould growth caused by dampness.
Quality matters more than price. Budget vents might save you money upfront, but poorly made components fail faster, seal less effectively, and often look cheap against your windows. According to Protolabs' analysis of vent manufacturing, quality vents are tested to BS 6375 Part 1 for weathertightness and use UV-stable materials that resist degradation over years of exposure. Inferior products may lack these certifications and use materials that become brittle, discoloured, or warped within just a few years.
So where should you actually purchase your vents? The market offers everything from budget hardware store options to premium manufacturer-direct products. Making an informed choice means knowing what separates reliable suppliers from the rest.
When evaluating any vent supplier, look for these indicators of quality and reliability:
For homeowners seeking a reliable, high-performance option, Shengxin Aluminium's window trickle vents represent an excellent choice worth considering. Their range addresses the practical requirements that matter most: compatibility with uPVC, aluminium, and timber windows ensures you'll find suitable options regardless of your frame type. The durable aluminium construction resists corrosion and weathering far longer than basic plastic alternatives, delivering years of reliable performance.
What makes these vents particularly practical? They're designed with real-world installation in mind. Whether you're fitting vents during a new build project or retrofitting existing windows to solve condensation problems, the product range includes sizes and configurations for both scenarios. The manual slider mechanism gives you straightforward control over airflow—open for maximum ventilation during high-moisture activities, partially closed when you want to balance airflow with thermal comfort.
The variety of finishes available means aesthetic integration isn't an afterthought. Matching your vent colour to your window frames creates the professional, seamless appearance that enhances rather than detracts from your property's look. And with certifications including ISO 9001:2015 and RoHS compliance, you're investing in products manufactured to rigorous quality and environmental standards.
You now possess the knowledge to make confident decisions about your home's ventilation. Whether condensation is already causing problems or you're wisely planning to prevent issues before they start, proper window ventilation through quality trickle vents offers a straightforward, effective solution.
Consider what you've learned:
The alternative to trickle vents—relying solely on opening windows—simply doesn't provide the consistent background ventilation modern homes require. You can't leave windows open at night for security reasons, during bad weather, or when you're away from home. Trickle vents work quietly and continuously, protecting your property around the clock without requiring any attention or compromising security.
If you're ready to take action, start by assessing your current situation. Which rooms show signs of inadequate ventilation? Where does condensation appear most persistently? Do your existing windows have vents, and if so, are they functioning properly? This assessment guides your purchasing decisions and helps you prioritise where improvements will deliver the greatest benefit.
For those exploring options, browsing quality suppliers like Shengxin Aluminium's trickle vent range provides a practical starting point. Review the specifications, consider how different products match your windows, and don't hesitate to seek guidance if you're uncertain about sizing or compatibility.
Your home should be a healthy, comfortable sanctuary—not a battleground against condensation and mould. With the right trickle vents properly installed and maintained, you're investing in exactly that: fresher air, drier windows, and a living environment that supports your wellbeing for years to come.
Yes, you can retrofit trickle vents to existing double-glazed windows. The process involves drilling ventilation holes through the frame, typically at the top of the window. For uPVC windows, you'll need a drill bit designed for plastic and metal layers. Measure carefully, mark positions on both inside and outside surfaces, then drill pilot holes before creating the slot opening. Professional installation is recommended for steel-reinforced frames or if you're uncertain about your window's construction. Quality aluminium trickle vents from suppliers like Shengxin Aluminium work with uPVC, aluminium, and timber frames for both retrofit and new installations.
Yes, most new and replacement double glazed windows require trickle vents under UK Building Regulations Part F, updated in June 2022. Modern airtight construction creates a ventilation paradox where energy efficiency gains reduce natural air exchange, trapping moisture and pollutants indoors. Trickle vents provide essential background ventilation that removes excess humidity, prevents condensation, reduces mould growth, and maintains healthy indoor air quality—all while keeping windows securely locked. Habitable rooms typically need minimum 8,000mm² equivalent area ventilation in multi-storey homes.
Window trickle vents have some potential drawbacks to consider. They can introduce dust, pollen, and outdoor pollutants into your home, which may affect allergy sufferers. Standard vents offer minimal noise reduction, though acoustic models rated 35-44dB solve this for urban properties. Some heat loss occurs through open vents, though this is minimal compared to condensation damage costs. Additionally, vents require regular cleaning every six months to prevent blockages. However, for most homes, the benefits of condensation prevention, mould reduction, and improved air quality significantly outweigh these minor disadvantages.
Retrofit trickle vent installation typically costs £30 to £80 per window, including labour and materials. DIY installation reduces costs to just £5-£20 per vent unit for standard models, while acoustic vents range from £25-£60 each. Factors affecting cost include frame material complexity, accessibility, and whether steel reinforcement requires specialist tools. For whole-house installations, professional fitting often proves more economical due to efficiency and consistent quality. Compare this to full window replacement costing hundreds per window—retrofitting is cost-effective for otherwise sound double glazing that simply needs better ventilation.
Vent size depends on room type and dwelling configuration. UK Building Regulations require minimum 8,000mm² equivalent area (EA) for habitable rooms in multi-storey homes, and 10,000mm² EA for single-storey properties like bungalows. Kitchens and bathrooms generating more moisture benefit from generous ventilation capacity. The equivalent area rating measures actual airflow potential, not physical dimensions—a vent looking large may have restrictive internal design. Match vent EA ratings to your room requirements, and consider multiple smaller vents if frames cannot accommodate full-size units. Shengxin Aluminium offers various sizes suitable for different applications.


 serviço on-line
 0086 136 3563 2360
 sales@sxalu.com
 +86 136 3563 2360
 português
 English
 français
 Deutsch
 русский
 español
 العربية
 ไทย
ไทย Việt
Việt Українська