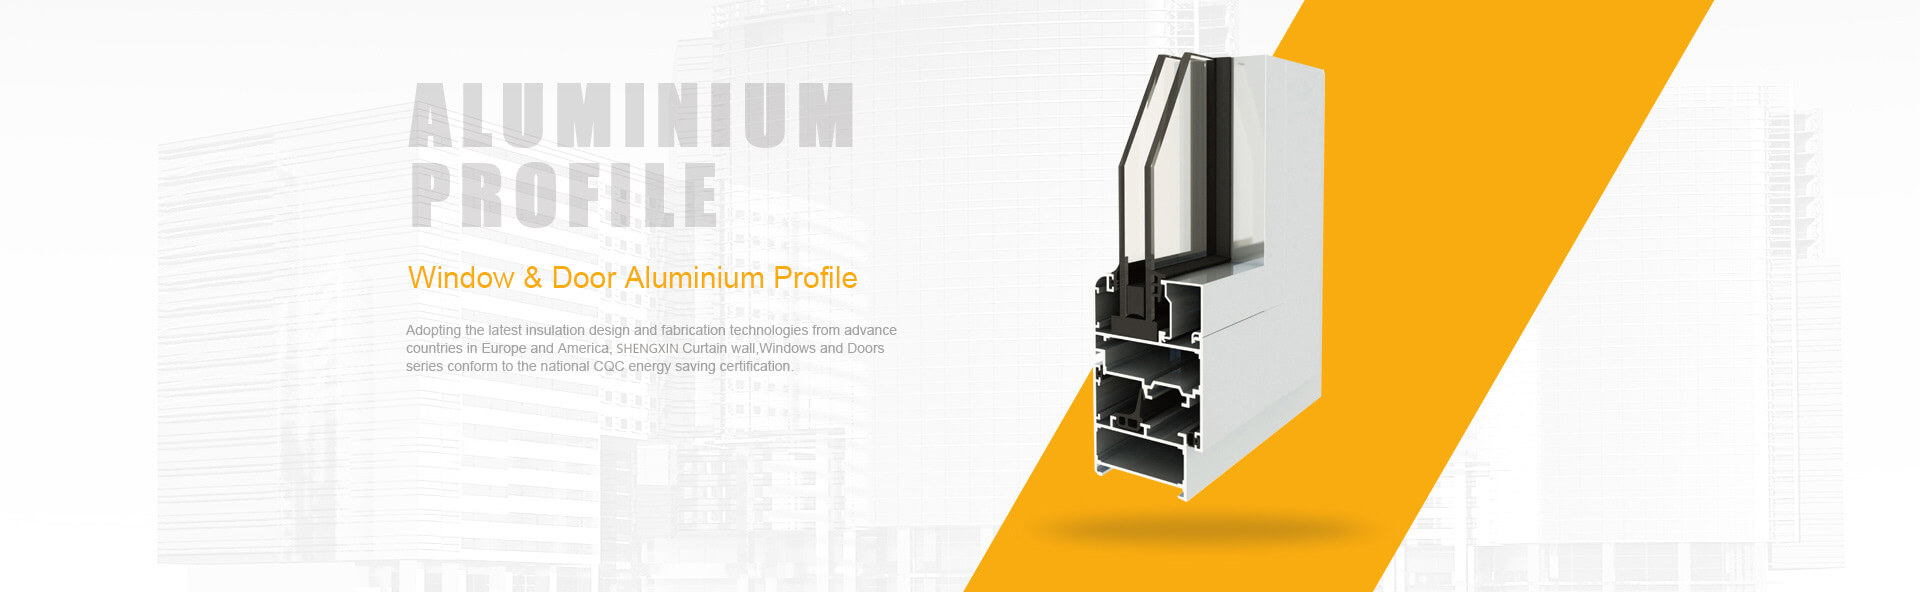
If you are scanning catalogs or RFQs for the first time, the term can sound more technical than it is. In plain language, aluminium extrusion is a way of shaping aluminum alloy by pushing a heated billet through a die so the metal comes out as one long part with a consistent cross-section.
Aluminium extrusion, often listed in U.S. sourcing as aluminum extrusion, makes long solid, hollow, or semi-hollow profiles by forcing heated alloy through a shaped die.
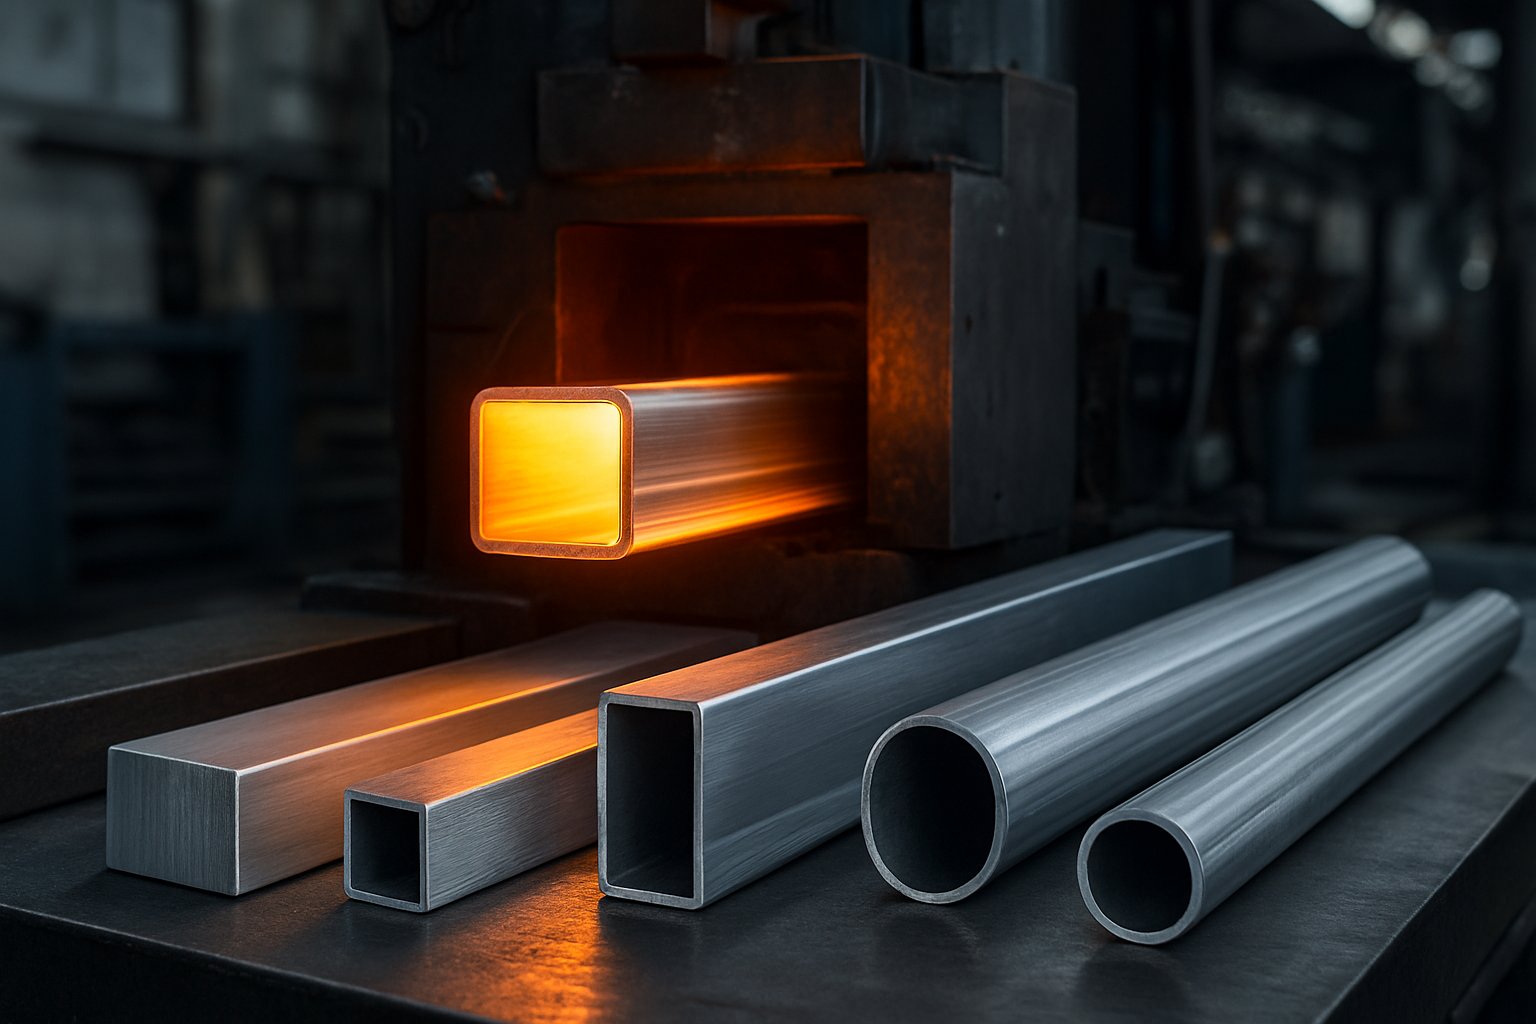
A simple mental picture helps. One reference compares it to squeezing toothpaste from a tube: the opening controls the shape that comes out. That is why aluminum extrusions are defined by their cross-section. A channel, angle, tube, or custom frame keeps the same profile along its length.
This is not the same as casting, where molten metal is poured into a mold and solidifies into shape. It is also different from machining, which removes material by drilling, cutting, or milling after a part already exists. Rolling belongs to flat-rolled product categories, while extrusion is used to create long profiles rather than sheet-like forms.
Myth: All extruded aluminum uses the same alloy logic. Reality: alloy choice changes strength, corrosion behavior, and finishing response.
Myth: Profile shape alone tells you performance. Reality: temper, wall thickness, and tolerances matter too.
Myth: Any extruded aluminium profile can be treated like a machined bar. Reality: geometry and process history affect how it should be cut, finished, and specified.
That is where many buying mistakes begin. The shape may look simple, but the route from billet to finished extruded aluminium profile decides far more than appearance.
The idea is easy to picture. A heated billet is pushed through a shaped die, and a long profile comes out the other side. The part that gets missed in many explainers is everything wrapped around that moment. Different aluminum extrusion shapes may look unrelated in a catalog, but the manufacturing sequence behind them follows the same core logic, and each stage affects quality.
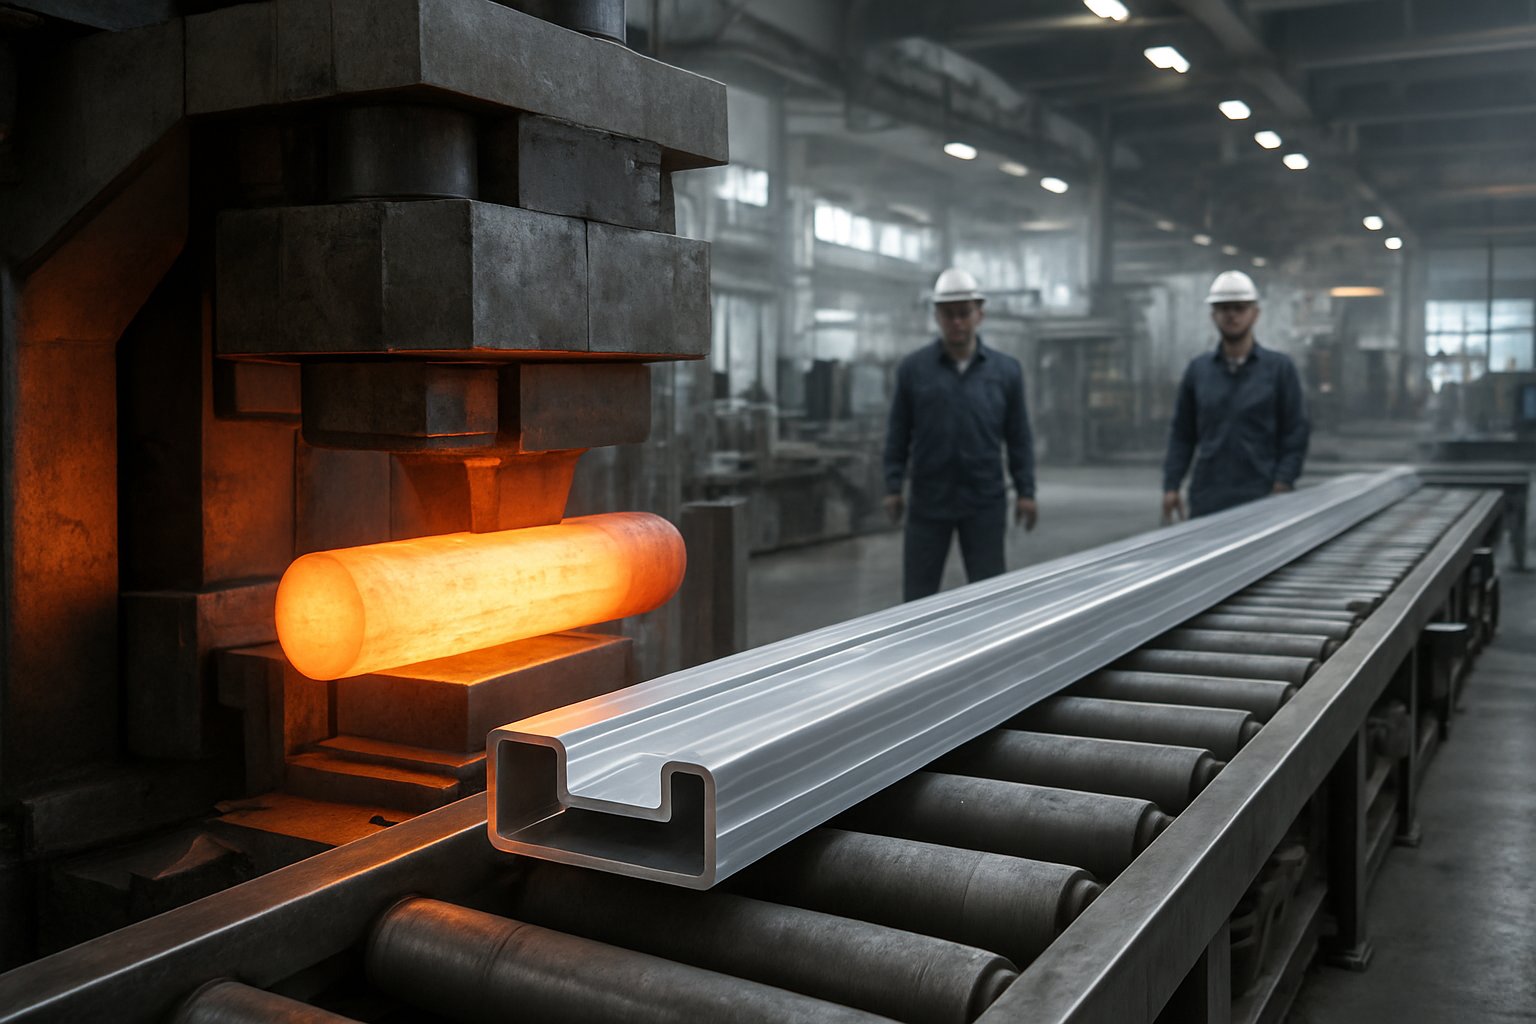
An aluminum extruder starts with a billet, usually a solid alloy log cut to length for the press. That billet is heated until it becomes soft enough to flow under pressure while still remaining solid. Process guidance from AEC places common billet temperatures above 700 F and, depending on alloy, up to about 930 F. The die is also prepared and preheated. If tooling temperature is off, metal flow and surface quality can suffer before production fully stabilizes.
Inside the press, the alloy is not behaving like a liquid pour. It stays solid while deforming plastically under force. When it exits the die, the cross-section is already formed. That fresh aluminum extrusion profile is still very hot, softer than its final condition, and vulnerable to bow, twist, or surface marking. It is guided out on a runout table, while the remaining butt end at the die is separated for recycling, a sequence also reflected in process summaries from Gabrian.
That is why pressing alone does not finish the job. The die creates shape, but shape by itself does not guarantee straightness, temper, or fabrication-ready stability.
Quenching controls the cooling path immediately after exit. For heat-treatable alloys, that cooling step directly affects how well the material can develop its required properties later. Stretching follows for a reason too. Fresh lengths can hold residual stress and slight curvature, so a controlled stretch helps straighten the profile and reduce stress that may cause trouble in machining, assembly, or visible installations.
Aging is just as important. Whether done in an oven or through a natural route for certain process paths, aging develops the specified temper and turns a newly extruded shape into a usable engineering product. Finishing and inspection come after that to confirm dimensions, appearance, and consistency.
| Stage | Purpose | Quality concern |
|---|---|---|
| Billet heating | Soften the alloy without melting it | Uneven heat can hurt flow and surface quality |
| Pressing through the die | Create the cross-section | Flow imbalance can distort the profile |
| Quenching | Control cooling for later property development | Inconsistent cooling can affect performance |
| Stretching | Improve straightness and relieve stress | Residual bow, twist, or stress may remain |
| Aging | Develop the required temper | Underaged or overaged material may miss spec |
| Inspection | Verify dimensions and surface condition | Tolerance or finish defects can go unnoticed |
Even this orderly sequence changes character once metal flow, friction, and internal voids enter the discussion. That is where direct presses, indirect presses, and hollow-die geometry start to matter.
The profile leaving the die may look simple, but the path the metal took to get there changes a lot. Flow direction, friction, and die design all affect whether an aluminium profile runs smoothly, holds tolerance, or becomes expensive scrap.
In direct extrusion, the ram pushes a heated billet toward a fixed die, and the metal flows in the same direction as the ram. Because the billet moves against the container wall, friction adds heat and resistance. That setup is still the most common and versatile route for many shapes, including general structural sections and many aluminum channel extrusions.
In indirect extrusion, the die is mounted on a hollow stem and moves toward the billet. The metal then flows opposite the stem travel. With much less billet-to-container wall friction, conditions can be more stable, which is one reason Extruder Press notes better consistency and billet utilization in many cases. The tradeoff is a more complex press arrangement and practical limits on section size.
| Approach | Metal flow | Tooling complexity | Typical use considerations |
|---|---|---|---|
| Direct extrusion | Billet moves toward a fixed die, with flow in the same direction as ram travel | Lower relative press complexity | Broad profile flexibility, common for mixed production and many open shapes |
| Indirect extrusion | Die advances into the billet, with metal flowing opposite stem travel | Higher press and alignment complexity | Useful where lower friction and more uniform flow are priorities |
| Hollow die configuration | Metal splits around internal supports, then rejoins under pressure | Higher die complexity than open profiles | Needed for tubes and multi-void sections with internal cavities |
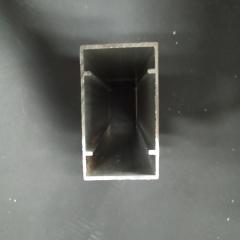
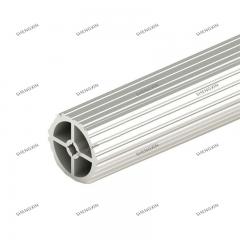
Hollow sections are where the process gets more interesting. In AEC's explanation of hollow die shapes, the metal separates around a mandrel and its supports, then rejoins and pressure-welds before exiting the die. That is how internal voids are created without drilling them afterward.
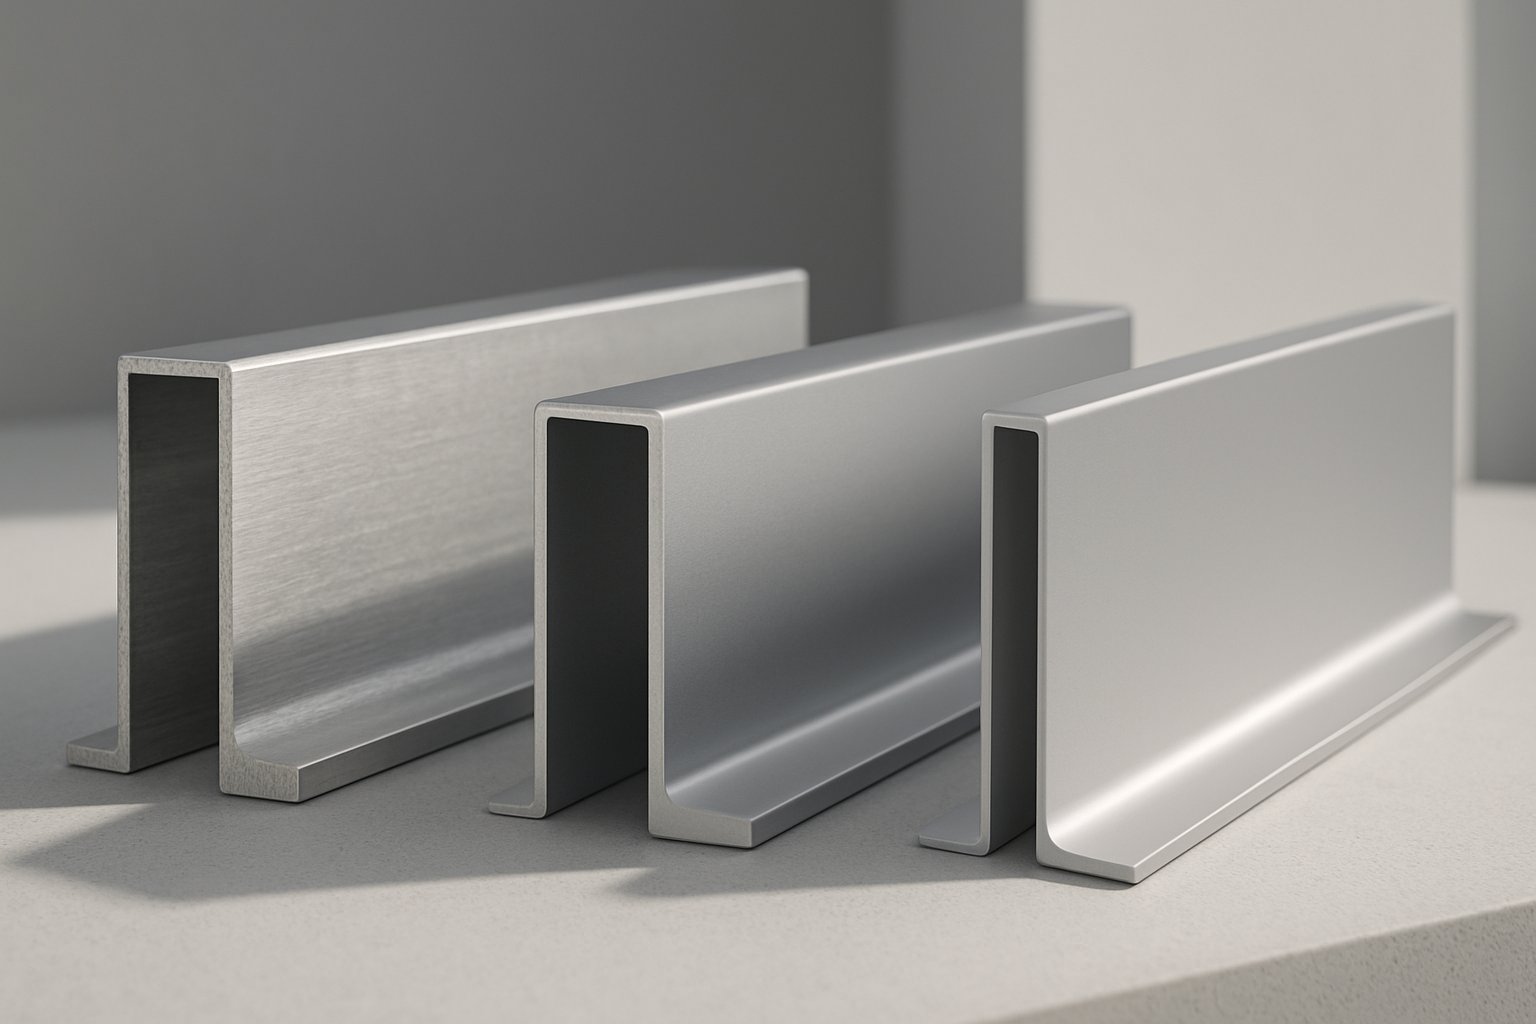
An aluminum t channel is usually an open shape, so it does not need that internal rejoin. An extruded aluminium channel with enclosed cavities does, and that changes both die design and process risk.
Geometry can make one part easy and another troublesome, even when the alloy is the same. Deep, narrow features raise die stress and can disturb flow balance. Guidance on tongue ratio highlights this problem in practical terms: harder shapes can mean more die wear, wall variation, or distortion.
In extrusion, geometry drives manufacturability as much as material choice.
That is why a basic aluminum t channel and a thin-wall hollow section do not behave like close cousins in production. The shape sets the rules first. Then alloy choice decides how well the metal can follow them.
Geometry decides whether a profile is possible. Alloy decides how comfortably it can be extruded, welded, finished, and used in service. That is why two parts with the same cross-section can behave very differently in production. In everyday aluminium extrusion work, 6xxx-series grades dominate many extruded aluminum profiles because they offer a practical balance of strength, corrosion resistance, extrudability, and heat-treatability, as summarized by Yaji's alloy guide and Gabrian.
Alloying changes how aluminum flows through the die and how the finished section performs afterward. In simple terms, more strength usually comes with less extrusion friendliness. Gabrian, drawing on ASM guidance, notes that stronger wrought alloys with higher alloying content are generally harder to extrude. That tradeoff shows up fast in real projects. A finish-critical window section often leans toward 6063 or 6463. A load-bearing member may point toward 6005, 6061, or 6082 instead.
The wrong choice can make otherwise simple aluminum profiles harder to run, harder to weld, or less attractive after anodizing. So the useful question is not, "Which alloy is best?" It is, "Best for what?"
For architectural and industrial aluminum profiles, these are the comparisons that usually matter most.
| Alloy | Strength | Corrosion resistance | Weldability | Anodizing quality | Relative extrudability | Common fit |
|---|---|---|---|---|---|---|
| 6063 | Moderate | Excellent | Very good | Good | Excellent | Visible architectural sections, frames, rails |
| 6463 | Low to medium | Excellent | Good | Excellent | Excellent | Decorative trim and bright anodized parts |
| 6005 | Medium to high | Good | Excellent | Fair | Moderate | Structural railings, ladders, and transport sections |
| 6061 | High | Good | Very good | Fair | Moderate | Structural parts with machining and fabrication |
| 6082 | Very high | Excellent | Good | Fair | Difficult | Heavy-duty structural and marine sections |
A few patterns stand out. 6063 is the easy favorite when you need clean surfaces and consistent extrusion behavior. 6463 pushes even further toward brightness and decorative appearance. 6061 and 6082 move the conversation toward strength. 6005 sits in the middle as a useful structural extrusion alloy with strong weldability.
Finish selection starts earlier than many buyers expect. 6063 is known for smooth surface quality and is widely used for architectural work, while 6463 is optimized for polished or bright anodized looks. By contrast, 6061, 6005, and 6082 are often chosen because the part must carry load first, even if the surface is less show-focused.
That matters when reviewing extruded aluminum shapes for visible projects. An alloy that meets the strength target may still disappoint if the anodized appearance is inconsistent, too dull, or simply harder to keep clean-looking. The best choice is always application-dependent, not universally strongest or easiest to buy. One more wrinkle makes selection even more specific: the same alloy can change character dramatically once temper is defined.
That shift in character is exactly why temper deserves its own line on the spec. In aluminium extrusion, the alloy name tells you the chemistry, but the temper tells you the condition the profile reached after processing. A 6063 member in an aluminum frame can share the same cross-section in T5 or T6 and still behave differently in fabrication, installation, and service.
Hydro describes temper designations as the way producers identify the physical properties achieved within an alloy through thermal and or mechanical treatment. For heat-treatable 6xxx alloys, the letter T marks a thermally treated condition. That matters because alloy alone does not tell you final hardness, residual stress, or how the profile will react to later shop work.
Alloy tells you the chemistry. Temper tells you the usable condition.
In practical buying terms, T5 and T6 are not just suffixes. Guidance from Engineering Express shows that T6 uses a full solution heat treatment, rapid quench, and aging sequence, while T5 avoids that full T6 route. The result is a familiar tradeoff. T5 is often favored when dimensional stability, lower residual stress, and good surface quality matter. T6 is chosen when the same profile needs higher strength, greater stiffness, and better resistance to permanent deformation.
| Temper | Process route | General performance character | Fabrication considerations | Finishing implications |
|---|---|---|---|---|
| T5 | Reaches its condition without the full solution heat treatment and rapid quench route used for T6 | Lower strength, lower internal stress, better dimensional stability | Often preferred for complex or thin profiles where distortion risk matters; commonly used for architectural or secondary members | Good surface finish is a practical advantage for appearance-focused work |
| T6 | Full solution heat treatment, rapid quench, then artificial aging | Higher strength and stiffness with better long-term load-bearing character | Quenching can introduce internal stress and geometric distortion, so straightness and tolerance control need closer attention | Finish planning should still confirm temper because appearance and post-anodizing strength can vary with alloy and temper |
Those differences show up quickly in real parts. In aluminum framing with thin walls, slots, or long visible runs, the lower-stress character of T5 can help reduce distortion concerns during secondary operations. In more structural extruded aluminum framing, T6 is often the better fit when load-bearing performance drives the decision. Hydro notes that temper influences how alloys respond to fabrication processes, and the Anodizers Council notes that alloy and temper both affect strength and appearance after anodizing. So if a part will be cut, punched, welded, or finish matched, ask about temper before approving it. The smartest call is never just 6063 or 6061. It is alloy, temper, geometry, and finish working together, and that is where profile size, wall thickness, and tolerances start to decide whether a standard section is enough.
A strong alloy in the right temper can still turn into a poor part if the profile itself is mismatched to the job. This is where specification gets practical. Shape, size, wall balance, joining method, finish needs, and service environment all work together, and small changes in section design can make a major difference in manufacturability and cost.
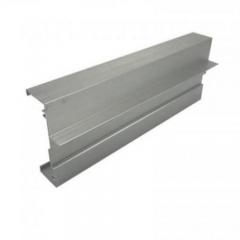
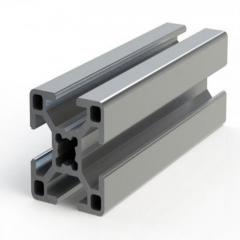
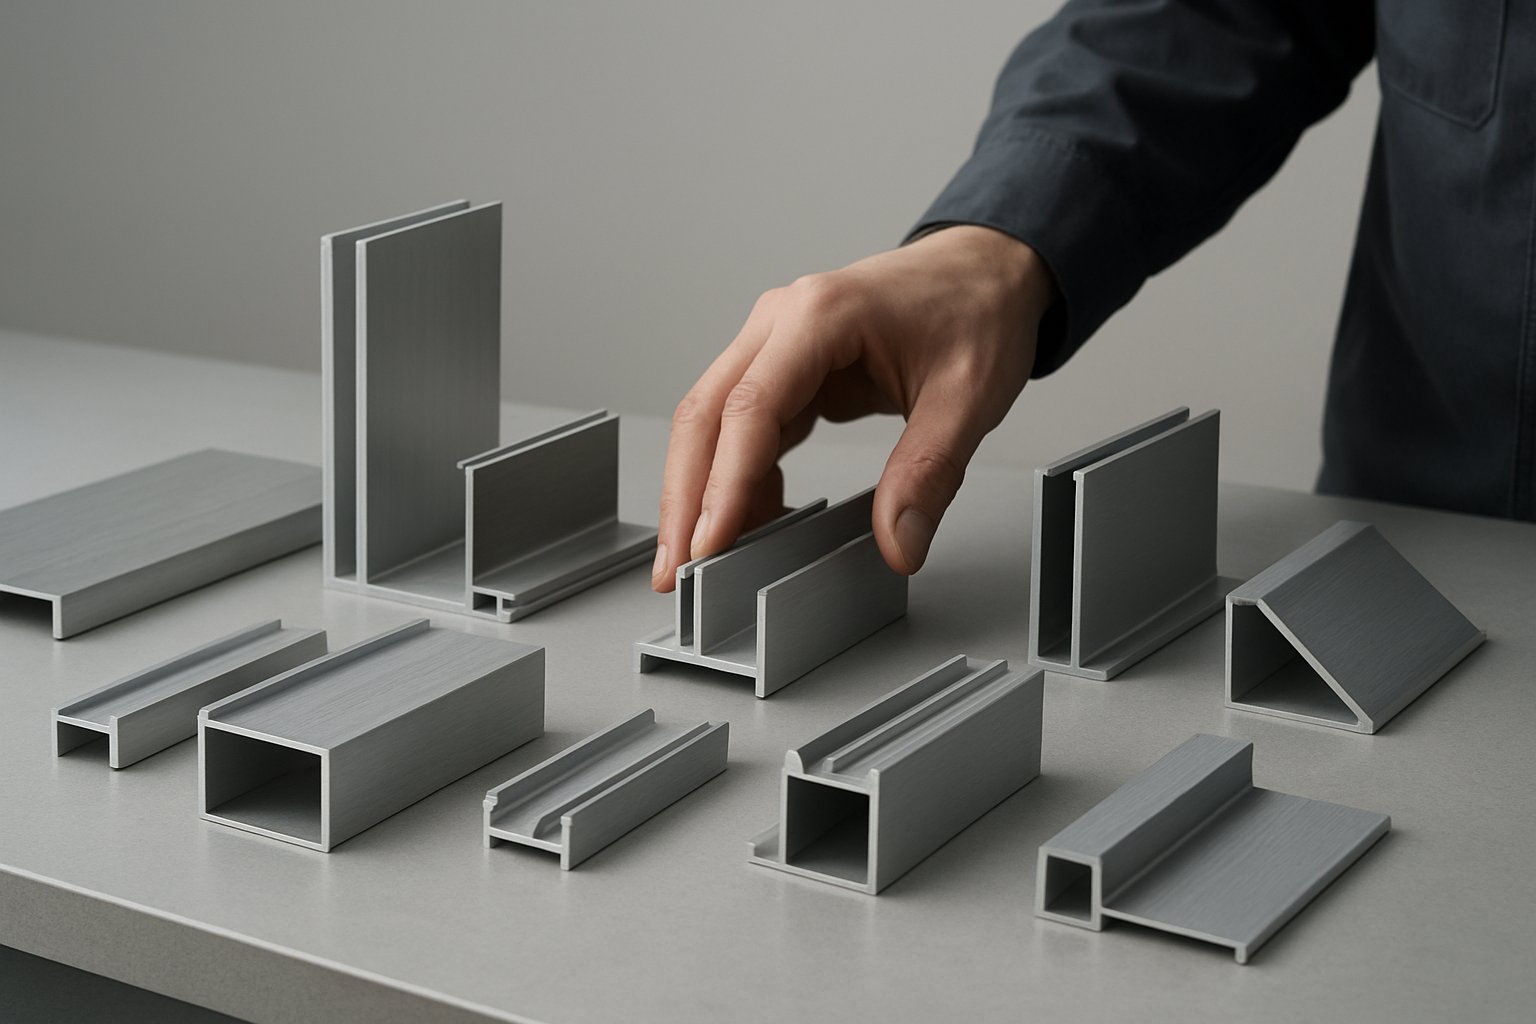
Start with function before you start with part numbers. A rectangular tube may suit framing, an angle may suit brackets, and a T-slot profile may make assembly easier when modular fastening is the goal. Shape also affects usable space. Open sections leave room for wiring, drainage, and tool access, while ribs, webs, and grooves can add rigidity without making the whole part solid.
Design guidance from AEC treats size as an early economic filter. The cross-section is commonly screened by circumscribing circle diameter, and many profiles are most economical within roughly a 1 to 10 inch range, with designs under 8 inches often reducing cost. Weight per foot matters too, because very heavy or very light sections can be less efficient to run. When reviewing aluminum extrusion sizes, do not compare width alone. Check the full cross-section, the mass, and how much routing or fastening space the shape really provides. Close-looking extruded aluminum sizes can behave very differently in assembly.
AEC also stresses balanced walls, lower tongue ratios, symmetry, and minimizing unnecessary hollows. In plain terms, very thin isolated fins, abrupt wall changes, or deep narrow features are harder to extrude consistently. That can affect straightness, surface quality, and downstream fabrication.
Tolerance should follow risk. Tight fits matter most where profiles must mate with hardware, slide into tracks, align across visible joints, or hold finish-critical reveals. Joining method belongs in the same conversation. Screws may need bosses or fastening lands. Welding needs access and enough section where heat will be introduced. Outdoor or corrosive service may favor shapes that shed water and finishes that protect exposed surfaces.
Many buyers begin with an aluminum extrusion profiles catalog because standard sections are faster to source and avoid new die cost. Notes from Can Art and Eleanor point to the same pattern: standard works well for common angles, tubes, and channels, while custom becomes worthwhile when you need exact dimensions, integrated features, or fewer secondary parts.
| Option | Speed | Flexibility | Tooling commitment | Design freedom |
|---|---|---|---|---|
| Standard profile | Usually faster availability | Limited to existing sections | Low, since an existing die may already be available | Moderate |
| Custom profile | Longer lead time due to design and die development | High | Higher upfront tooling cost | High, with features tailored to the application |
The best section on paper is not always the best section after finishing, and that surface question often decides the final shortlist.
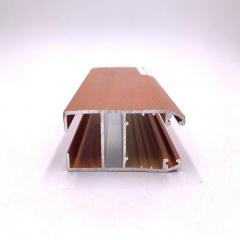
Surface finish is where a good profile becomes a good product. A section may be strong enough and dimensionally correct, yet still miss the mark if the surface weathers unevenly, scratches too easily, or clashes with the visual brief. For many visible parts, especially trim and facade pieces, finish is not a cosmetic afterthought.
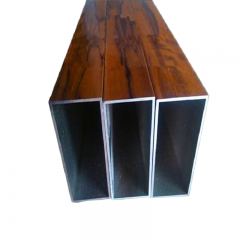
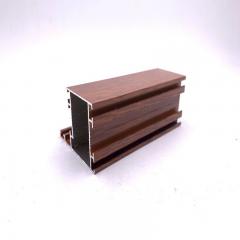
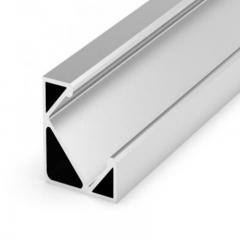
Wrisco offers a practical three-way comparison. Mill finish is the natural surface after production, so light texture, processing marks, and variation are normal. Anodizing thickens aluminum's natural oxide layer through an electrochemical process, creating a hard surface that becomes part of the metal. Coated or painted systems place a protective layer on top, which gives the broadest control over color, gloss, and texture.
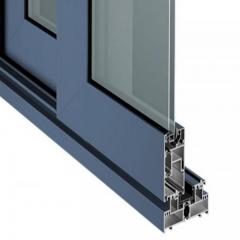
That difference is easy to see in real parts. A black profile made by anodizing keeps a metallic depth. A coated black profile usually gives tighter color uniformity and more sheen choices. Mill finish is commonly selected when the part is concealed or will be finished after fabrication.
| Finish type | Appearance goals | Durability role | Common application fit |
|---|---|---|---|
| Mill finish | Raw, industrial look with natural variation | Relies on the natural oxide layer; lowest upfront cost; outdoor appearance may change over time | Internal structures, concealed parts, components intended for later finishing |
| Anodized | Clean metallic look, including clear, bronze, or black tones | Hard, corrosion-resistant, wear-resistant surface that does not peel or chip under normal use | Storefronts, handrails, signage, aluminum extrusion trim, other high-touch visible sections |
| Coated or painted | Best color consistency, controlled gloss, and texture flexibility | Protective barrier with strong exterior performance when quality coatings are used; impact or abrasion can damage the top layer | Architectural panels, enclosures, decorative systems, color-critical visible parts |
Finish cannot be chosen in isolation. If a drawing only says anodized aluminum material, the specification is still incomplete. Research summarized by Finishing and Coating showed that, in sulfuric-acid anodizing of AA7075, tempering changed the porosity and hardness of the anodic film. That does not make one temper universally right or wrong. It does show why alloy and temper must be checked before finish is finalized.
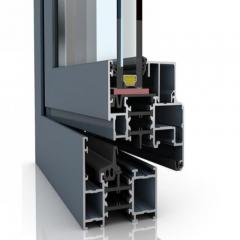
For readers who want to compare real-world custom sections and finish ranges, the Shengxin Aluminium catalog is a useful reference point. It shows how anodized and other finished profiles are offered for building facades, trim details, and machinery parts. It is still important to confirm alloy, temper, finish callout, and appearance standard on the drawing before treating any catalog image as the final answer.
That final check matters most when browsing ends and specification begins, because a reliable quote depends on more than shape alone.
Catalogs are a smart place to start. The risk appears when a clean profile image gets treated like a complete specification. If you are deciding where to buy extruded aluminum or where to buy aluminum extrusion for a real project, the safest move is to define the technical requirements before comparing prices. That applies to stock sections, fabricated parts, and visible extruded aluminium profiles.
Strong RFQs reduce guesswork. Practical RFQ guidance shows why a drawing alone can lead suppliers to make different assumptions about function, finish, machining, and inspection.
Price matters, but process discipline matters longer. A solid supplier audit checklist looks beyond the quote into press capability, downstream processing, inspection tools, finishing control, traceability, and responsiveness.
Many aluminum extrusion distributors are well suited to standard sections and quick replenishment. Custom or finish-critical work usually needs a mill or fabricator that can show stronger documentation and process control.
For buyers asking where to buy extruded aluminum, the best answer is rarely the lowest quote by itself. It is the supplier whose catalog, controls, and documentation match the part you actually need.
Aluminium extrusion shapes a heated alloy billet by forcing it through a die, which creates a long part with the same cross-section from end to end. Unlike casting, the metal is not poured in liquid form into a mold. Unlike machining, the shape is not created mainly by cutting material away after the fact.
T5 and T6 describe different post-extrusion temper routes, and that changes how the same alloy behaves in service. T6 is generally chosen when higher strength and stiffness matter most, while T5 is often preferred for profiles where lower internal stress, dimensional stability, and appearance are important. The right choice depends on load, straightness sensitivity, machining, and finishing needs.
6xxx series alloys are the most common starting point for many extruded aluminum profiles because they balance extrudability, corrosion resistance, and heat-treatability. 6063 is widely used for architectural and finish-sensitive sections, while 6061, 6005, and 6082 are often selected when structural performance matters more. Decorative anodized work may also lean toward alloys such as 6463.
A standard profile makes sense when an existing channel, tube, angle, or framing section already meets the job with minimal extra fabrication. A custom extrusion becomes more attractive when integrated grooves, bosses, cavities, or exact dimensions can reduce brackets, machining, waste, or assembly time. Before deciding, compare wall balance, tolerances, finish requirements, joining method, and expected order volume.
A good first step is to review supplier catalogs that show profile families, finish options, and application examples. The Shengxin Aluminium product catalog is one practical resource for custom architectural and industrial profiles, including anodized and other finished options. Even when a catalog looks promising, buyers should still confirm alloy, temper, tolerances, fabrication details, and appearance standards in the RFQ.


 serviço on-line
 0086 136 3563 2360
 sales@sxalu.com
 +86 136 3563 2360
 português
 English
 français
 Deutsch
 русский
 español
 العربية
 ไทย
ไทย Việt
Việt Українська